
It’s time to feature the 1928Shovelhead and American Iron said theywould take it on. They’re the only bookthat accepts antique bikes. I’ve writtenabout four features for them on rare, very coolhistoric models.
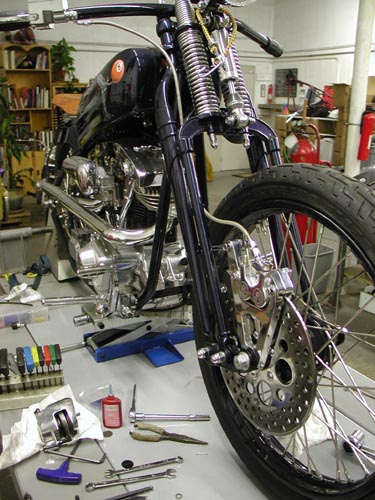
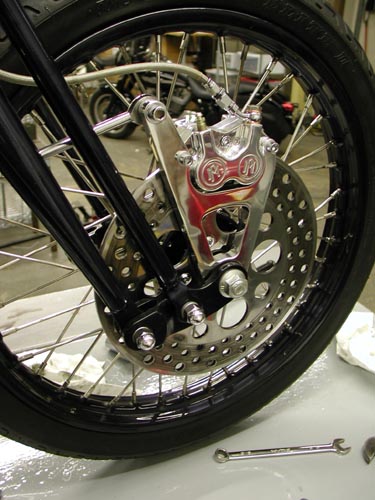
No the ’28 Shovel doesn’t fallinto that catagory, but what the hell, it’sgot class. We needed to complete a couple ofdetail mods before Markus Cuff would aim alense at the blue beast. We needed matchingbrake rotors and a PM front brake system. Ipulled a front rotor from the CCI catalog andcontacted Performance Machine for theappropriate front brake caliper and springerbracket.

Much of the following comes directly fromthe very complete Performance Machineinstructions. They don’t mess around.There will be no doubt about the installation ofthis unit. Let’s hit it:
Before installing a caliper or rotor kit,read through these instructions completely;this will familiarize you with the way in whichthe parts fit together and the tools needed tocomplete the job.
In the course of installing these kits youwill be replacing the stock brake caliper(s)and/or rotor(s) with a high-performance brakecaliper(s) and/or rotor(s). Please pay specialattention to the section of the instructionsdealing with the centering of the caliper overthe brake rotor. Actually, I couldn’t findthis section. Generally a set of shims arepacked with calipers. Use the shims andmake sure the caliper is centered over therotor.
The brake caliper(s) used in this kit isdesigned to use DOT 5 brake fluid. Neverreuse brake fluid, don’t use brake fluidthat you are not sure is new and clean. Thisinstallation should only be attempted by amechanic with a thorough understanding ofand experience with motorcycle brakesystems.
If you plan on using the stock brakeline/hose that runs between the mastercylinder and the caliper, then you will be justswitching the line at the caliper’s banjofitting. We recommend that you do notdisconnect the line from the stock caliper untilyou have the new caliper bolted in place andare ready to bleed the brake system. This waythe brake fluid will not run completely out ofthe master cylinder before you have the newcaliper connected.
Loosen brake line and remove the twobolts, lift the caliper up off the rotor and use ashort length of wire or bungie cord to hang itfrom the handle-bars, up out of your way. Onthe 3/8‚ bolt, remove the cotter pin from therear; unscrew the lock-nut, unscrew the boltfrom the threaded bushing in the fendermount and pull it out of the caliper mount andreaction link. On ’93 and later models,use a piece of wire to hold the fender up out ofyour way. Unscrew the axle nut, slide the axleout of the fork and lower the wheel to theground. Remove the caliper mount from theaxle and the bushings and spacers. Keep thisshit around, you’re going to need it.
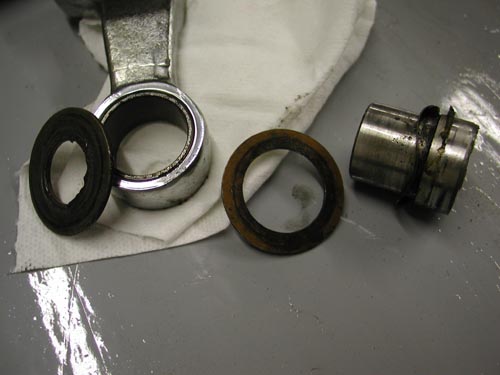
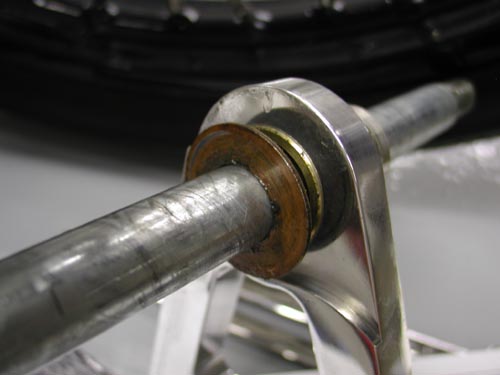
The Springer uses a combination axleseal and caliper mount bushing, with awavy-washer and bronze thrust washerbehind the caliper mount. Remove anddiscard the bronze thrust washer that goesbetween the caliper bracket and the wheel.The PM mount has this thrust washer built-in.Install the PM caliper mount on the axleseal-caliper mount bushing with the wavywasher and raise the wheel assembly up intothe fork.
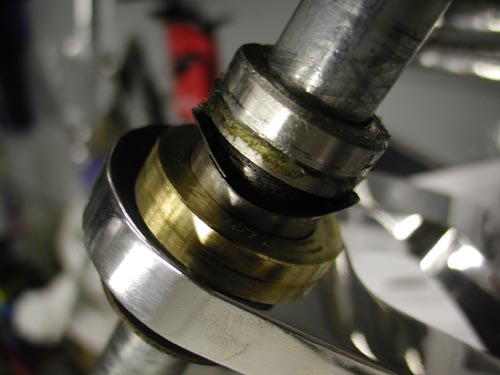
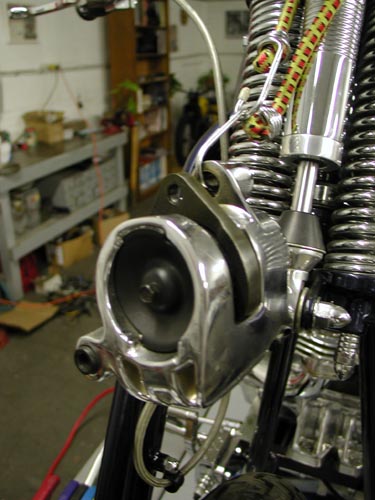
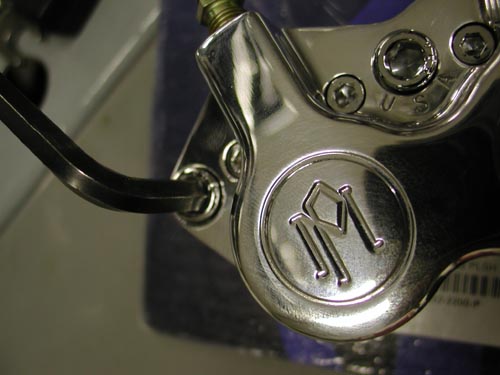
Here’s the outside brass bushing inplacebetween the rocker and the caliperbracket.
Install the stock outer caliper mount thrustwasher between the caliper mount and thelower fork rocker. This is a factory part thatwas on the fork assembly; the copper coloredside faces the caliper mount. Slide the axlethrough the fork, install the flat washer andaxle nut and tighten the axle nut to 65 ft. lbs.
Caliper installation
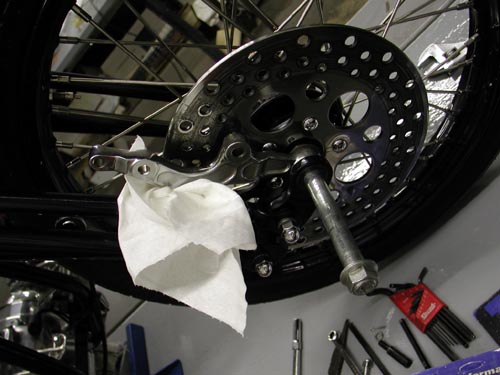
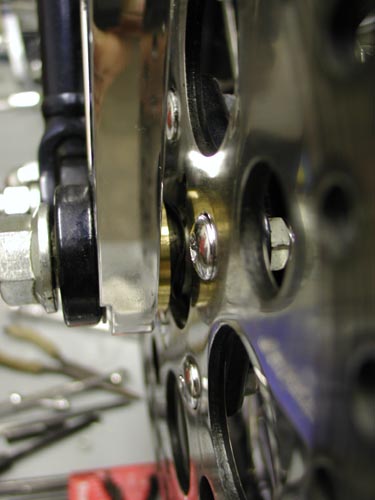
Remove the two chromed Allen end boltsfrom the Performance Machine caliper body,slip the caliper over the rotor and install the5/16 x 1 3/4-inch socket head bolts (Allens)and flat washers. Here’s where youcheck the caliper over the rotor. Step in front ofthe bike and eyeball the pads in the caliper.
Make sure the caliper is centered. Beforethe caliper is tightened down, it must becentered over the rotor; see page 3 for theproper procedure.

Yep, sure enough they were on pagethree. Here’s what I missed, “The centerline of the caliper is where the two caliperhalves meet. Look down from the top of thecaliper onto the rotor. If it’s offset to theoutside then you need to install mounting boltshims. Shim kit includes six shims, two each:.016, .032. .062-inch. Insert the shimsbetween the mounting boss on the bracketand the caliper body by removing themounting bolts. After the caliper is centereduse Loctite or lock washers and torque thebolts to 22 ft. lbs.”
The small print dictates that failure toproperly center calipers will impede theperformance of this fine braking equipment.They’re right. Do it right the first time.

Attaching The Brake Line
First tape handle bar master lever 1/2 wayclosed. This will prevent fluid from free flowingfrom hose. Remove the end of the brake linefrom the stock caliper.Working rapidly so thatan excessive amount of brake fluid does notrun out of the end of the brake hose, attach theend of the brake line to the new PM caliperusing the PM supplied seal washers, onewasher goes on each side of the banjo fitting.
Position the banjo fitting so that the brakehose does not rub on the frontfender or other part of the motorcycle. I had toreroute my Goodridge brake line. Had to movefast.Tighten banjo bolt to 10 ft. lbs. of torque.
Bleeding The Brake System
You will find it is easier to bleed the brakesystem if you have a helper. First, fill themaster cylinder with DOT 5 brake fluid and putthe cover back on the master cylinder. Attach ashort length of rubber hose to the bleederscrew on the brake caliper. Put the other endof the hose into a coffee can or other suitableclean catch can.
Have your helper pull inon the front brake lever or push down on therear brake pedal five times. At the end of thefifth stroke, have your helper hold the brakelever in or pedal down.
While the helper holds the lever/pedal,open the bleeder fitting on the caliper. You willneed a 1/4 box end wrench. Air and brake fluidshould come out of the end of the hose that isconnected to the bleeder fitting.
After theair and brake fluid have stopped coming out ofthe hose, close the bleeder fitting. Your helpercan now release the brake lever/pedal. Thisaction will force the air that is trapped in thebrake system out the bleeder screw. Repeatthis procedure until the brake become firm orthere’s no air in the line.
Check thefluid level in the master cylinder after eachbleeding. Don’t let the master cylinderrun dry as this will push air back into the brakesystem which will require all-night bleeding.
Front brakes can be a bear, since airdoesn’t want to flow down the forksthrough the line and out of the caliper throughthe bleeder nipple. Some guys force fluid upthrough the bleeder nipple into the system. Ifyou want to use the above system, sometimesthe caliper needs to be raised above the barsto allow the air to flow to the bleeder nipple.
I’ve discovered that with a littlepatience, bleeding is hardly necessary. Takethe cap off the master cylinder reservior andpump the handle slightly. This allows the airbubbles to rise out of the caliper, up the lineand out the master cylinder. Tap the lines acouple of times and pump the lever slightlyuntil it’s firm. Refill the reservior whenneeded until complete, top it off and call itquits.
Leave it overnight and check it again in themorning. It may take a couple of days beforeall the bubbles are gone, but it’s abreeze.

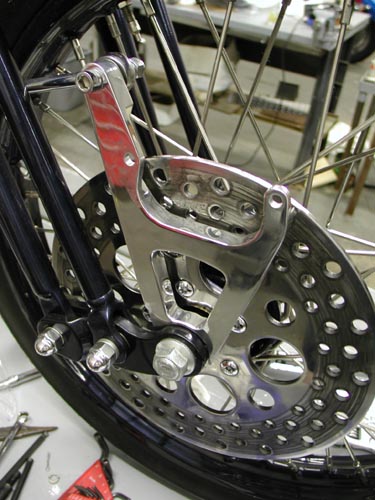
Here’s a shot of the 1928Shovelhead during the photo shoot forAmerican Iron. It looked sharp thanks to thefinal details from CCI and Performancemachine. Of course, it would be nothing but apile of parts without the talented efforts ofStrokers Dallas and painter Harold Ponteralli.Watch for the feature in American Iron, thenwe’ll post a feature on Bikernet.

Need to see the previous chapter:http://www.bikernet.com/pages/story_detail.aspx?id=9001