How do you feel about your computer? I could easily take my old .357 Smith and Wesson revolver and blow this sonuvabitch into the briny harbor Pacific waters. I'd set the smoking gun down, go find a job driving a trash truck, and be able to hang out with the bros and drink beer until my kidneys failed, then you could toss my carcass into the Pacific along with my IMac. Life is nuts.
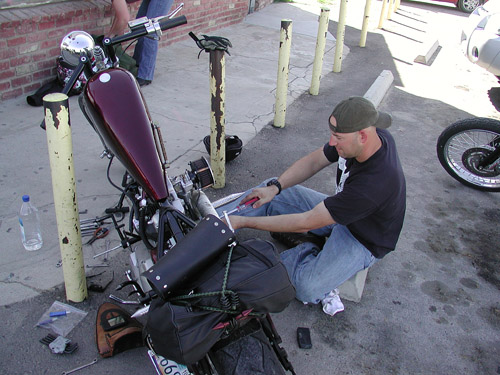
Ah, but the 5-Ball Factory Racer is coming right along. I hauled it down to Chica's for rear fender fitment, never thinking about the front fender. Should I? Chica makes his own wide ribbed fenders 5 and 6 inches wide. They're available for old tall 16-inch wheels and 18-inch wheels for an easy fitment to the tires. On my way south of Long Beach, California, I swung into Todd's Cycle. He was jammed with work. It's odd in this dour economy to see shops cookin'. Chica also was hustling to fill wheel orders, work on vintage bikes, and rebuild engines. I stopped in another shop on the edge of Long Beach, Richard Graves's car restoration facility. Damn, he does sharp work. He was working on a '50s Ariel square four.

Graves was also jammed with work, so the world ain't all doom and gloom. We just gotta provide a valuable service and be honorable businessmen, and we'll survive, goddamnit. Like Dave Rash, of D&D Exhaust says, “Motorcycles are mechanical Valiums. The world can go to shit, and the brothers take care of their motorcycles.”
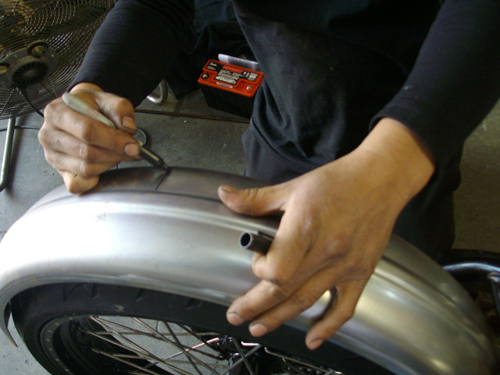
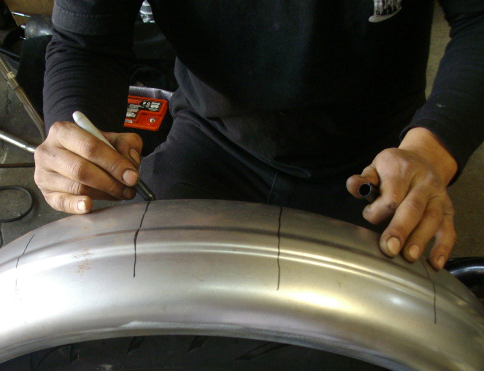
I like that notion. Chica marked my fender for stretching since his fender wouldn't wrap about a knockout Black Bike 23-inch wheel with an Avon Tyre. He indicated where the stretching would take place every 4-5 inches with a felt pen, then went to his machine. “You need to stretch it the same amount,” Chica explained, “and stagger the stretching maneuvers to prevent the fender from warping or twisting.”
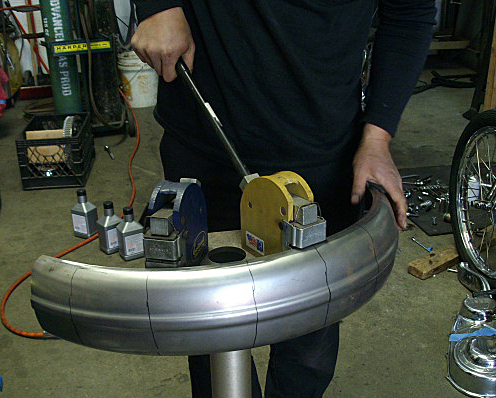
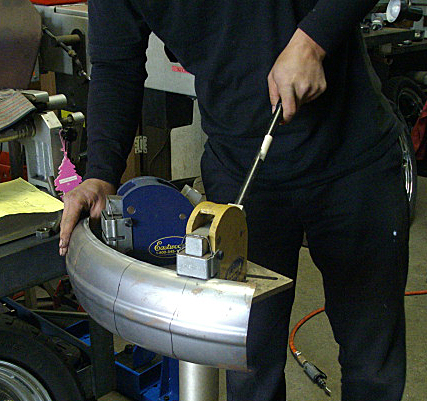
I asked Chica if his fenders needed additional support where the fender rails would be attached. He pointed out that the extreme contours and the ribs added extra structural strength. But he did recommend two fender straps over the frame cross-member.

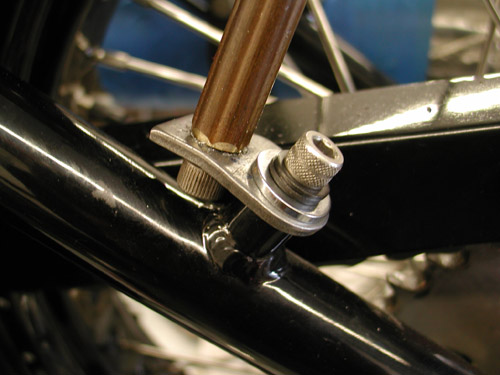
That did it, and Jeremiah and I loaded up the Racer for the return trip to the Bikernet Interplanetary Headquarters deep in the Wilmington ghetto. I started to work on the rear fender installation immediately. I bobbed it about 4 inches, but was grabbed by the rear wheel adjustment designed by Rick Krost of U.S. Choppers and manufactured by Paughco.

It's interesting, and I'm still getting the quirky hang of it. It automatically adjusts the ¾-inch axle back and forth, and up and down about ¾ inch. That element makes mounting the rear fender even more interesting. I was forced to don my patience- and-remain-flexible hat. Who knows if it's right, but I tried to work in several fender fluctuation means, so I could adjust it if necessary.
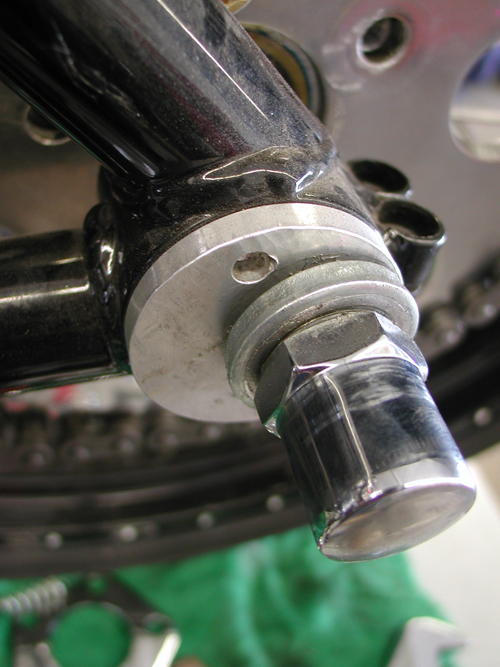
The fender was mounted with a single bolt at the bottom behind the battery case. Then, with the fender spaced evenly from the tire throughout the complete radius, I marked drilling holes for the fender straps. I drilled the holes, and the gods of stainless steel blessed my ass that day with a keen sense of accuracy. The holes and the fender straps lined up. I had to keep an eye on the axle adjustment, or the wheel was cocked right or left in the frame. “Ya gotta watch for the sweet spot,” Rick Krost said. I called him in the middle of the night to quiz him about wheel adjustment and alignment.
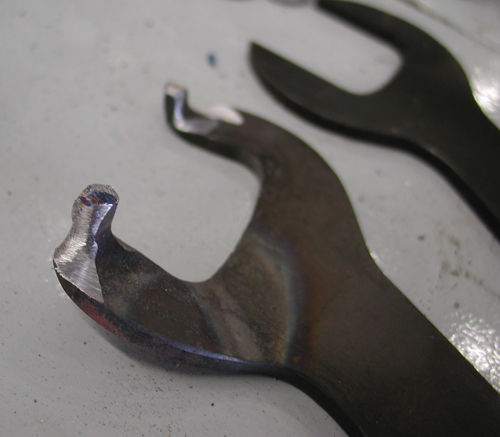
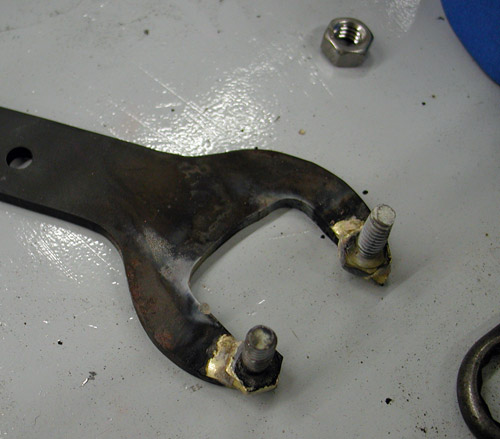
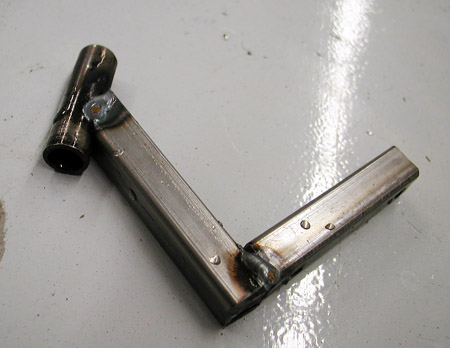
I also needed to make a spanner wrench for his axle adjusters. I was in a hurry one night and built a crappy one with some strange punched out flat open-end wrenches. I just heated, bent the tangs, and ground it to fit. It was sloppy, and ultimately, I built another one with brazed ¼-20 bolts to another wrench. It fits much better.
I also attached the Pauchco toolbox strap to the chain side of the bike, since the pipes would interfere on the right. It worked out perfectly for an additional installment point for the chain guard.


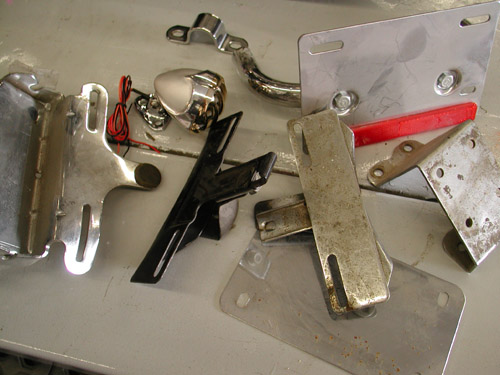
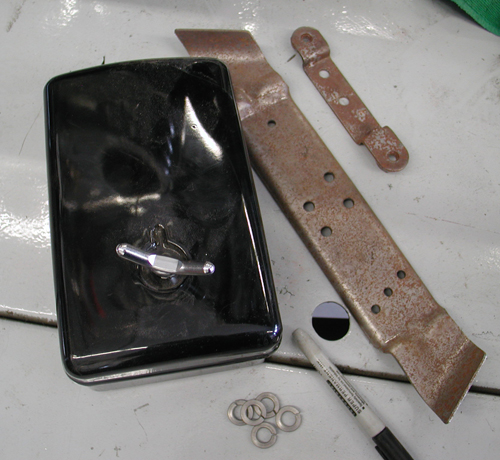
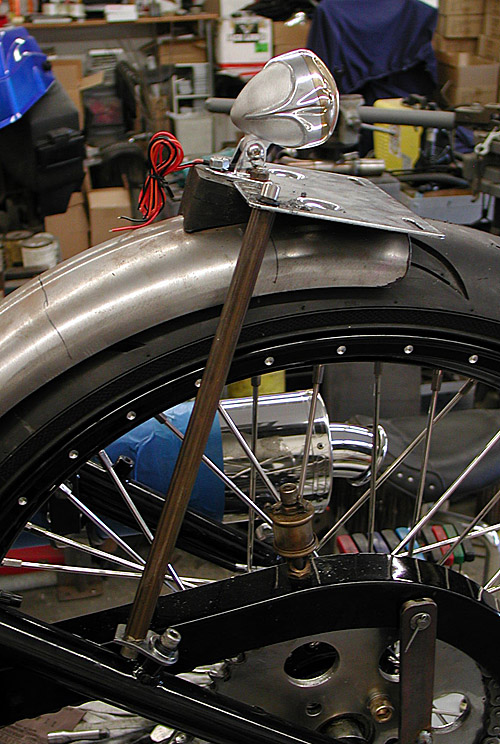
Next midnight run in the shop included grappling with mounting the Crime Scene taillight. It's a cool bastard, but I didn't have anything to mount it with. I dug through old boxes of parts, stock license plate rings, mounts, you name it, until I found an old rubber mount for license plate holders. It was already drilled for my three-point mounting taillight triangle. I found a thick license plate backing plate and went to work.
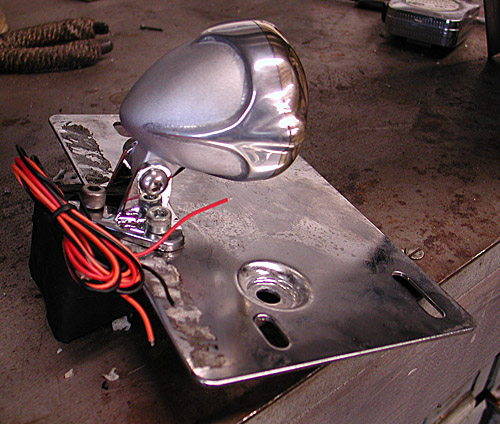
I drilled it to catch two of the Crime Scene holes and held the taillight over the license plate. I thought I had it made. I drilled the fender so the lip of the license plate will hang just slightly over it, for a proper, readable angle. Not sure I was successful. We'll see the first time I'm pulled over for speeding in Wyoming.
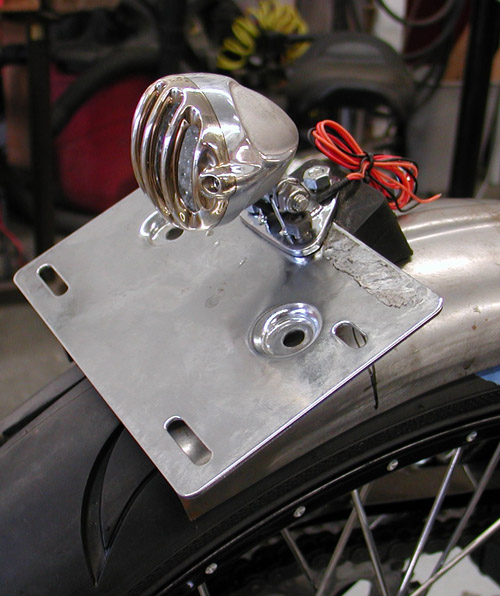
The one item I missed was the spacing for the bonaroo cool license plate ring. I'm not sure I didn't drill the holes too far into the plate, but I was thinking about strength and not bling. From that point, I moved to making fender rails. I can't do anything status quo. So I drilled corner holes in the backing plate, machined more brass, cloverleaf stock with 5/16 coarse threads and bent tabs and mounted them to the frame. Sorta crazy, but actually strong.
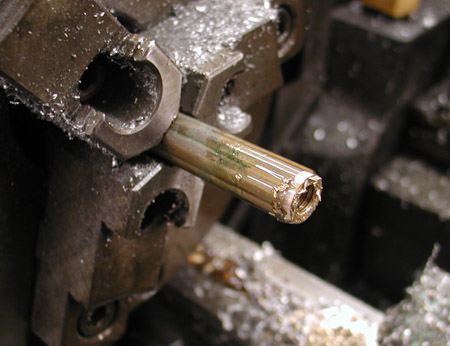
Evan at Power Plant Motorcycles on Melrose in Hollywood coached me on cutting threads in brass. “You need deep thick threads, so don't cut fine threads in brass,” Evan said. “It's soft.”
He also showed me a trick on his new antique lathe for centering cutting bits, which I'll never forget. I'll demonstrate in another tech in the near future. His shop was also busy, when I last stopped in. He builds vintage bobbers with very cool hand- made components. No CNC billet shit for Evan. Watch for his Chopper Challenge feature bike to show up on the pages of Cycle Source.
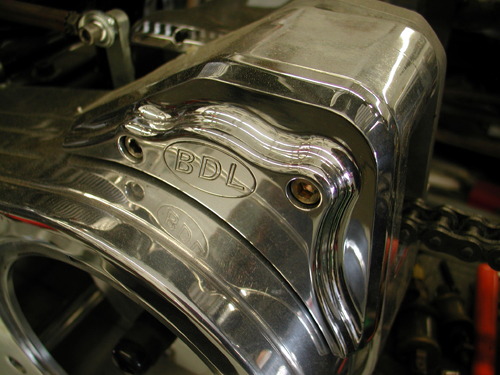
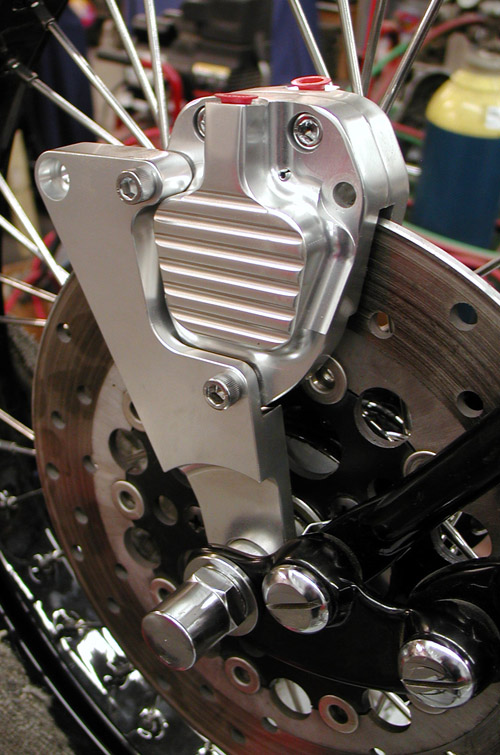
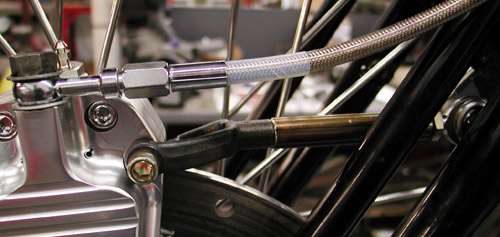
The guys at BDL helped with a super deal on a GMA front brake caliper, bracket, and hand lever. Unfortunately, they only make a springer bracket for the right side, so I modified for the left and built my linkage. Dealing with a narrow Paughco Springer and a front brake is a challenge to fit everything and center the caliper over the rotor. I still need to machine an axle spacer. I also need to deal with this billet bracket. I'm looking for some super cool art deco piece to bolt up front, like a hood ornament from an old Packard.
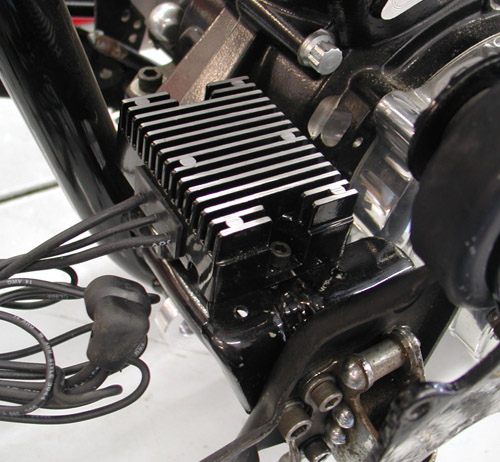
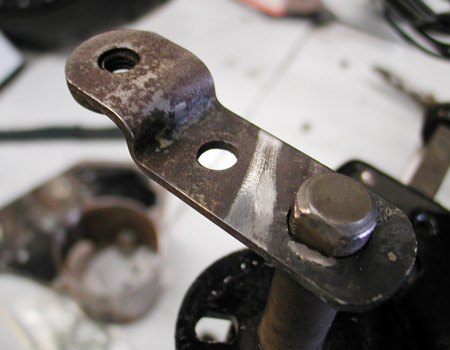
I had to deal with the suicide clutch situation. I had a vintage H-D rocker clutch system, minus the linkage and spring. I made the linkage with a spare Paughco toolbox-mounting bracket. Then while digging around, I discovered what I thought was a regulator mounting bracket. It would work perfectly for the regulator and had the space, and holes drilled for a clutch cable bracket. I went to work digging around for the perfect cable guide.
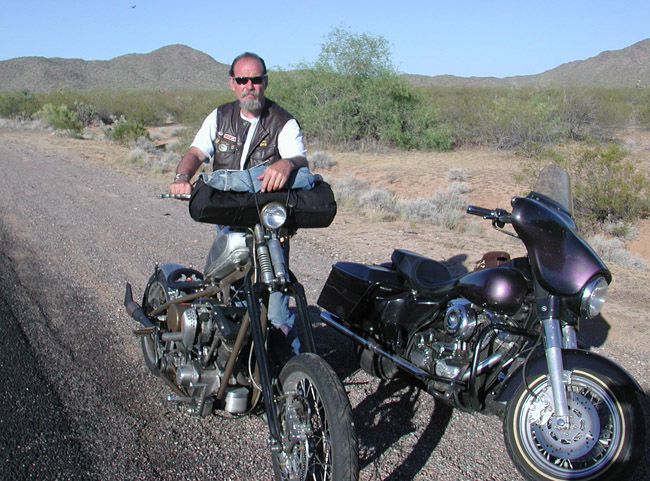
About this time, the Laughlin River Run surfaced and I rode my King into the desert. Two weeks later, I was called to duty on my Sturgis Shovelhead chopper to ride back into the desert to Cottonwood, Arizona for the Smoke Out. On the way I helped a couple broke down in the desert with a wiring problem. As we tinkered with his rigid Sportster, fulla devil tails welded everywhere like handles on wrought-iron furniture, I noticed his suicide clutch set up and his linkage and it gave me some good notions for a cable pinching system.


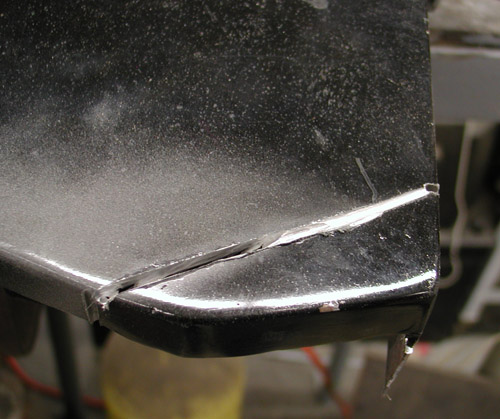
Between Laughlin and Cottonwood, I finally rolled around to cutting the front of the tanks to make room for fork stops with the Paughco narrow springer. As it stood the springer stops would smack the Factory Racer tanks, and my turning radius was shot. I went to work with a Makita cut- off saw and a plasma cutter to slice a new piece of 14-or 16-gauge steel for the replacement. The tanks were painted and that fucked with my MIG welding. Always clear the paint away from the welding area. The smoke from the heated paint messes with the pure oxygen and gas required for proper penetration. I'll work on that more with the next tank.
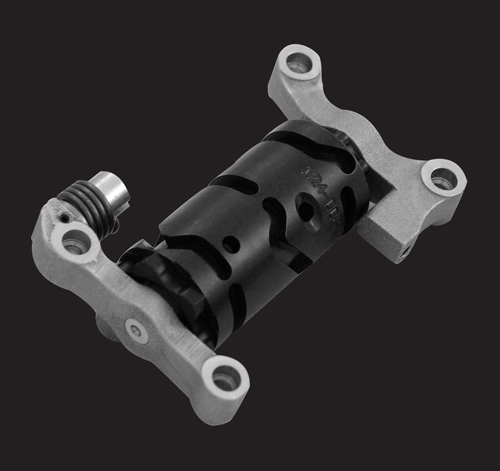
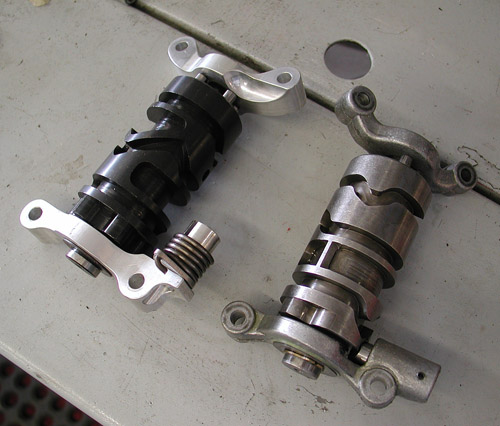
I'm getting close to making some final welds, while praying that a TIG welder will wander into my shop. But first, I needed to drop in the Baker N1 drum for 5-speeds. This is the simplest modification on earth. It's so easy even I could do it, amazing. These N1 drums… well I'll let Trish Horstman and James Simonelli tell you the facts:
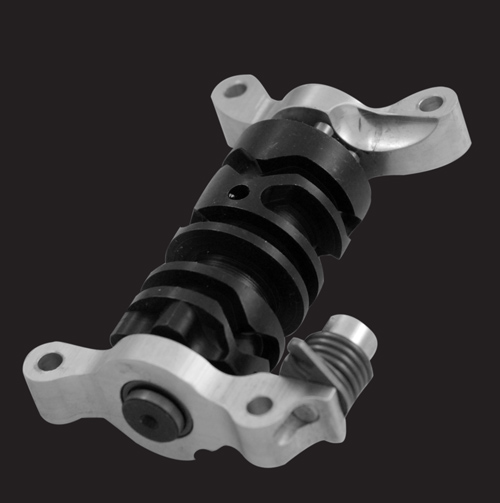
Five years ago we developed the N1 drum for drag racers and street racerswho used our 6-speed overdrive. The N1 shift pattern (Neutral-1-2-3-4-5-6) wasdesigned to prevent false neutrals during aggressive 1-2 upshifts by positioningneutral under 1st.
The jockey shift/foot clutch crowd soon discovered the benefitsof the N1 pattern. The big lever ratio of a jockey shift lever desensitizes the feelof the detents in the transmission such that finding neutral is a crapshoot withbad odds. With neutral on bottom (or all the way forward), the jockey shifter canmindlessly tap all the way down to neutral thus allowing him to put both feet onthe ground as he rolls up to the stop light.
Today, a whole new crowd is realizing the benefits of the N1 pattern. Pingel’selectric shifter is slicker-than-snot and appeals to racers as well as those withrestricted movement in their left foot and left hand. Utilizing an N1 drum inconjunction with Pingel’s electric shifter makes finding neutral (with the solenoid)seamless, and yields a solenoid-actuated shift system that almost makes footshifting obsolete.
PN DESCRIPTION FITMENT
5-6QT-A N1 drum & pillow block assembly, 6-speed BAKER 6-spd overdrive except*
5-6QT-A1 N1 drum & pillow block assembly, 6-speed *Old 6-into-4 (S&S case) &Frankentranny
124-OD6RN1-A N1 drum & pillow block assembly, 6-speed RSD right-side Drive 6-speed, 2ndgeneration
124-DD6N1 N1 drum & pillow block assembly, DD6 DD6, all
2-5R-N1 N1 drum & pillow block assembly, 5-speed Single pole neutral switch 5-spds
2-5RL-N1 N1 drum & pillow block assembly, 5-speed Double pole neutral switch 5-spds
FEATURES/NOTES:
– N1 shift system option available at no additional cost with purchase of a complete transmissionor builder’s kit
– 5-speed N1 shift systems fit H-D 5-speeds and BAKER 5-speeds
– For aggressive shifting we also recommend the use of our anti-overshift ratchet pawl, PN555-56A for 5-speeds through 1999 and 555-56L for 5-speeds 2000-up. For example, this pawlmechanically prevents an unintended 1-3 up shift during an intended 1-2 upshift
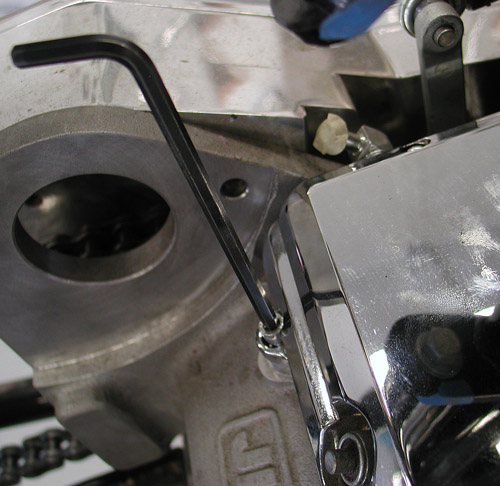
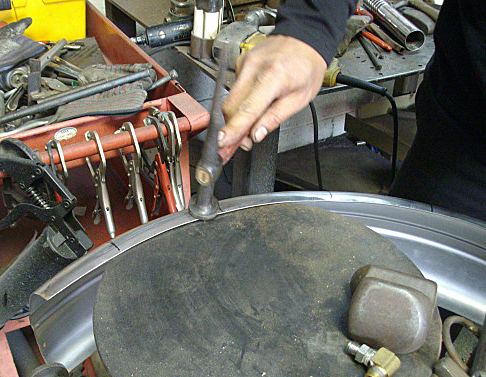
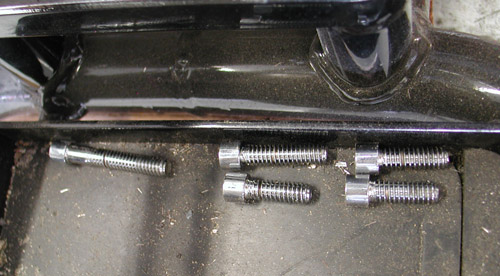
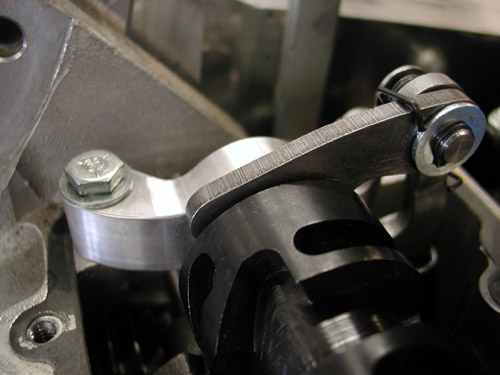
Okay, so I popped off the ¼-20 Allens off the top of the tranny cap. Since, within five fasteners there were three sizes, I placed them neatly in the battery pan to prevent mixing up the formula. The lid came right off.
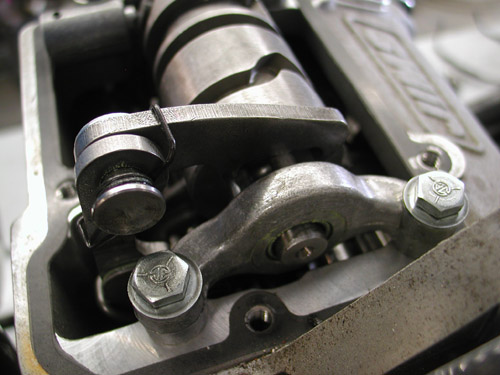
Then the four 7/16 hex heads need to be removed and the drum and pillow blocks came off as a single unit. Don't forget to lift the shifting arm, and keep it up when you replace the drum.
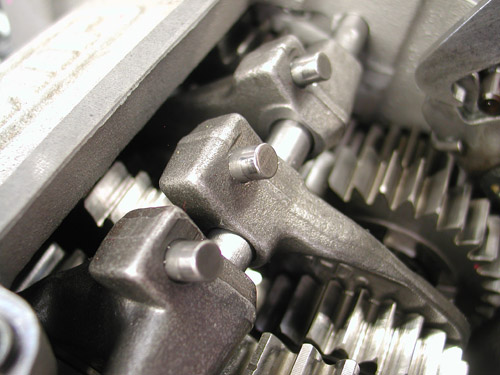
It might feel slightly snug to remove since there are guide inserts pressed into the case to hold the drum perfectly aligned. I studied the drum as I removed it and set it in exactly the same position on the bench to insure I put the new N1 drum back exactly the same way.
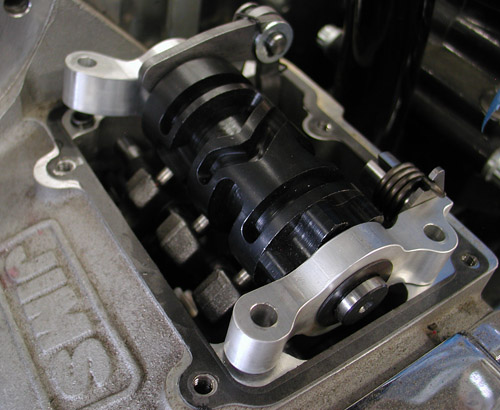
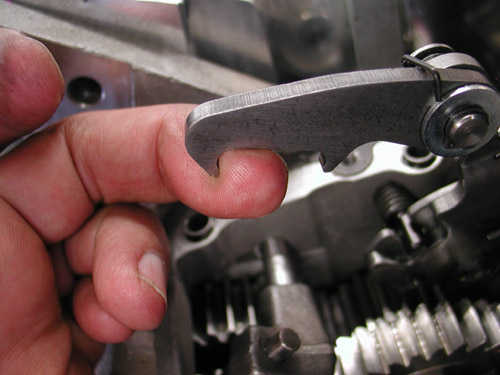
I told myself the old mechanic's rule as I replaced the drum and aligned the shifting forks: Don't force anything, jackass. I carefully aligned the shifting forks, then made sure the pillow blocks fit comfortable over the inserts before rolling the fasteners back into place and torquing them to 130 inch pound of torque or 10.8 foot pounds.

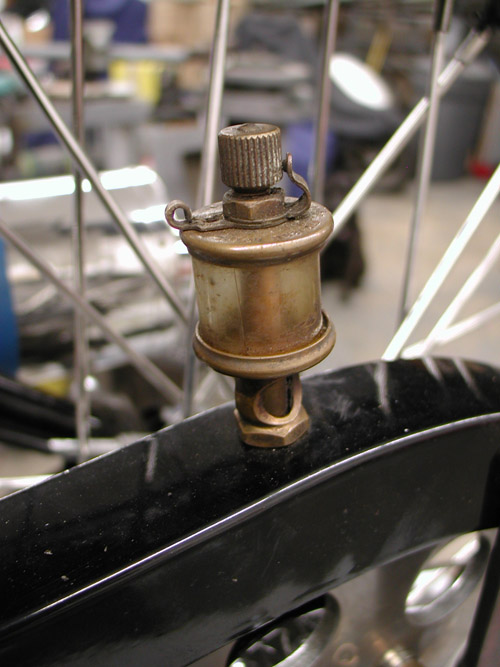
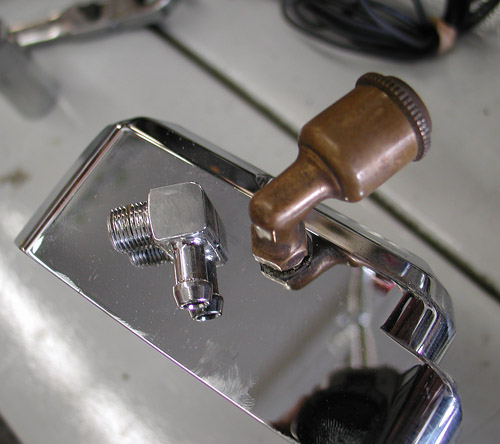
I smeared a dab of tranny oil on the lip of the transmission lid and slipped it into place, then tightened the fasteners to 130-inch pounds of torque. Oh, I forgot. I replaced the standard vent with something brass, mechanical, and vintage. What the hell. I'm going for that vintage appearance.
That's it for this installment. Next, I will install an Exile sprotor rear brake and 48-tooth sprocket. I'll finish all my welds, strip her down, and head to powder coating and paint. I have the color scheme down. It's going to be wild. I've also promised not to hit any more events between now and Sturgis for maximum shop time. We'll see if I run out of whiskey and women or not. Hang on.