I hope the next couple of chapters paint a picture of the variety of emotions we’ve encountered during this week of September (12-18). We’re getting close, but every element must fall into place in a timely manner or… All my adult life I’ve dealt with deadlines. I told harried magazine staff members, crumbling under pressure, “Take it easy, no one’s gonna get shot. Just fix the mistake and don’t let it happen again.” I’ve lived through times in which getting shot was an option.
This is almost a year long deadline, a strident one, fulla emotion, research, alterations, let-downs and highs. This week Berry Wardlaw, of Accurate Engineering is flying out for tuning, then we have one week before we roll toward the salt. The bike is just one element in the massive mix. We have an ever changing and growing team, transport that’s shifted from pickups to trailers and now a motorhome. There’s lodging, packing, salt meal preparations handling, with loving grace, by the Bikernet Queen, Nyla Olsen. We needed team apparel, patches, stickers and bling. We still need our Bonneville Sponsor Banner and Nyla’s daughter Karley is supposed to have the Sponsor check list and make sure I install the right Sponsor stickers in the right places. Where is that girl?

It’s a wild undertaking for a couple of old scooter tramps, and I know every race team in the country is flying through the same scenario and praying for good weather conditions over the salt. I’ll clamber into this report on all fours using quotes and e-mails from experts and contributors. Our first note comes from our esteemed engine builder Barry Wardlaw:
We are waiting on the Yellow freight truck coming from Panama City and it might be as late as 7:00 p.m., but if they don't make it, it will be fine with me, as I am putting as many damn minutes of run time on this thing as I can. The next time we run it, we will be on a dyno. I REALLY want this thing perfect and am having some fun with the new laptop and ignition program. You'll see. So far so good.
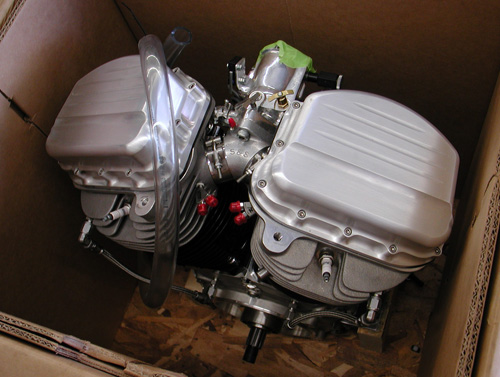
My very best engine assembler/painter/polisher/fabricator and friend gave his two week notice today. Of course we are still friends but he had an opportunity and I told him to take it. VERY good money and he deserves it. I'm gonna' miss him.


The front end proposed a problem. Harley-Davidson helped with some ’06 Dyna 49 mm components, but one part was missing, which slowed fender mounting. I need to thank H-D profusely. I planned to use another front end and waited seven months for it to arrive. It never showed. Talk about a set-back. Harley moved quickly, and we had front end parts in a couple of weeks. I had to shift to plan B for the final component and called Larry Petri from Chop N Grind racing, who works at Palm Springs Harley-Davidson. He went into red alert on the missing part and grabbed old Bob T., our arch rival on the salt. They brought me a lower Dyna leg and I hunted down a piece of 49mm tubing, or something close.

We set it up on the chassis and Jeremiah and I began fabricating the front fender. Jeremiah is turning into a master fabricator and we worked well into the middle of the night beating steel and tacking pieces in place. This fender was always a critical component to our teardrop, aerodynamic shape. I fixed spacers to the wheel to allow for salt build-up clearance and did my damnest to align the wheel and the fender perfectly.

With the fender mounted Jeremiah began cutting construction paper panels, then cutting them out of 16-guage sheet metal with our plasma cutter.


The next morning I cut out two sets of wedges for the top, threw one away and started over until the fender was completely tacked and additional mounts were made to secure the front of the fender. I handled the final welding and Jeremiah worked the grinding aspect until the fender was ready for heavy Silver from Worco Powder Coating.


I devoted one solid weekend to the fabrication of the fender and fairing. The fender went as smooth as glass, and we had a chunk of 18-gauge cut for the fairing and bent to match the front fender. That took considerable drive time on Friday finding a joint that would back-door the project quick. A brother in the motorcycle industry stepped up.

We were in uncharted waters, and my esteemed associate didn’t show on Saturday, but the good Dr. Hamster rolled in as I began. He didn’t like my design and suggested that I contact Air Tech, a company known for quality fiberglass fairing manufacturing. Wink’s BDL bike fairing was handled by Air Tech.

I burned through Saturday without accomplishing much and cut into Sunday. I was staring down two-week barrels, before we rolled toward the salt.

The vote in the shop leaned toward Air Tech, but I burned through my fairing manufacturing time and needed to move onto final assembly. I took some time to mount two headlights backwards for some aero support and prepared the brackets for powder. I was frustrated. I still believed in our original wing design fairing and even attempted to find a airplane junkyard in the area. That didn’t pan out, then Jim Waggaman called from Del Mar, California, and I spilled my guts.

He jumped on the case like a true Hamster, cut an old custom bike, Arlen Ness fairing apart and stuck a beanie helmet in the center.

Jim started sending me shots from his cell phone and I coached him until he could make a run north to LA. We configured it once and he returned to his seaside shop and laid on the fiberglass, then returned for mounting efforts.



Jeremiah and I made a set of mock handlebars and House of Stainless bent them with thick wall stainless. I used a set of Custom Cycle Engineering risers turned upside down to give us a secure clip-on position with some steering dampening. Worked perfect and allowed us to move the H-D Dyna glide front end to any position for perfect ride height without interfering with the bars.


Jim and I made brackets for his make-shift fairing and he took it home for final grinding, bondo work and paint. The brackets were finish-welded ground and shipped to the powder man.


Berry paid extra so the engine would arrive on Friday–guaranteed, the 10th, but it didn’t show. On Monday several anxious calls to Yellow freight grilled them for the whereabouts of our Assalt Weapan engine. It was in Gardena, California, 10 miles away, but wouldn’t be delivered until Tuesday afternoon. Fuck that! I drove out Monday morning and picked up the engine and had it in the frame in the afternoon.


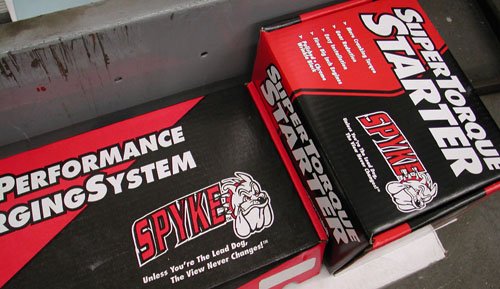
The next move was to install the Spyke alternator, carefully mounting the stator plug in place using some lubrication to slip it through the new Accurate Engineering case. It took some delicate time and effort. Then I installed the set screw and had to file some paint off the rotor teeth to slip it over the drive shaft splines.

The next move was to mount the BDL inner primary as a guide to driveline alignment. It’s always a roll of the dice. I start by mounting the rear of the engine with grade 8 fine thread bolts and snug ‘em up. If there was any gap under the front of the engine, I’d find shims. With the .030 shims in place, I loosened the rear of the engine and tighten the tranny plate but loosened the transmission.

Then with anti-seize on the 5/16 Allen fasteners, I attempted to bolt up the inner primary. It pulled the driveline into alignment then I checked the transmission. I needed shims under the front of the engine, then under the front studs of the transmission before the inner primary bolted up easily. It should just bolt up and unbolt without a problem. That's the key.

Each engine and transmission fits any aftermarked frame differently. This, I’ve been told, is the best way to align the engine and trans. I don’t ever want to mount a driveline and have it strain or bind by installing the inner primary. Many problems will ensue.


I started the Allens in the engine pulley insert, then drove in the pins, before tightening them. There’s a slight bevel on one side. That’s where the drive pins were started. Once in place I tightened the Allens and the engine pulley was set.

BDL CORRECTION FROM BOB GALLETTI: THE PICTURE YOU SHOW OF THE INSERT IS A STANDARD INSERT AND YOU INSTALLED IT BACKWARDS, ON THE STANDARD INSERT THE SPLINED SNOUT GOES INTO THE PULLEY FROM THE BACK SIDE AND THE BACK OF THE PULLEY IS FLAT, NO OFFSET. YOU ALSO INSTALLED THE BELT BACKWARDS. GET YOUR SHIT TOGETHER!
–BOB
There’s a trick to slipping both the engine pulley and clutch hub in place, but first I installed the Spyke starter and BDL included all the components for the starter drive gear.

Next, I installed the clutch hub and engine pulley simultaneously and they slipped right into place. This particular BDL system has a much narrower, 2-inch wide Panther belt and seemed to fit on both pulleys without a problem. I needed to start the bike and see how she ran.

This BDL system also runs their new Ball Bearing Lock-up Clutch with 32- 3/8-inch steel balls and a set of seven ERCP-100 clutch steel plates. It’s a breeze to install and the spring tension is self adjusting with shoulder bolts. According to the BDL verbage, the clutch contains a performance Kevlar plates for positive shifting and consistent grab for any size engine. With a variety of covers this unit is available for any Softail, 1990 to 2006.


Just don’t install the beveled spring retainer over the diaphragm spring backwards, like I did the first time—flat side out. Then I tightened the ¾ sockethead shoulder bolts and turned them all the way in until they bottomed out. Then I adjusted the clutch as usual and one item was checked off the list.
