 Welcome to the inside of the Bikernet Northwest Garage. This is where the next project begins. The goal – To complete one bad ass, mail haulin, knuckle draggin’, speed bump scrapin’, rip the skin off your face, back breakin’ rigid scoot. This bike is going to be ALL about mailorder. Since many of you don’t have shops in your area that are versed in how to build a custom scoot, we thought you might like to know how we did one without the help of a local professional shop. Buying parts is easy. Painting, powder coating, and certain sheet metal fabrication and modification however, can pose particular problems when you, the builder, do not have the ability paint or weld. Watch over the next couple of months while we put this beauty together (without the help of a local shop) and tackle some of the hurdles of a ground up – mail order custom. The following is a glimpse of some of the stuff we have so far. It should be noted that the most important piece of equipment here IS the cooler pictured in the first photo (above). You gotta have beer to properly build and test a rigid…..
 This is the single piece Softail tank with welded shrouds on the front and in the seat pocket. This particular tank is available from Custom Chrome. Since this is going on a custom frame with a 2″ backbone stretch, we made some minor mods that required some welding and finishing. More on that later.
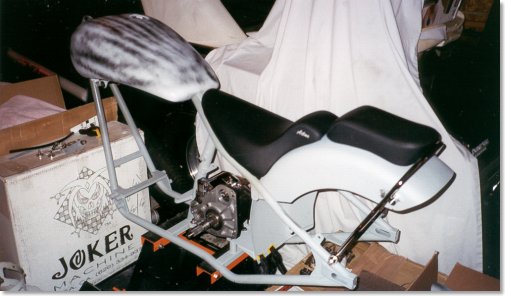
 The Baker Six Transmission. This is the Softail version. These amazing pieces of engineering come with full width Andrews Gears. They’re tough. Damned tough. One of these took Zebra from Florida to Sturgis at a non-stop 110 MPH last year.
|

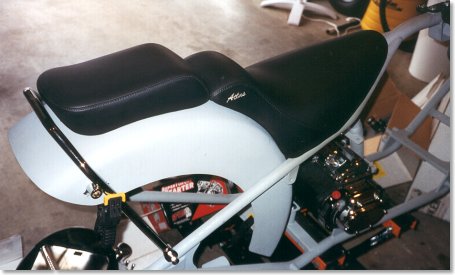
The above photo details the back end of the Atlas Precision ‘Roadrunner’ frame. Attached is a 9″ wide stubby fender, also supplied by Atlas. Both the fender and the frame are designed to handle 200 mm meat. We’ll be using a 180 for the project.
Since wide tire aftermarket frames require special fenders, you have to be careful to select the proper width fender and fender struts because stock fenders don’t often fit, even if you run a stock tire.
The Atlas Seat pictured above is by Danny Gray, built specially for Atlas to fit their frames. It’s pretty bare bones, but fits the ‘Roadrunner’ like a glove. This seat also came with an optional pillon pad. I got it so the wife could tag along. I have a feeling, it’ll get used only once. A note about the seat maker. Danny uses all European leather to make his seats. He does this for a good reason. Since European cattle ranchers don’t use barbed wire, the cattle don’t get any scars. This means, you get a seat without any irregularities in the leather.

See the open BDL drive in the box? Stop drooling – it’s mine! We’ll be putting one together in detail for you.
In addition, we’ve got a LOT of Joker components for the project including the hand controls, wheels, pulley’s brake rotors, etc. We’ll detail ALL of the goodies when we pull them outta the box and mount them to the bike.
Stay tuned boys and girls. When Oz gets me the engine, we’ll really start to rock and roll!
We’ve collected a number of parts for the rigid over the last few months – but one key item was missing. That’s the engine. When it came time to decide on a power plant for the project, there were a couple of factors that warrented consideration. The first is of course, cold hard cash. None of us have a lot. Any way you cut it, an engine is not cheap. The second factor, of course, is engine performance. Nobody wants to make this kind of investment, no matter what the price, only to find out it the motor is a dog or doesn’t hold it’s own when the throttle is cracked. (When buying mail order, performance is particularly tough to judge because you never get to test the engine before you buy.) The third factor is overall quality. If you shell out a few grand for a motor – you don’t want to have to do it again in 3 years. You want it to last, and you don’t want it to be plagued with problems. Having a bike that spends more time in the shop then it does on the road just plain sucks.
As the number of V-Twin manufacturers increases to meet current demands, the competition to provide a high quality, big torque V-Twin that can withstand time and abuse for a reasonable price has also increased. The clear winner in this competition is you, the consumer.
For those of us who need to maximize our dollar spent, we need to really understand our requirements. What’s the average biker want? A motor that’s usable for the street. If you want a Nitro-Burning tire shredder, get ready to spend some serious cash. But if you basically want a hot street motor, and live on a budget, you should to look at a couple of factors. These are performance, reliability, total long term cost of ownership,and the reputation of the engine manufacturer.
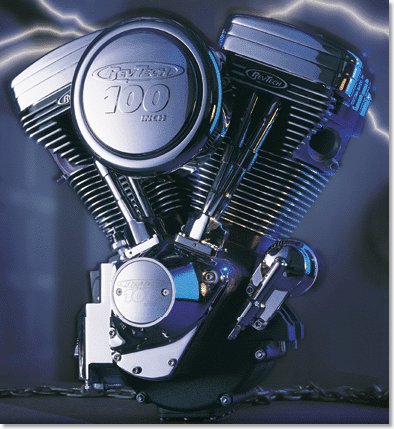
For this project, a Revtech 100 CI Evo-Style motor was procured. The guys at Custom Chrome cut us a deal on it to fit our budget. Let’s have a look at some of the features that convinced me that the RevTech 100 was my best choice.
First off, the Engineering and Manufacturing team at RevTech have spent thousands of hours researching, designing, building, and testing their engine design. When you buy one of these motors, you’re not just buying an engine, you’re buying 20 years of experience and expertise from one of the largest, most respected aftermarket american v-twin companies in the business. The company’s reputation was an important in choosing to buy one of these motors because I’ve never so much as thrown a leg over a bike built with one of these engines.
Second – The spec sheet. Have a look at all the features this engine has.
Basic FeaturesALL Chrome Covers are included. No need to add your own. Price this out when you’re building your next project. You’ll see the advantage of buying these as a package. Comes with a Mikuni Carburator, Revtec Air Cleaner, Thunderheart Ignition Pickup AND Thunderheart Electronic Ingnition Module. Keep this in mind when buying a motor. The Module, Ignition System, and Carb/Aircleaner setup when purchased separately are worth at LEAST $600 retail if you have to add them separately. There’s a trick feature here too – the ignition module is actually mounted right on the pickup – so mounting an external box is NOT required. Available in 88 or 100 CI displacements, in Raw, Black Powdercoat, or Show Polished finishes on the cylinders, heads, and case.
Case356-T6 Aluminum Case with added material in key areas for increased strength. What does this mean? Lower case flex. Why is that good? Longer bearing and shaft life. If things stay aligned, they wear less. It also means, this motor can take some punishment and that your lower end is likely to fail in an extreme condition than your average run of the mill case. Removeable Lower Sump Plate. – This is VERY cool. It allows you to keep tabs on your motor over time by being able to inspect the lower end WITHOUT having to rip the whole motor apart. You don’t get this with just any case. Pressed and Bolted Crank Pin and Pinion Bushing Carriers. The carrier on the left is pressed in like stock. The one on the right is pressed and bolted against a machined surface for superior alignment across the case. This translates into better alignment of the bearings, lower friction, and less bearing and shaft wear.
HeadsNo head gaskets! O-Rings are used for LEAK PROOF SEALS. This is an extremely important feature for retaining compression and performance over time. Wider than stock spaced head bolts for superior strength. D-shaped ports for high flow characteristics. If your motor ain’t flowin’, it ain’t goin’.
CylindersSteel cyliner liners are perma-locked into the outer aluminum casting for the ULTIMATE in durabilty. Larger Cooling Fin Area that Stock Evo Motors for lower engine temperatures. Lower engine temperatures means your oil retains it’s integrity longer and provides better engine protection to reduce wear. Cast Pistons in the 88″ motor, Forged Pistons in the 100″ CI Motor. This is something you may want to consider if you have a personal preference.
FlywheelsThe halves are one piece forged and then post machined from 4340 Steel. What’s that mean? They’re seriously strong and accurately manufactured. Oil Pump
The latest in oil pump technology. NEVER underestimate the importance of delivering good lubraction to your motor. In an air cooled motor, oil is also the lifeline to cooling. Warranty
2 Year – 20,000 Mile warranty. Just make sure you fill out the card when it comes. Shipping
Bagged and shipped in a custom built wooden crate..


Third factor – Total price – about $5600, retail. We did some internet shopping and found that you can knock about $600-$700 off if you look around a little.
We also priced comparable Black Powder Coated 100 CI motors from S&S $6300 Retail + which still require an ignition module to run (about a $200-$350 investment). If you want a TP Engineering motor, add another $500-$600 to those prices. Don’t get me wrong. S&S and TP make damned good engines, but you’ll pay for them. If you want a great motor that’s convenient to install, and has the added benefit of a carb pre-installed and dialed in with a pre-existing ignition module, and you’re on a budget to boot, you may want to have a hard look at the Revtech motor.
We’ll have some details about mounting it into the frame as the project progresses.
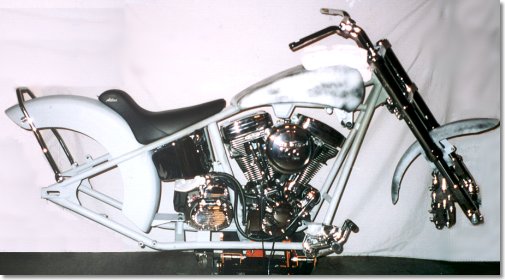
OK, I know….. It’s a shitty photo. Sorry folks. The good news is, it’s promted me to go out and buy a new camera – so keep an eye out for some high quality photography in the next installment.
So here it is. Actually, as I write this, the project is a little further than the photo would indicate, but the time it takes me to get film developed has me at a disadvantage (Did I mention that camera will be a digital one?) Whatever the case, at this point, it’s almost completely mocked up.
We do have one good photo to show you however (and no, I didn’t take it.) It’s a photo of the front end. I feel it’s one of the centerpieces of the bike. It’s a GCB 54 mm inverted system. It’s massive. They aren’t the most inexpensive forks on the market, but a set of forks this wide will give you the most stable ride you’ve had. Not to mention, they look killer.
This set came from Chrome Specialties. The chrome leg version retails for about $3000, but if you shop around the web, you can sometimes find someone with an online shop who will sell them to you for 10-15% less.
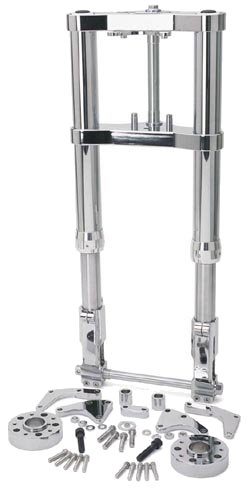
These setups come in either a wide or mid-glide style fork, in either satin or chrome. They are stock FL length (30″) which when matched with the rigid frame and 40° rake, provides for a nice level stance on the frame.
A couple of things I’ve learned along the way during the mockup.
1.) If you’re building a bike with rake over stock – get prepared to make use of internal fork stops. I’ve got somthing kinda jimmy-rigged for the mock up, but will be putting some in soon.
2.) If you’re making use of a belt drive, be sure you’ve got a tool to remove the race from the main shaft. Jim’s makes one. If you go look in their section, you’ll see a “How To” on using one. I ended up waiting for some period to time to get mine in the mail.
3.) If you think you can use the spacers and the bearings only to determine where your front wheel should be placed on the axel – think again. I was able to do this on my last bike, but not on this one. I found that the races in the hub were not quite where I thought they should be. They were off about 1/4″ the left as received from the manufacturer when looking at the bike from the front. Since I had a local shop already check the end play on the bearing races, and pack the hubs, I had to make up the difference with spacers….. Which meant I had to order some….. Which meant I had to wait another week for parts. Patients is a virtue when building a mail order custom.
4.) Paint. I’ve changed my mind on paint. I’d planned originally to paint the bike orange and put some racing stripes down the middle. Here’s the problem. I’ll be sending my paint out via UPS to have a friend paint it who lives in California. So, without the chassis, how do you line up the stripes along the length of the bike? The answer is, you don’t. So much for that idea. Instead, here’s a pencil sketch of the artwork that will be adorning the tanks. Jon Towle is working on the final product, and I’m going to see if I can’t sweet talk Crazy Horse into making it a reality in enamel.
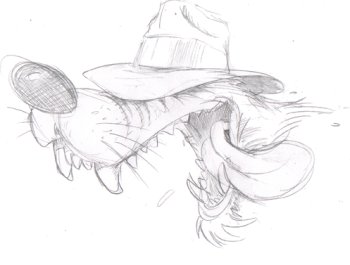
Uncle Big Bad – By Jon Towle
When Jon get’s the artwork done and colored, we’ll have a look to see what color will be best behind it, then it’s time to send the sheetmetal out for paint.

Although you haven’t seen it in a fully assembled state, the rigid has actually been mocked up to completion. However, anyone who’s built their own sled knows that an assembled bike without paint and powder just isn’t quite the same as the finished product. Although a primered mock-up will show you the lines and shape of a bike, the machine doesn’t truly come to life until it’s been dawned with color. For that reason, we saved a lot of the assembly detail for you until the paint and powder was complete.
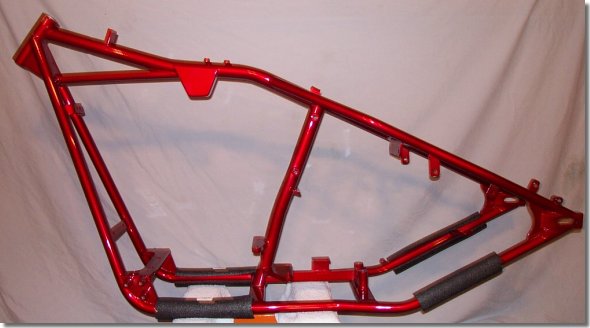
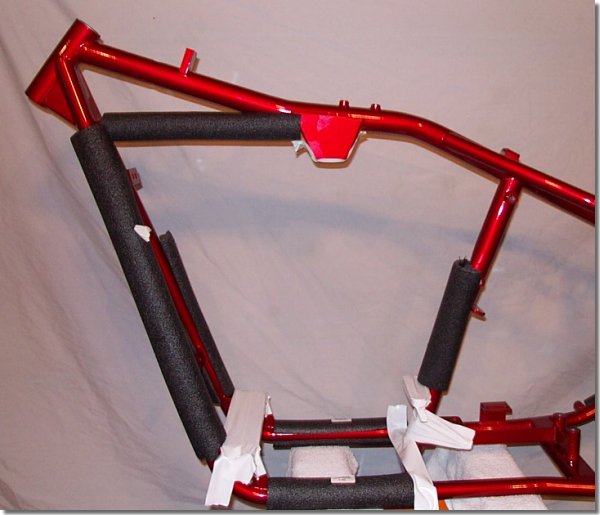
The mocked-up rigid was torn down to the frame, which was sent out for powder coat. It came in only a few days ago and blew my socks off. Although the photos shown here make it look screaming red, it’s actually a deep sunset orange.
The powder coat was done by Hytek Finishes in Kent, Washington. Hytek was the ONLY house I could find in the area that had worked with anything other than a flat powder. This one is a candy orange, color matched to a House of Kolor Kandy paint I’d selected as the base coat for the sheet metal.
Candy paints are valued mostly for their depth. They are made of a base metallic coat covered by a transparent paint. House of Kolor offers a color book for about $42 that you can order from their Web site. Many custom painters around the country use and are familiar with these paints, so they make for a good standard to work with. Candy colors will vary slightly based on the thickness of the transparent color that is used to coat the base.
Candy powder is a little different. The base principle is the same, but you are limited on thickness that can be sprayed because the metal has to be charged to get powder to stick. If the base coat is too thick, you will lose the charge and be unable to get the top coat to stick. Whenever you pick a powder house to do your candy color, make sure they’ve used such paints before because they are tricky to use. This one had a couple of thin spots underneath because the powder coater didn’t want to lay it on too thick. Fortunately, the areas are under the bike that nobody will ever see.
The way I had this matched was to send the House of Kolor sample to Hytek Finishes. They sent the sample to their ‘Prismatic Powder’ supplier, who custom mixed the powder for the job. Not many places do this, so you may have to do some searching. The results are well worth the effort.
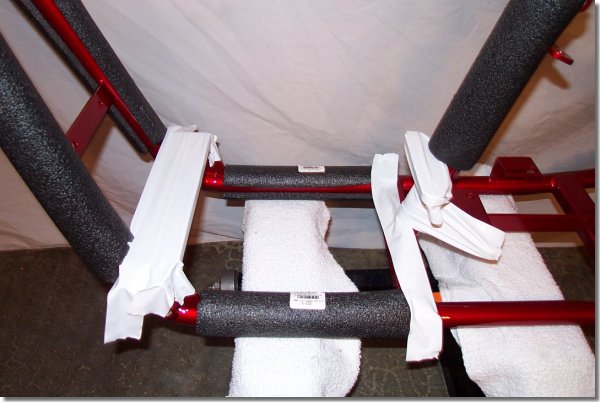
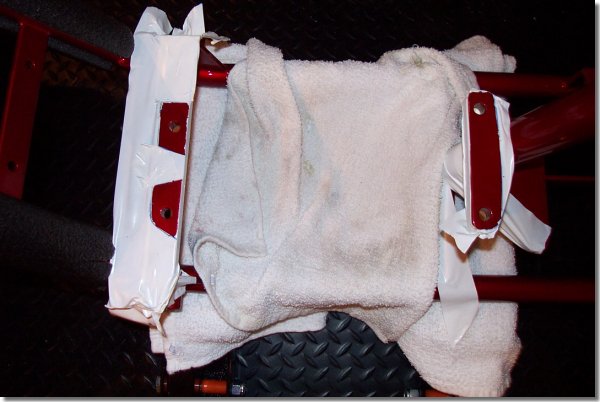
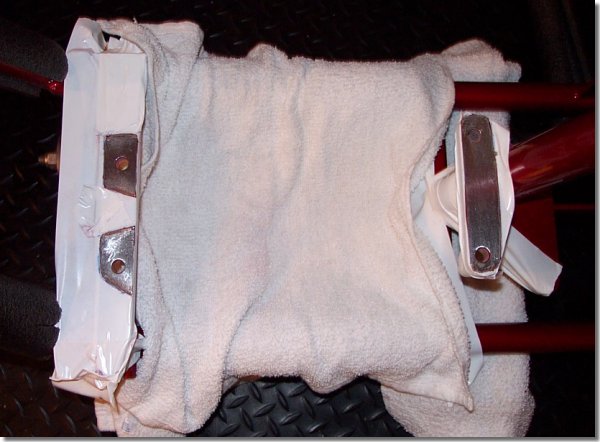
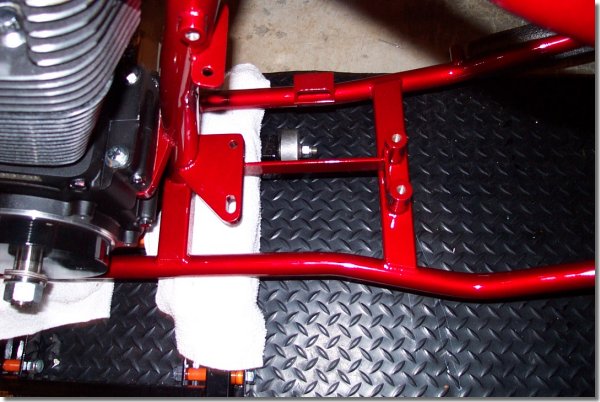
With the frame back in the garage, it was time to get started. The first order of business was to get the power train in place. I started by prepping the area where the engine would sit in the frame. To do this, one must take the time to pad the area so as not to scrape the shit out of the newly finished frame. I used a combination of plastic tape, pipe insulators, towels and bubble wrap to do this.
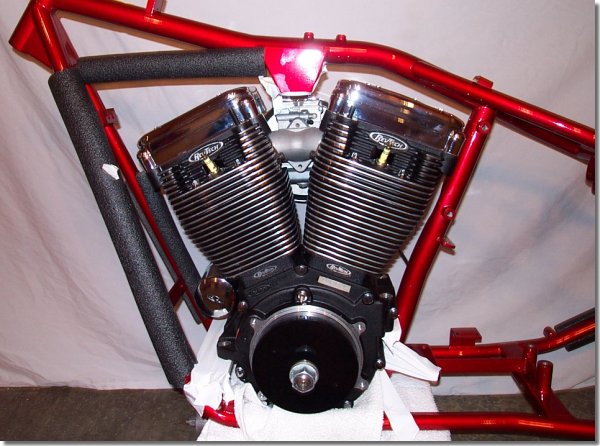
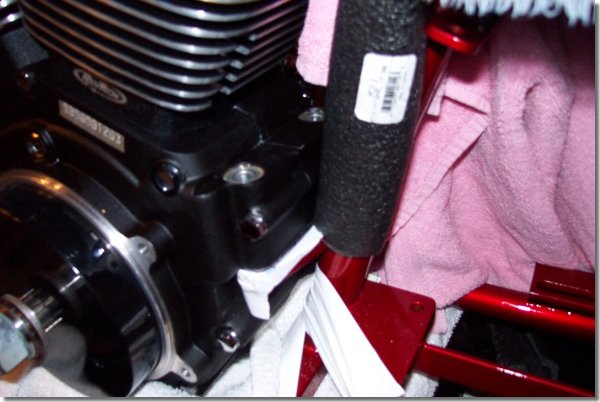
It was then time to put the Revtech engine in place. Caution and ease are the keys to success here. One thing to note: If you build a ride of your own and are using the type of stand I do, which sits under the frame, make sure the rails are around where the bottom of the engine will sit to ensure the motor will fall into place and not sit ON the rails.
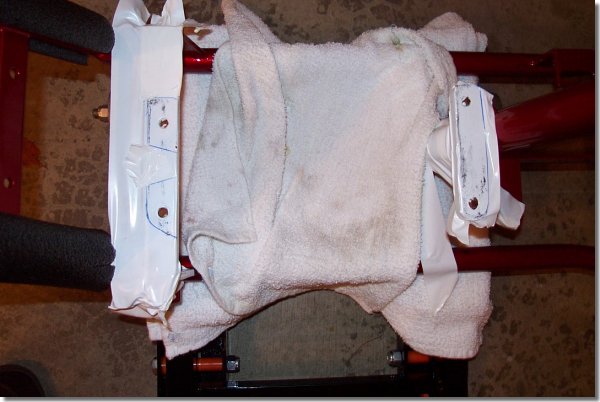
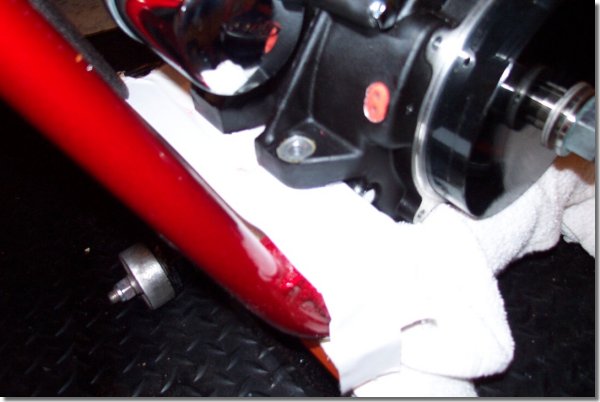
Using a pen, the front and rear engine mounts were traced. The engine was removed and what is left is what you see in the next photo.
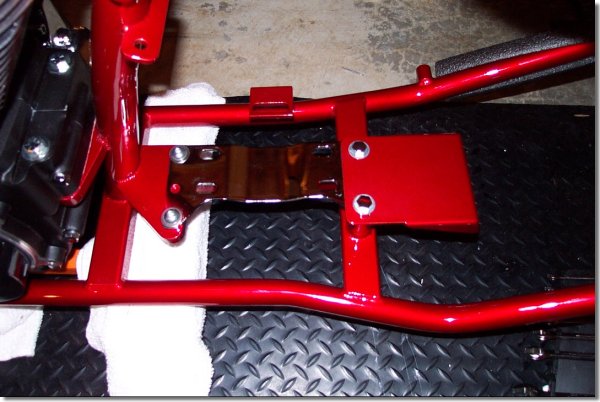
Using a razor blade, I removed the tape from the areas where I planned to mount the engine and prepared to strip the powder coat. The powder must be stripped from the mounting area because the power train must make electrical ground contact to the frame for the ignition, starter and speedo sensor on the transmission.
Once the tape was removed, a small Dremel tool was used to strip the area down to the bare metal.
The area was cleaned and the engine was placed back in the frame over the bare metal spots.
Then it was on to the area where the transmission was to be placed.
The transmission plate from Custom Chrome and the rear fender mounts were put into place and bolted down.
The transmission was then put in place but not bolted down.
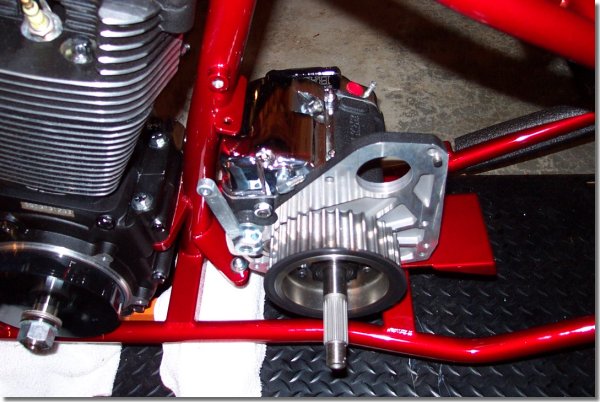
You’ll notice at this point that the secondary pulley is already on the transmission’s output shaft and the shifter lever is in place. Note: You want the shift lever to be straight up and down when bolted in place. The one in the photo required some adjusting to make this correct.
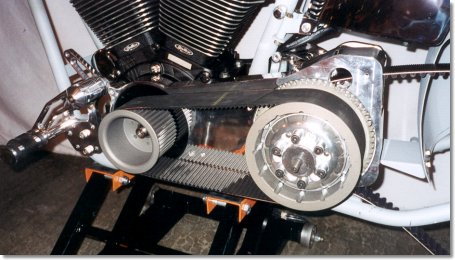
This project uses a BDL open drive system to drive the tranny, so the motor plate was put into place and bolted down while the engine bolts and transmission bolts were still loose. Make sure to use Loctite 242 and to torque the bolts to spec per the instruction sheet provided with the BDL system.
Something to note: This plate comes with its own bearing for the main shaft on the transmission, so the color had to be previously removed from the transmission. A tool from JIMS USA is available for this and can be found here in their section on Bikernet.

The offset needs to be pinned into the front pulley as shown below.

Both pulleys had to be slid onto the engine and transmission shaft simultaneously.
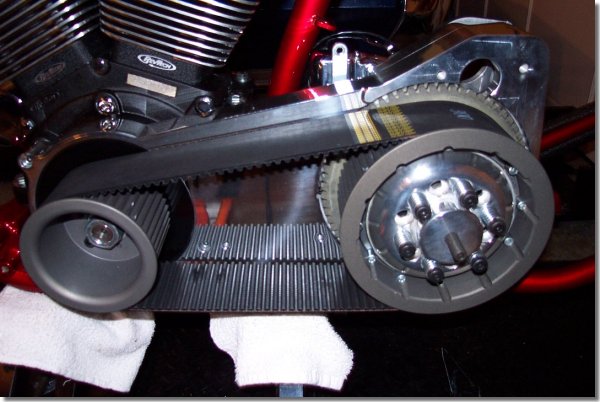
The spring plate on the clutch had to be removed to allow for bolting the rear pulley to the shaft. This was done by removing the six spring/bolt assemblies and the plate.
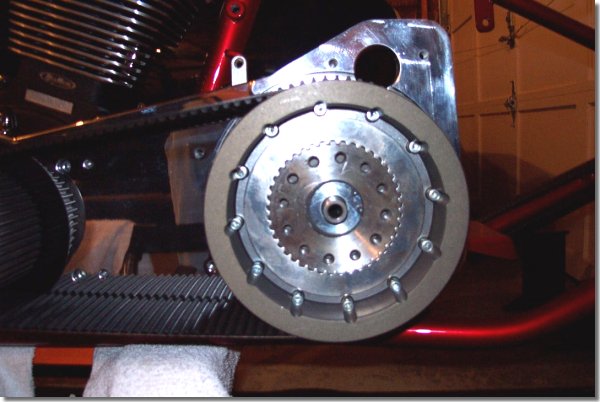
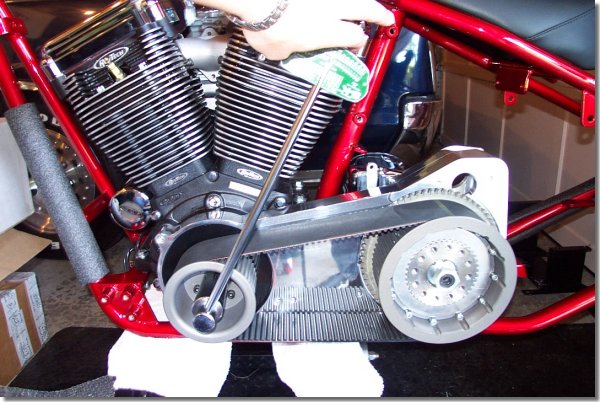
The bolt was torqued down to spec, along with the front pulley. I was then ready to turn the motor to make sure the belt tracked properly. To torque these down, an air compressor and an impact wrench was required. I would never have been able to torque against the motor or transmission using a regular torque wrench unless I had jammed the pulleys.
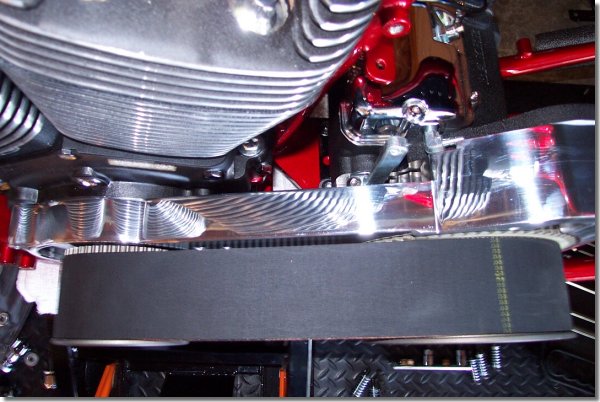
Using a large torque wrench, I turned the motor forward a few times to make sure the belt could make three revolutions and still track to the center of the two pulleys. If you use one of these set ups, it should track as assembled, but if it doesn’t, check the spacing on your front pulley. If you still have problems, you can call BDL and they will walk you through how to shim things up on your frame.
| |