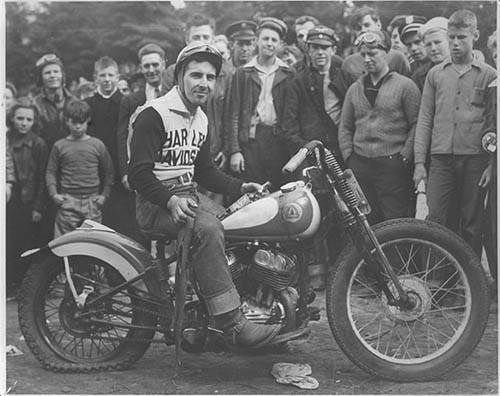
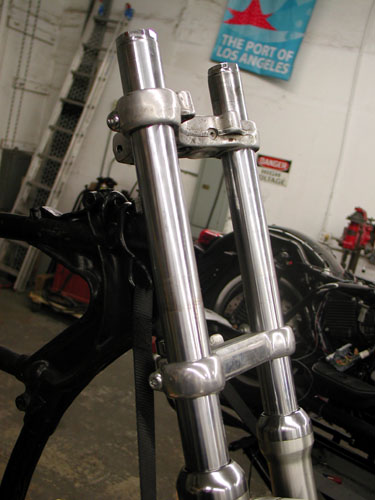
This is nuts. But let me try to explain. We’re making progress fast. Even our Bonne Belle art improved from a Chris Kallas black-and-white line drawing to a colored rendition by the master. Rick Krost straightened and strengthened the frame last chapter and we ordered Paughco cups designed for this frame (with Timken bearings) with a 7/8-inch, Paughco Springer stem. We (Settle’s Cycle, in Harbor City) machined the stem and pressed it into the Sportster bottom tree. Larry Settle also laced the PM hubs to the aluminum Sun Rims, mounted the V-rated Avon Tyres and balance the lot. We were rolling. Our goal was to turn this puppy into a roller, ship the sheet metal to Jim’s Custom Paint, while the frame and brackets were being powder coated. I’m getting ahead of myself. We were jazzed to pick up the wheels. We machined the rear hub, estimating the distance to the sprocket face from the frame, aligning it with the transmission sprocket. Fortunately we had access to a 1939 WLDR and made measurements. We ended up machining both sides of the rear PM hub before the wheel was laced. With complete wheels in our hot welding gloves, we returned to the Bikernet Headquarters and went to work. First we had to shave 1/32-inch off the rear axle landing to slip in the new Custom Chrome ¾-inch big guy axle. We looked at grinders, and various tools and decided to hit it with the traditional metal file and some cutting fluid. It took no time at all for the axle to slip in securely. Next we installed the front wheel on the stock Sportster front end with the springer stem. The bike set way too high. The stock ’39 stood between 4.5 and 5.250 inches off the ground with an original springer is place. Rodan, an avid Bonneville racer and SCTA official, told me recently, “You want your bike to set as low as possible and eliminate anything off the front that will interfere with air passage.” We need to keep lowering this sucker. It’s currently close to 6 inches in the air with the tubes pushed up through the top Sportster triple tree.


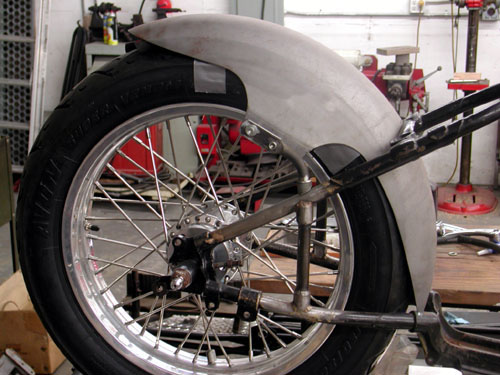
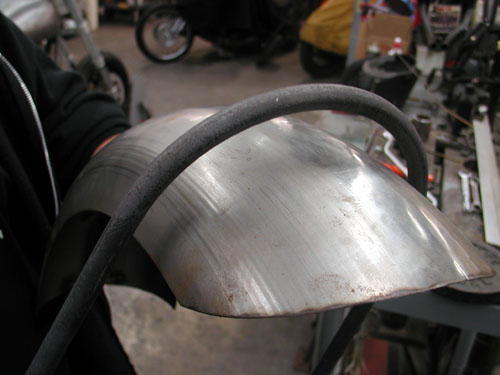
Next we needed to mount the rear fender so it would be ready for Jim Murillo, the master painter, to go to work. He already has the tanks and a stock Sportster front fender. We looked for a narrow front fender for the small Avon, 120/18, rear tire and discovered a heavy gauge Kraft Tech front fender and started pondering do-ability. We laid it over the tire and found some old rubber (used to vibration dampen handlebars). We cut it in two and duck taped it to the tire. For racing clearance we gave it about ¾-inch of clearance from the tire surface on the top. It was sorta tight on the sides.
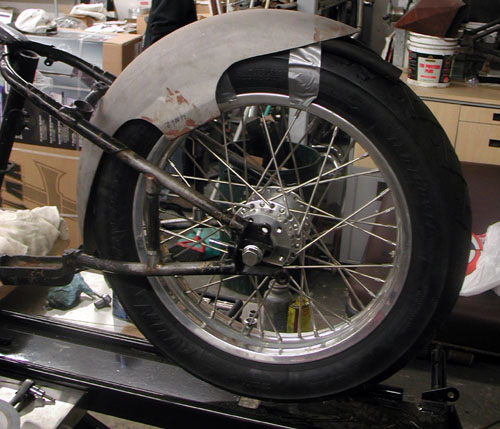
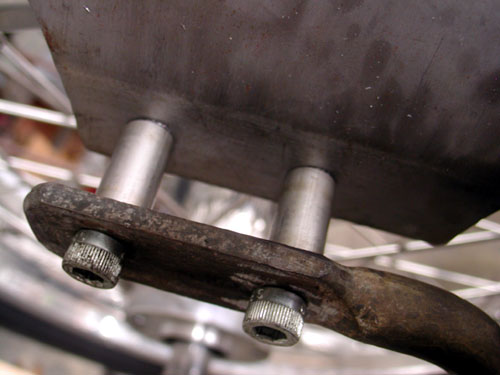
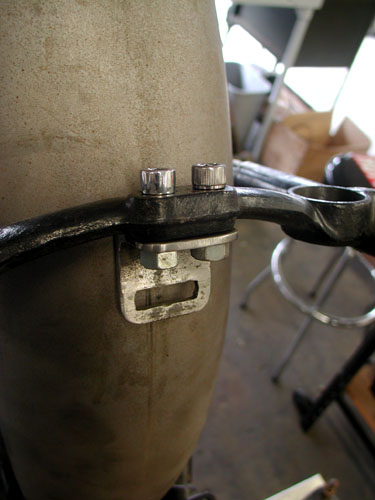
We decided to use the front fender tabs instead of shaving them and running standard fender struts. We dug around the shop for some stock that might match the material used to gusset the rear fender arms. We wanted to give it the same caped look as the gusset tubes with an outside sleeve at the ends.


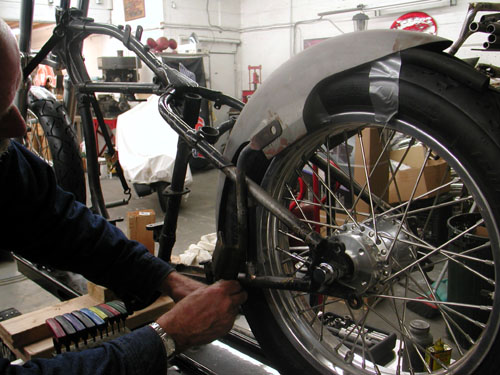
We discovered a solid rod, muffler bracket with tabs already in place. For a couple of days we monkeyed with the tabs, bending them, twisting the flats and fitting them to the fenders. We decided that since we were going with this configuration, that we would set it up so the fender could be moved to the right and left, if the wheel needed to be re-aligned.
It took a lot of balls to make the initial cut. Even with adjustments built in, it’s nerve racking to fit fenders. The slightest shift throws everything out of whack.
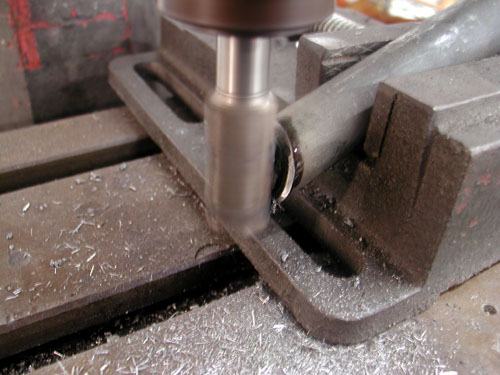
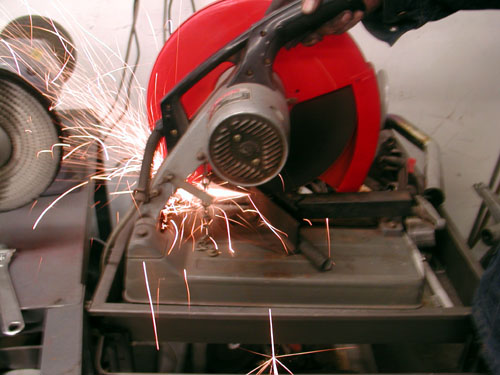
We found the right sized tubing to make sleeves from and began by setting up my mill so we could trench cut the tubing to fit the fender rails. This brings up a couple of wild stories. We’ve been fortunate to stumble into caches of machining equipment and I don’t throw a damn thing away. A buddy inherited his dad’s pad. When he moved in, he discovered a complete machine shop in the small teetering garage. He was rapidly building a business around “On-Site” hazardous waist collection bins. He needed to clear out the garage and called. We scored. Then we bought a cheap, used milling machine from Settle’s Cycle. This was the first time we put all the pieces together and fired her to life.
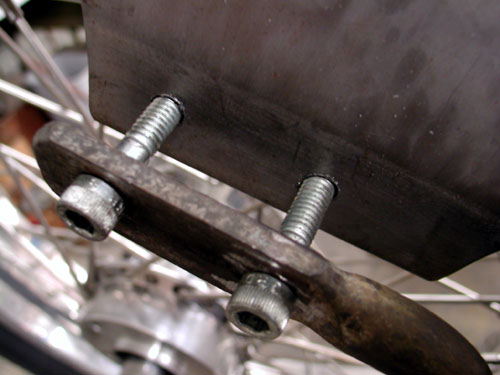
Next we drilled the tabs. They already had one hole, so we drilled matching holes in each tab and on the fenders. Then I went to work on developing spacers to hold the fender centered in the frame and over the tire.
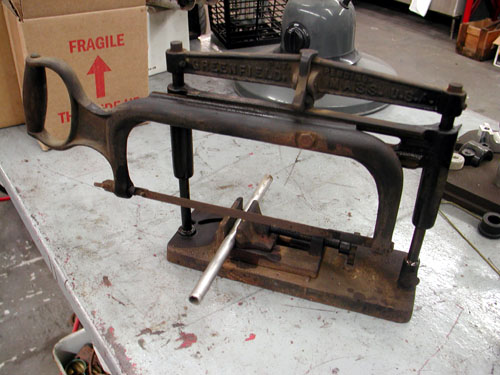
One of the wild benefits of living in an industrial ghetto is the strange opportunities that pop up. The Welder down the street was force to move, since the shop property was sold. He turned me onto a bunch of stainless tubing which would work out perfectly for this operation. Get this, recently a homeless guy called and told us about a shop that burnt down and the people were being forced out. We scored a bunch of old tools, including the above antique hacksaw guide.
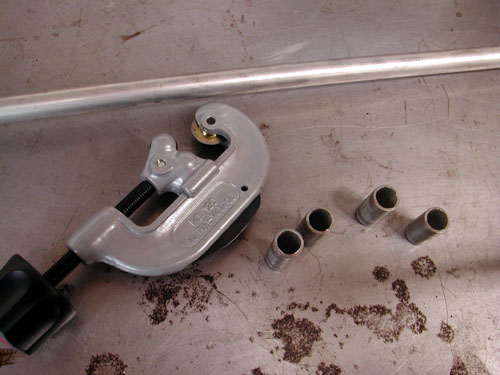
Unfortunately I didn’t have any blades that small. I turned to a tubing cutting tool that worked like a charm. I could cut segments almost any length accurately and cleanly. I cut a variety of sets, ¾-inch, 1-inch and 1.250-inch.
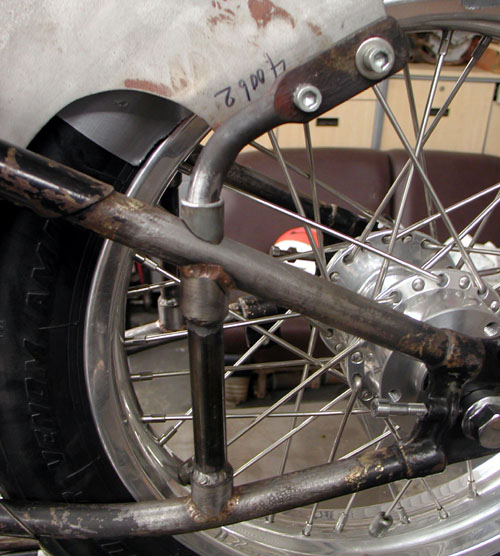
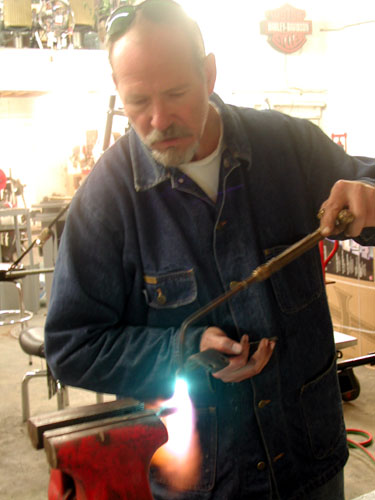
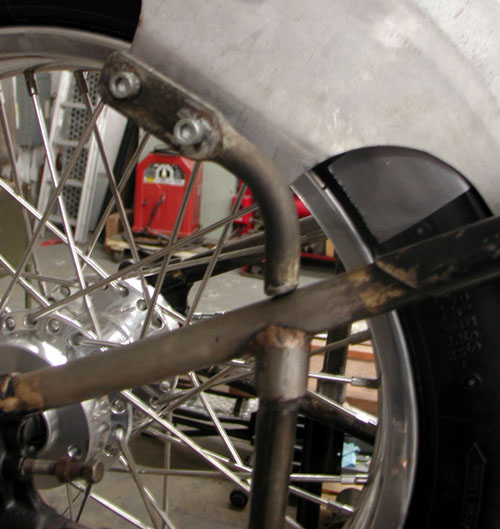
With the grooved sleeves in place and the spacer juggling act completed, we believed we had something going. There was a question about the welding, though. I called master builder Rick Krost, from U.S. Choppers, the man who straightened our frame. We discussed the frame sweat-brazing and avoiding any contact with brass. We also discussed his TIG welding with silicone bronze and the need to keep extreme heat away from delicate welds.

We decided that the best method was quick MIG welds that wouldn’t produce excessive heat. He suggested that I tack them, then rotating from side to side, welding from one tack to the next. I tacked them front and rear, then welded from tack to tack on one, then shifted to the other and finally doused them with a wet rag to prevent the heat from lingering.


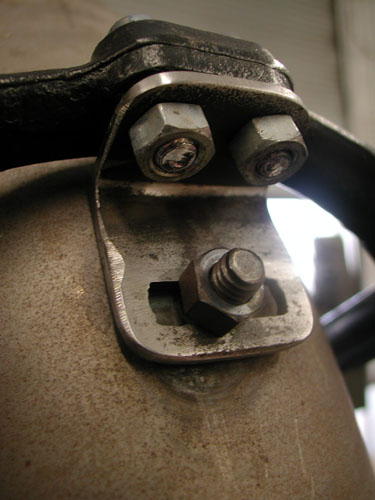
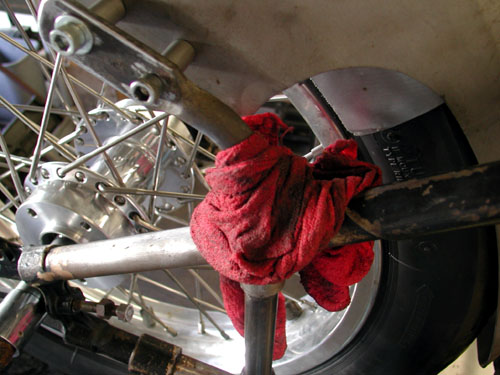
With the fender rails in place and fasteners tightened we discovered that we still needed something in front, although we were elated with the outcome. They were solid as hell. We cut a chunk of angle iron and drilled it to fit the frame. Then by drilling and using a Dremel tool cut-off blade, we cut a slot in the bracket to allow the fender to be shifted right or left. Finally we welded a bolt to the inside of the fender for ease of installation and adjustment.
The last element we could mess with, at this stage was the seat. I’m constantly shifting seats around the shop. This seat was destined for the Salt Shaker for awhile, but it fit the 45 like a glove, so I looked for spacers so it would sit enough above the fender and the springs wouldn’t rest against the frame and fuck with the finish. I save anything that might be considered a spacer. We dug through the drawers and discovered two perfect units, made of stainless steel, a bonus.
Back to the milling machine and shop lathe we cut a spacer for the front of the seat and machined it for a perfect fit. We furrowed another chunk of tubing and welded it to 6-inches of steel strap. It was drilled for the bottom of the seat then welded to the tubing.
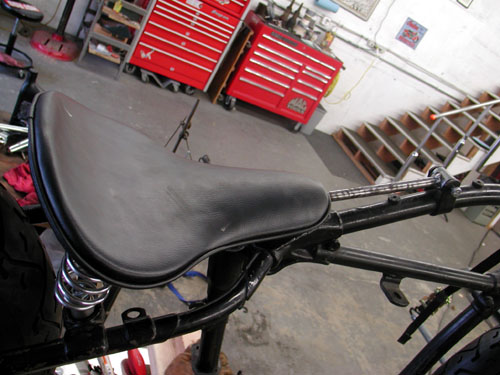
The seat fit perfectly with the bike. We are trying to position Valerie so she can tuck in and low for the blast along the salt. Wait till you see the handlebars in place.

We were just about to slam the door shut on the shop for the night when Japanese Jay showed up and asked for help building his sissy bar. It was another chance to get some experience with our Bill Hall strap-bending machine. Chris Kallas our official Bonneville Team artist was helping us with the 45 and gave Jay a hand bending the solid stock.
We looked around the shop for the perfect diameter guide and discovered various weight plates, from the Bikernet Gym, might do the trick. We tried 2.5 pound, 5 pound and ultimately 7.5 pound, which worked like a goddamn dream.
This move could be introduced in any shop with a weight plate and a strong vice. It would be tougher to handle than with this bastard, but you could pull it off. The rail fit Jay’s fender like a dream.
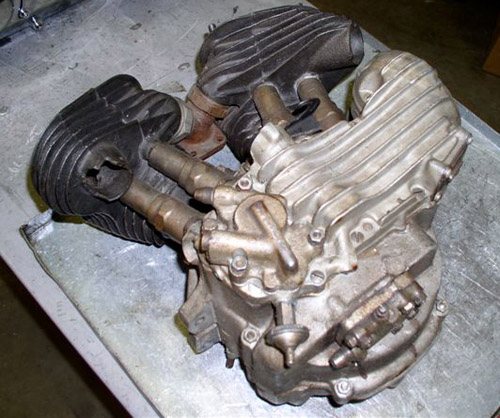
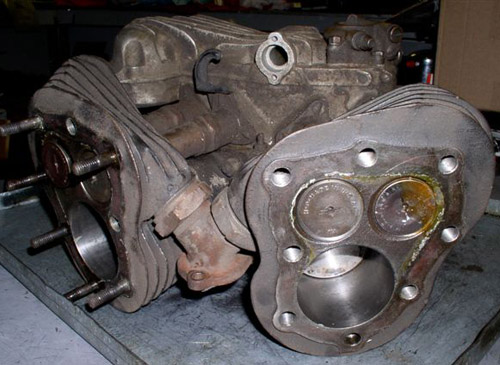
Wait, there’s more. The brothers, at Departure Bike Works, have stripped the Bonne Belle engine and are preparing for hop-up rebuild. The initial plan called for running two front cylinders, dual carbs and bigger valves and pistons. I snagged Greg from the Service Department:

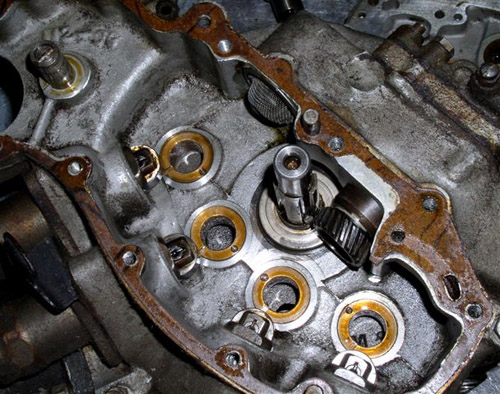
Klink Walton (resident guru of flatheads & other things ancient), and Billy Wheatley (resident motor wizard & stripper afictionado) were the two brave souls who tore into this old, decrepit hunk of iron. Overall, things went pretty smoothly, although Klink forgot to bring all of his special 45″ tools (some guru, huh?)
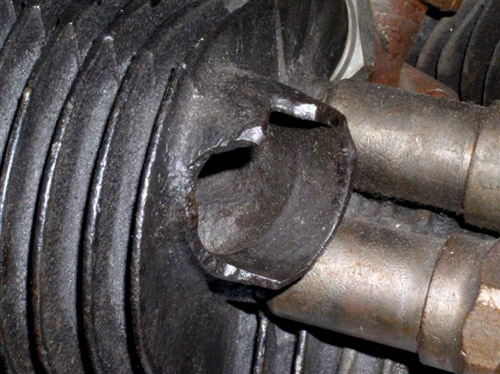
A few things we noticed were, one of the cylinders had a broken exhaust flange. No biggie, Klink wants to use a set of WLDR cylinders (if we can find a set, hint,hint Bikernet readers). We also noticed the motor had a military oil pump set, by the olive drab color they were sporting. Nothing major, just an interesting little tidbit.

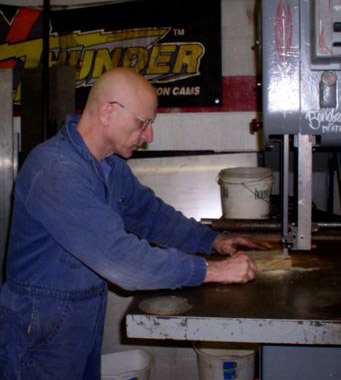
We noticed that the cases will need a bit of welding and machining, but WTF did ya expect on a motor of this vintage. It was about this point that Klink realized the need for a special case splitting tool, so off he went to the bandsaw, and returned with the tool you see pictured. I'm sure it'll be available in the JIMS catalog shortly…
Anyway, the cases were split, the flywheels removed & disassembled, blah, blah ,blah, and we were left with a large pile of parts that smelled like the funk of forty thousand years. Our next step will be to separate the good from the bad & the ugly, and order all the trick parts we're planning to use in this beast(if you can call a 45″ flatty a beast), so STAY TUNED!!!!!
These are WLD cylinders and WLDR already have larger valves and better ports with less distance to the cylinder. The Departure Bike Works boss asked if I could find two front WLDR cylinders, which seems an impossible task. I don’t feel right about breaking up a set either, so I think we’re going to weld up and machine the ports and machine the heads for larger valves. We still need to find another front aluminum head.
The next challenge is having new cams ground. Again, I spoke to Rodan who told me that KR cams will work, or Andrews Bonneville Sportster cams for higher lift. We need to separate the lobes from the gears, switch gears for the reversed valves and put the sets back together. We’ll see. More reports coming soon.