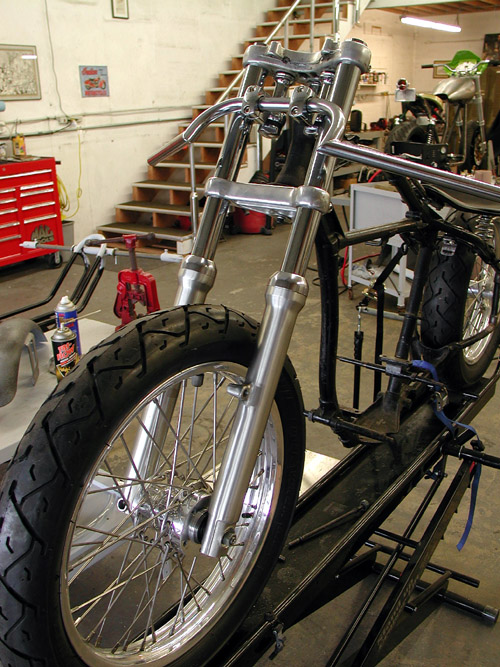
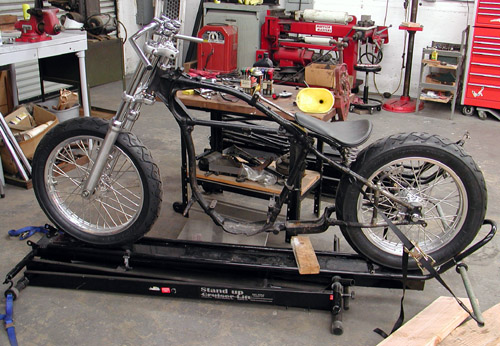
We’ve made serious progress on both bikes, thanks to terrific help from friends around the industry. The buzz is hot for the Bonneville this year.
I may jump around a bit, but let’s haul ass into my first move. With the 45 frame aligned by U.S. Choppers, Rick Krost, the sheetmetal out to paint, at Jim’s Custom Paint, I needed to complete a few more tasks to finish the Bonne Belle roller. The front end needed shortening and bars, risers and fork stops. I ordered a sent of Custom Cycle engineering, 2-inch risers. I also ordered a set of 2-inch under Custom Cycle Engineering 39mm fork tubes. I still don’t understand why they measured only 1-inch shorter than the stock tubes, unless my tubes were lowered, an inch, from the factory.
I ended up taking the front end apart a number of times. Kent, from Lucky Devil in Houston, told me to remove the metric Allens from the bottom of the lower legs first to drain them. I did. It worked alright, but there continued to be oil on the springs and inner components, so rags were necessary constantly.
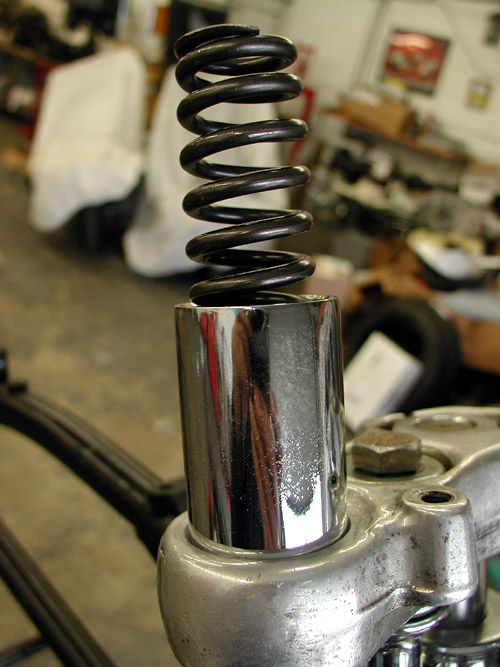
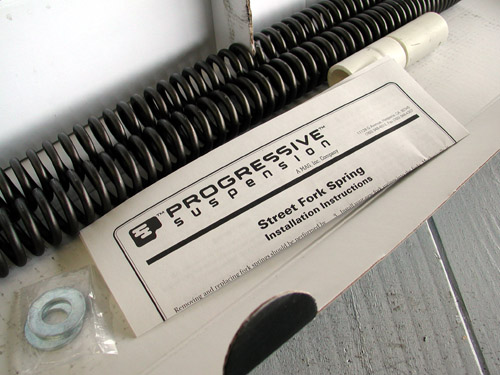
We ended up using shorter tubes and a set of Progressive suspension lowering kit springs from Custom Chrome to drop the front end even more.
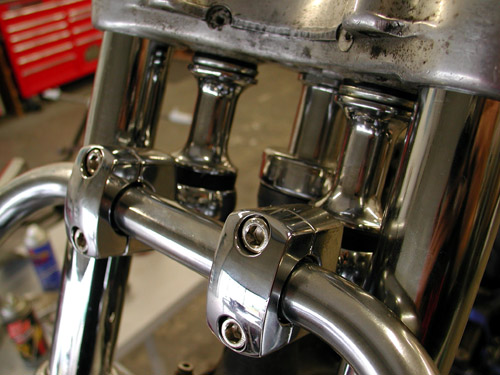
Before I finish the tube switchin’ procedure, here’s a shot of the dirt bike, 7/8 bars in place with the Custom Cycle Engineering risers upside down under the top triple tree.
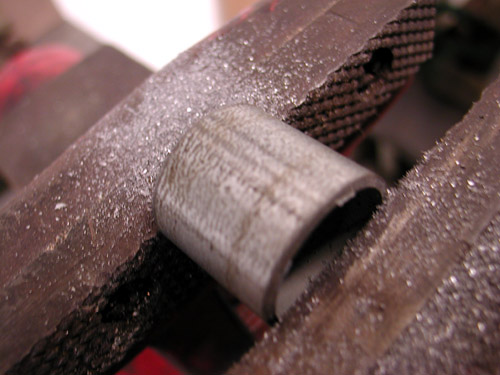
I cut chunks then sliced, in half, thin electrical conduit tubing to make shims to hold the bars securely in the risers. I used rubber trim cement to hold them in the risers, since I usually work by myself and it takes four hands to hold the riser caps, the Allens, the shims and the bars.

Here’s one more odd notion. We pressed a springer 7/8-inch neck stem into the Sportster bottom tree and left it Springer length, but altered the top bearing nut, so the top tree stands 1.5 inches above the top of the neck cup. That lowers the bike another 1.5 inches. We’re shooting for 4-5 inches of ground clearance.

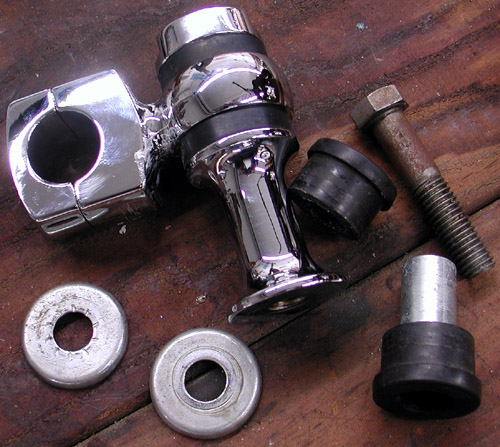
Okay, let’s run through disassembly of a Sportster front end. Of course remove the wheel and brake components. I might suggest prying that Allen on the bottom of the lower leg loose first. Don’t remove it, but the compressed spring holds tremendous pressure on it.
Then take the top cap off the tube with a 1 3/8 socket while the tube is still pinched in the trees. I loosened the pinch bolts and slid the legs out of the trees. I put a big coffee can on the bench and removed the Allen off the bottom of the lower leg and made sure to secure the brass washer that came with it. I slid the tubes up and down in the lower leg to pump out the fluid.
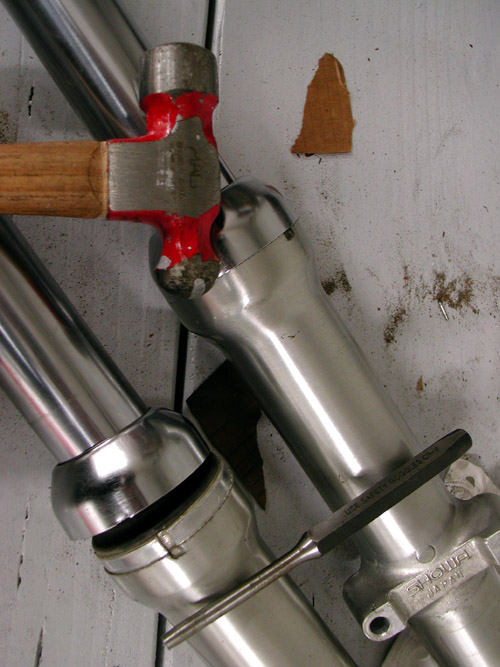
With a small punch and hammer I removed the dust shield/cap. There’s a notch in the lower leg for this chore, but be careful not to damage the cap or the leg. Tap it lightly.
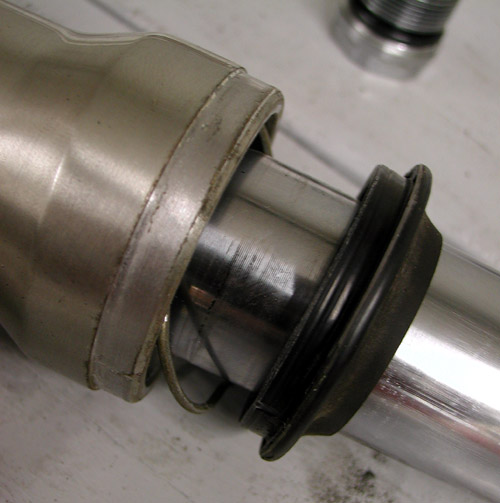
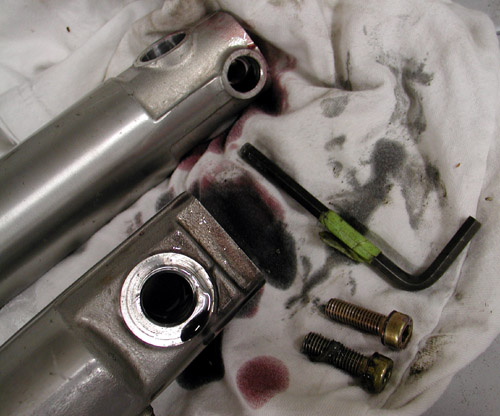
With a wedge I carefully dug under the rubber dust seal. This was a reasonably new front end, so I didn’t plan to replace these items. I took a lot of care not to damage them. Next, with a small flat screwdriver we removed the wire keeper that holds the fork oil seals in place. Then, by yanking up on the tube and sliding the damper components against the seal, it came out.
Then the damper tube came free with the rebound spring. I carefully washed all the components then reassembled the components with the new tubes.

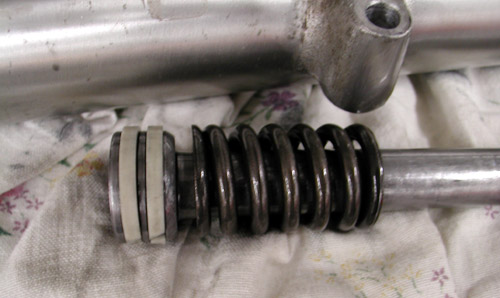
First this brass lower bushing needed to be carefully removed from the old tube and slipped onto the new one. Then the damper tube was returned to the tube with the rebound spring in first.
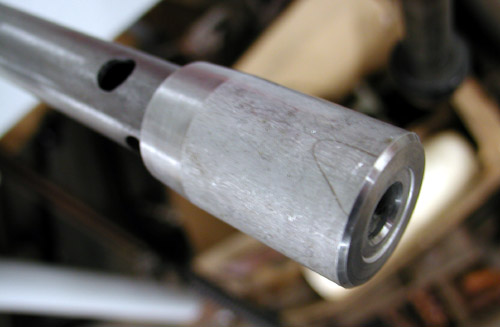
This cap slips over the damper tube and seals the bottom of the lower leg. It’s imperative that this puppy is clean and the inside of the lower leg completely free of dirt or debri, or the bastard won’t seal.
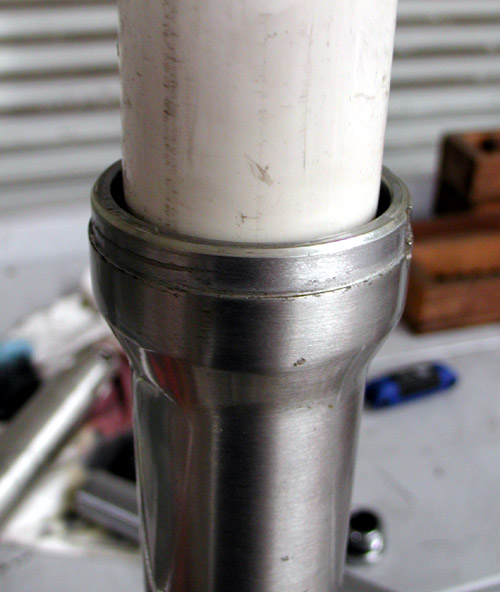
Here’s the kicker. Returning the oil seal can be a turkey. I made a tool out of a nut and chunk of exhaust pipe welded together, then wrapped it with duck tape to prevent marring the chrome. For some reason it didn’t work this time. Since the leg was off the trees I ran a chunk of 2-inch PVC pipe down over the tube and hit it with a rubber mallet. The Fork Seal slipped right into place. I returned the clip ring, the dust shield and dust cap (the PVC pipe worked as a tool here, also). I slipped the Progressive spring into the tube to hold it in place and tightened the Metric Allen at the bottom of the lower leg.
We slipped the tubes into place, tightened the pinch bolts, added 10 ounces of Amsoil Fork Oil in each tube and tightened the top fork tube caps. Shortly, we’ll have all of our Performance Machine Brake components, coupled with Yamaha 250 master cylinders, hand and foot controls for the light/small racing look. Yeah, I know, Jap stuff on our 45 flatty, but I think you’ll dig it when we’re finished.
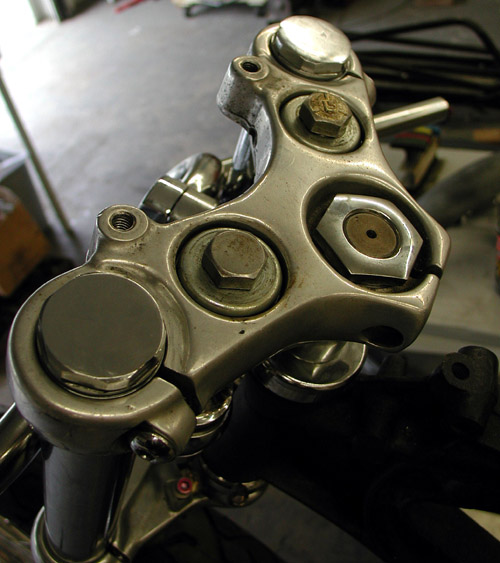


We weren’t done yet. The tanks were being painted and the last thing we needed were fork dings. I pondered the glide front end for fork stops and thought we had it made, no way. They were too low to catch the arch in the frame.

Then I discovered that even with extentions on the cast aluminum tabs the front end turned too far. That’s when the squirrely notion surfaced. I decided to connect the dots on the lower triple tree and create extensions that would reach the frame.
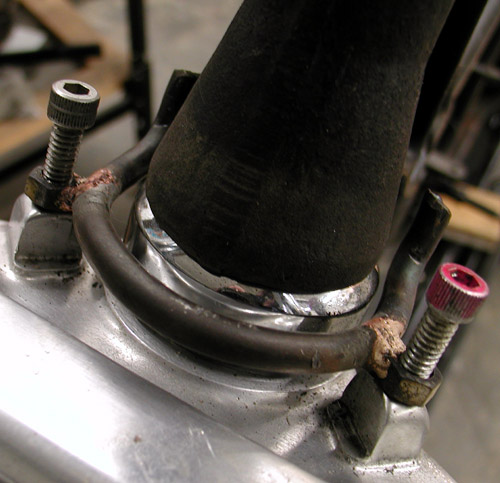
I bent a chunk of ¼-inch round stock and welded a couple of ¼ nuts in place. Then we bent the tips up to catch the frame.

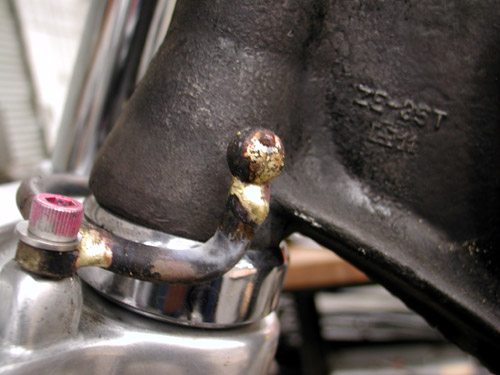
Then for “Bandit” style I brazed a couple of old ball bearings on the tips to finish them off. Brazing works well for small pieces that don’t need excessive heat or strength.
These puppies won’t allow a whole lot of turning ability, but generally we’re running straight down the salt and these will be easy to adjust once we have the tanks in place.