We’re rockin’ with this project. I’ve never built two bikes at once, Bonneville aside, but we’re having a blast. Both projects are hustling and this report will bring you up to date.
The CCI V-Bike Panhead is still a roller and we’re waiting on the drive-line elements so we can mock-up the pipes before shipping anything to powder. But we decided to grapple with tank mounting and messing with the seat. But first here’s what Berry Wardlaw said about the 120-inch Panhead from Accurate Engineering:
First off, good morning! I am sending a mock-up engine so you can continue the build and I will give you the theoretical specs for the exhaust diameter and the length. The specs for the exhaust will be for stepped and straight headers. I came to this design from a computer generated program which has been very successful for me in the past.
The REAL engine is going to be pure race and the components have already been ordered. Still waiting for the crankcases but believe (have been told) they are ready. The exterior dimensions of the engines will be the same.
I will include the 3-bolt exhaust flanges. I am using many titanium internal components, modified components as well as custom squish areas, custom oilers and coatings. Ryan Baisley is blue printing my rocker arms (true 1.5:1 ratio). We have been overwhelmed with orders and the Biker build-off thing is getting to be a too much but we are hanging on.
I have two court dates this week, so maybe I can get this shit behind me. I promise to be good. As good as I can be.
–Berry
We’ve sent the transmission specs to Baker Transmission, but haven’t heard anything back. They’re a tough group to communicate with. I’ve offered to write articles about their products, but can’t get a return phone call. We’ll keep trying. I have a lot of respect for their components and we’re determined to use one of their transmissions. Following are communications with John Reed, Custom Chrome Designer regarding the transmission:
The V uses a touring tranny, but any FXR unit will be OK. It uses one of the CCI extended chain sprockets, with the same teeth as stock. But Baker sells a sharp one, If there is any problem with the offset /teeth, etc. let me know and I will go down and measure one. If the back of the engine is the same as a (rubber mount) FXR/dresser, and the front part of the tranny is for a (rubber mount) FXR/dresser, it should be OK.
As far as I know, the back end of the engine mount is the same on Shovel and Evos, and I’m sure Panheads, and late model FXR rubber mount trannies bolt straight to the engines. It’s only really early r/m trannies that need a separate bracket.
The twin cam tranny won’t bolt to a non twin cam bottom-end engine.
On my Vs, with a 110 revtech, I have never had a problem with the engine moving with the tranny, using a stock OEM inner /outer primary, which is a really good stabilizer.If you are using a belt drive with a good billet piece that takes the place of the stock inner, you should not have a problem.
How much hp/ torque do you have on the engine you are using?The V is a lot different than a the Softail setup, that most choppers use, the primary is shorter, and seems to be a lot more rigid.
CCI has a V going to Daytona, Why don’t you ask Your butt-hole buddy, Sean, if you can ride it around, so you can get used to it.
–John Reed
Custom Chrome
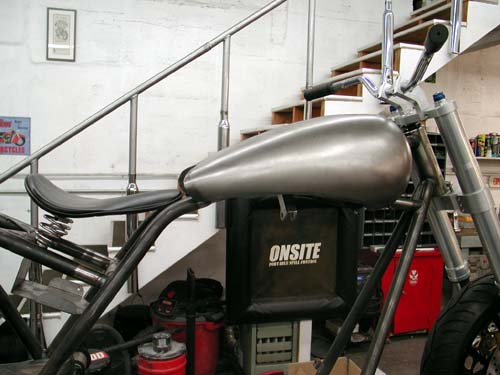
John’s in constant trouble with the brass. We will run a BDL primary drive. That brings you up to date on the driveline. Now lets shift to the tank installation.
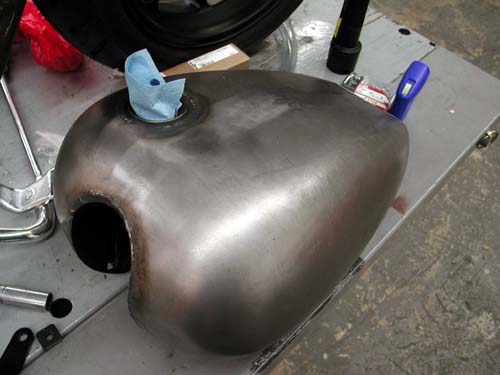
I believe this is a Regency built tank for Custom Chrome. It was designed as an adjustable stretched fuel tank for Softails, 2000-up to contour a seat, in this case a Corbin job. Because of the multi-fit business I received all the brackets to make the tank fit an H-D chassis, then separate fasteners for the V-frame. That often creates confusion. Actually Bikernet Black Market John saved our ass. “Hey, this is going to mount like a lot of Jap Bikes,” John said. “It slips into that scoop thingee and just bolts to the rear.”
Fortunately mounting to the V-frame eliminated a lot of heavy bracketry that we endeavored to use, only to find out we could shit-can them. I never toss any brackets. You never know…
Some of these extra motions I don’t mind, because we become familiar with their use and will know how they work for future reference. Never know when we might wrench on a Softail.
I asked John Reed if I should put a gusset in the neck. Here’s how he responded:
Good news. The frame passed the European TUV test.Our engineeer is back from the states and has just talked to the TÜV.
To pass the TÜV test a frame has to bear 100.000 load alternations. As we have tested the Paioli front fork at the same time the frame was tested with 500.000 load alternations. So the frame beared more than 4 times the standard test.
regards
–Günther
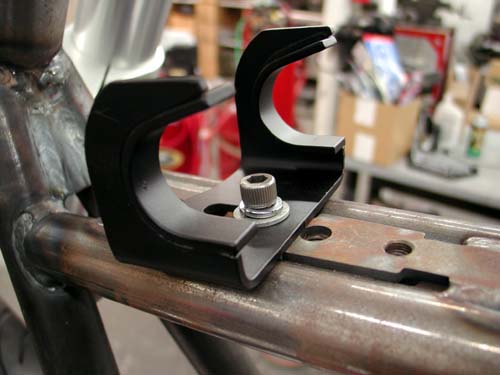
The above shot shows the front Softail mounting brackets in place. The shot below demonstrates how these brackets weren’t going to work. I must have installed and removed this tank a dozen times before I discovered the error of my ways.
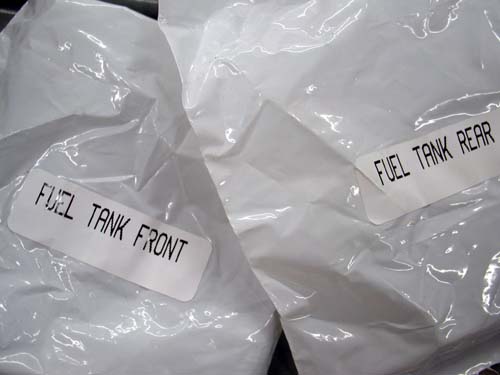
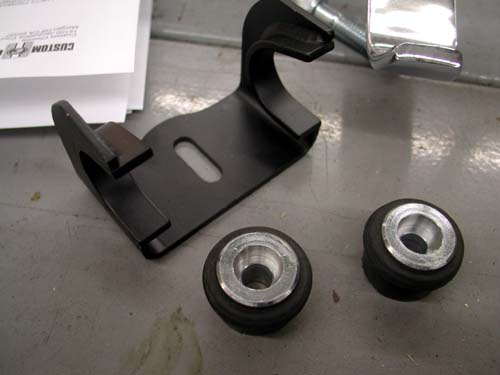
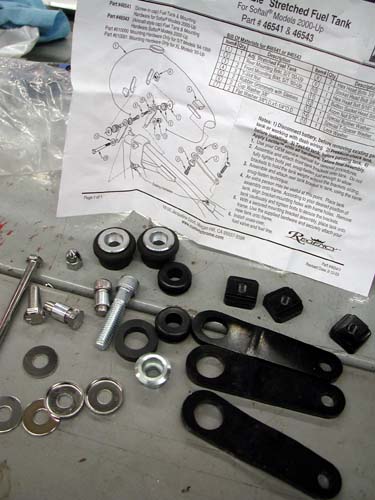
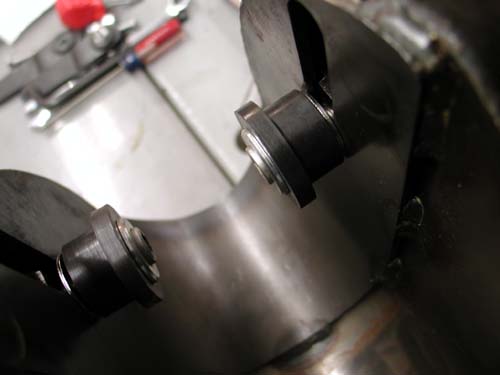
Once Black Market John straightened my sore ass out, we discovered the additional fasteners, carefully labeled in a box. Suddenly the mounting system seemed extremely easy. Mount the rubber grommets into the slider rails, fit them to the scoop, set the Corbin seat in place for accurate tank placement, tighten the Allens in the front tank mounts with the tank adjusted to the perfect height, and we’re golden. That’s the way it should go.
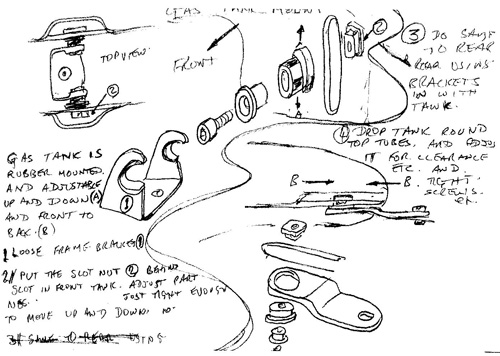
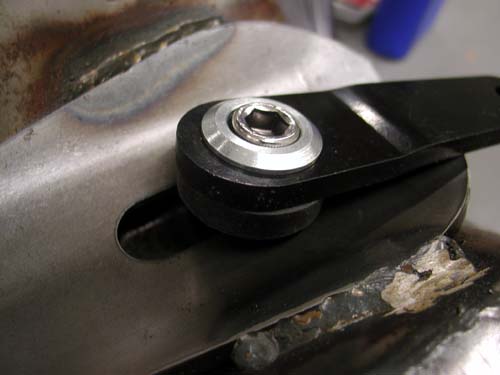
I dropped John Reed a note and he sent me the above sketch, which answered some question, but then we ran into a problem. The scoop is a half-inch narrower than the thick slotted slab of steel bent to fit into the tunnel of the tank and the slots don’t line up. They’re not even. We added spacers to the rubbermounts so they would reach the bracket. That would have been golden, but we couldn’t squeeze the tank over the backbone of the frame.
We removed the spacers and tried again. What seemingly would been the simplest way to mount a gas tank had us completely perplexed. Even with the spacers removed, we can’t get the tank on without removing the scoop, which defeats the purpose of this system. We’re still investigating.
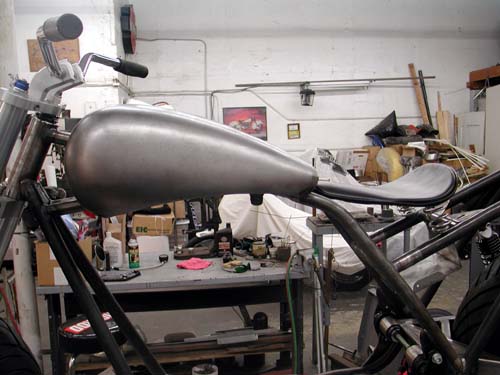
Since this is going to be ridden at Bonneville and we’re calling it the first Sportbike Panhead, we removed the Corbin seat and the plastic tail section and decided to run a sprung slim solo from U.S. Choppers and make the brackets that we can slip way back so the rider can lay on the tank for a fast run on the flats.
We’ll get to the bottom of the tank mounting and mount the seat in the next segment. Hang on. Let’s move onto the Bonne Belle, 45 Flathead progress report.


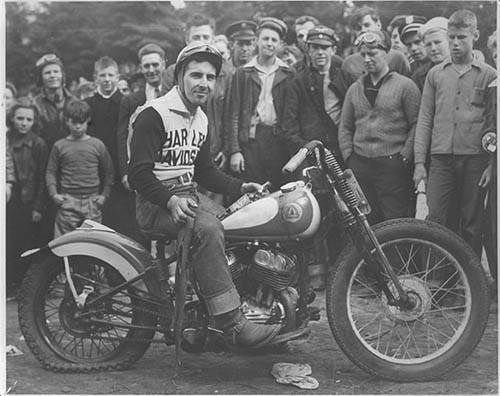
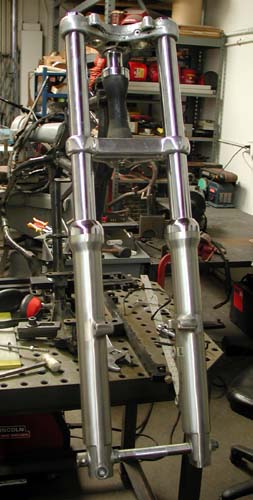
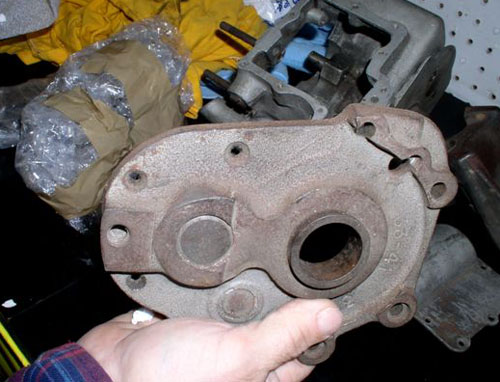
We’re working like mad dogs to create a roller while Klink and the crew from Departure Bike Works rebuilds the engine and transmission. We’re basically building the 45 cubic inch flathead above, with a handful of upgrades, including the recent 39 mm Sportster front end and PM disc brakes and wheels. We are also planning to shift it to a foot shift bike using Tedd’s cycles mods.
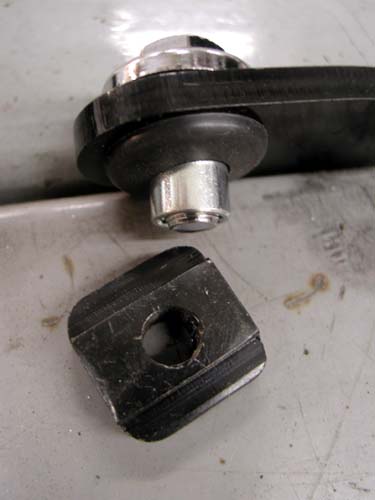
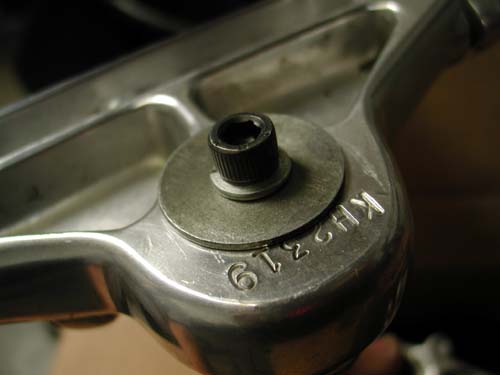
With the help of Larry Settle’s bike shop in Harbor city we machined a Paughco 45 springer stem and pressed it into the late model Sportster aluminum tree. Larry bore a hole in the bottom and taped it ¼-20 so we could install the below Allen and washer to prevent the stem from pulling loose.
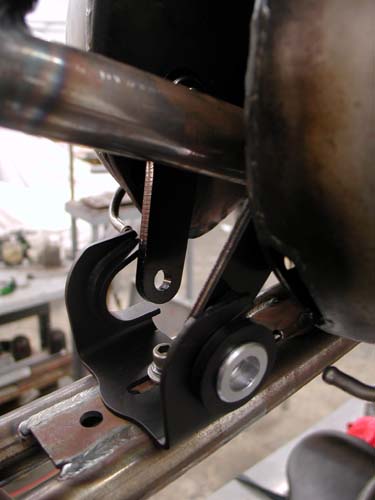
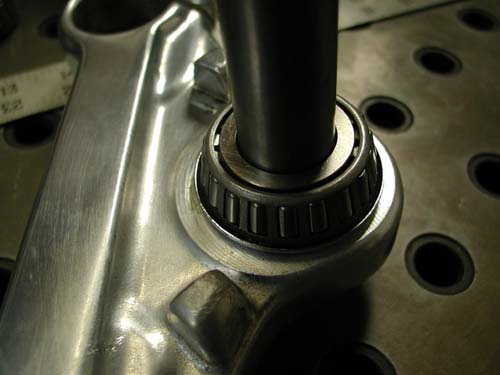
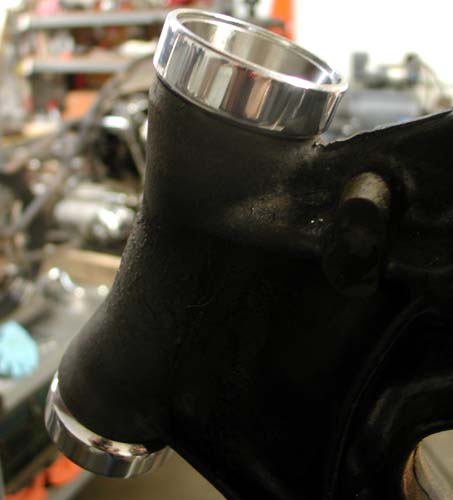
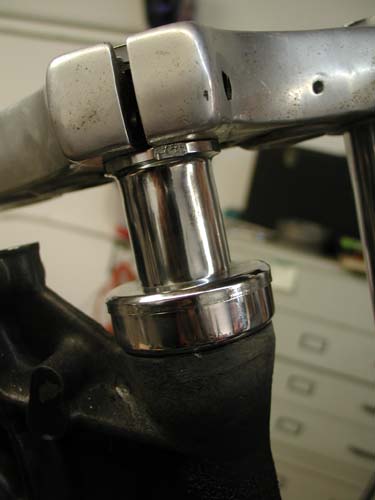
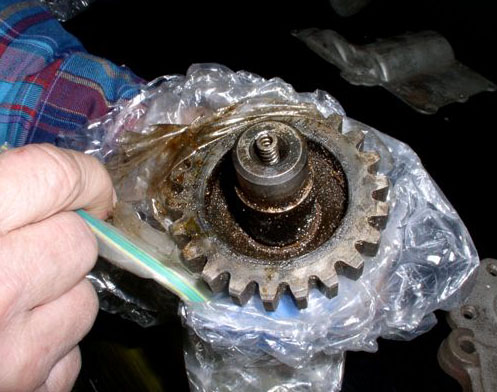
We installed Paughco neck cups allowing us to eliminate ball bearings for Timkens. See shot below.
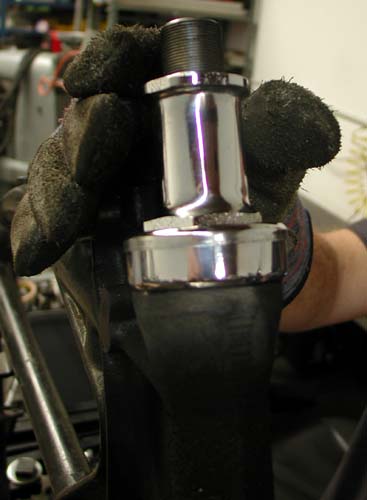
This created a quirky dilemma. The stem was long for a springer. We had a choice to make and an unforeseen opportunity. From Timken bearing to bearing the neck measurement was 6 3/8 inches. We discovered later that today’s Sportster neck is 7 ¼ inch from top to bottom. We could have turned the Sportster stem to 7/8-inch, but we decided to try the springer stem. For one reason, this system will allow us a more secure pinch bolt system above and below the top triple tree.
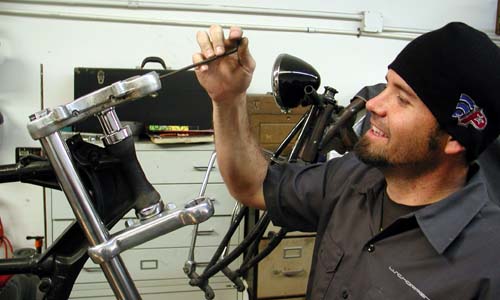
We took all the re-machined front end parts to Rick at U.S. Choppers so the frame could be checked with both axles in place for the most accurate frame check.
Larry Settle machine chamfers in the springer nuts to slip inside the top triple tree for the most accurate secure fit. We also machined the springer nut down to make the best use of the stem with a nut on the top and bottom.
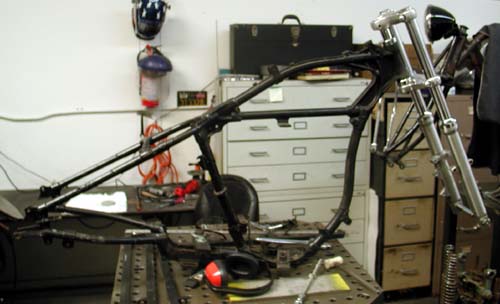
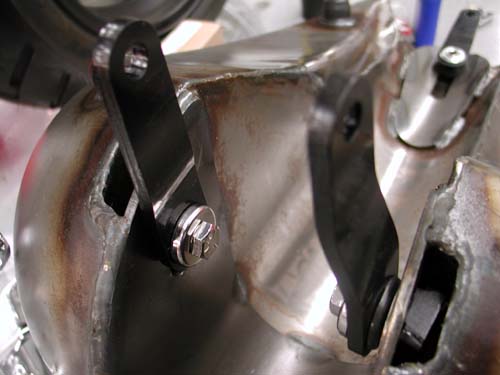
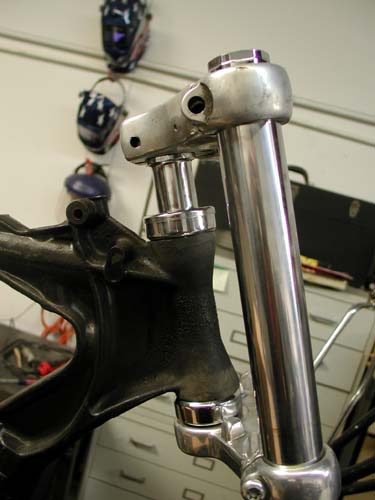
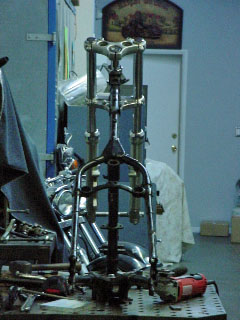
Above shows the frame with the front end in place. We will fit up a PM wheel shortly and decide if we need to shorten the tubes more. Actually doesn’t look too bad. Using the springer stem lowered it almost 2 inches.
We already have a set of black powder coated lower legs ready. We will probably powder coat the trees black also.
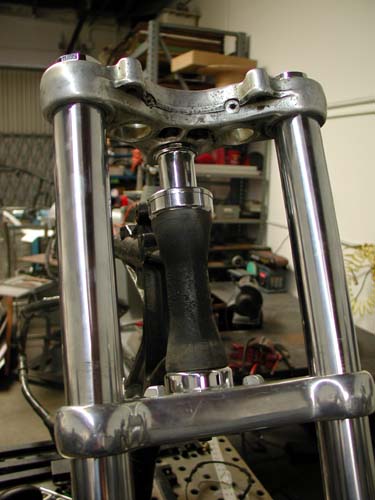
Here’s a close up of the trees in place. After Rick checks the frame, we’re ready to pick it up.
Here's The Report from U.S. Choppers

First, we cut through the frame in several places, making sure to cause as much damage as possible. Actually we're cleaning up an old mess with da grinda. It’s a highly technical and grueling operation requiring skill and tenacity.
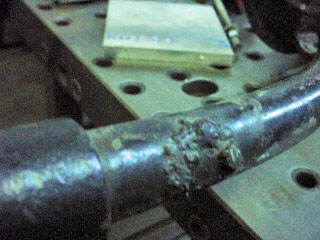
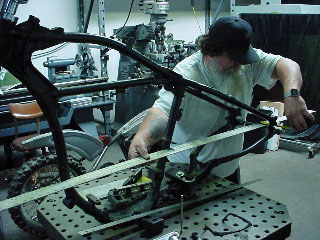
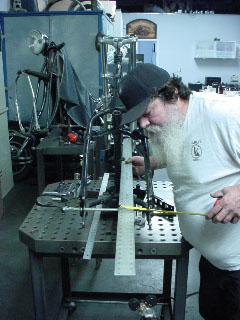
Local expert vet and living legend, Fat Paul, bending the frame into place with shear strength using a hardened piece of spring steel which acts as our straight edge. Go Paul, go.
The frame fairy came over night and delivered a fresh straight frame….. straight and true like an arrow. Disclaimer: no heat was used nor animal testing in conjunction with this experiment.
U.S. Choppers
2039 S. Lyon St
Santa Ana, CA 92705
714-546-4699
Appointments Only Please
http://www.uschopper.com/
And now a report from Departure Bike Works, in Richmond, Virginia– Lee Clemens and his crew are responsible for the engine and trans rebuild and hop-up. Fortunately we had a set of performance aluminum heads and an extra front cylinder. Lee is planning to have special cams ground and run two front cylinders with dual carbs.
”I know, I know, better never than late, right,” Greg, from Departure said? “Not a whole lot to report yet. I finally got Klink to come by & take a preliminary inventory of what you sent. He just had one comment…..’You CAN'T put an ELECTRIC START on a Bonneville contender!’
I'll have more soon…..”
Keep It Greasy,
Greg @ DBW

I’m pumped. I may pick up the frame tomorrow and then I’m working with PM and a dirt-bike-foot-controls guy to set up the complete roller. Once we fit the tanks with a new petcock they will be shipped to Jim Murillo for paint with the fenders.
Hang on for the tank and sheet metal tech, coming soon.
–Bandit