

This is the original aluminum dash that we mounted the old Triumph handlebar fairing to for positioning, but I knew another dash panel needed to be in the works. Honestly I didn’t know how the hell I was going to build it. I grabbed a piece of stainless 1/6 inch sheet at the metal shop and went to work. I was thinking about using a jig saw to cut it, but dreading the maneuver. I knew it would take forever, then Jay arrived with the Plasma cutter.

We started the process with a sheet of heavy tar paper and cut a pattern as close to the actual dash area as possible.
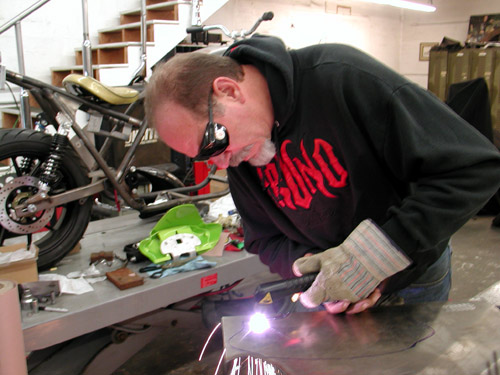
I marked it out on the stainless and went to work, blasting away. What a bitchin tool. You can cut a name into it, write your signature, whatever. I’m a newbie at the job and my lines were sloppy.


I ground, ground, then hit the edges with a emery disc. Once is was smooth I set it in the dash pocket, check it and made notes and marks, then ground some more. It took me a couple of days.

I thought I had a cool angle for the mounting tab and discovered that it wouldn’t work at all. I had to make another make and fire up the Plasma.

Once trick was figuring out the mounting hole positions and the electronic Custom Chrome speedo dash. I taped the original dash panel to the fairing then removed the bolts. I dropped the stainless plate into place and made markings from the back, then prayed.


Here’s that puppy with the holes drilled in place. Then we moved to our machine turning operation. Too bad the shots didn’t come out, ‘cause it was a major operation, figuring out the pattern, running out of emery discs and clamping the sheet down securely to keep each row in line. Ultimately it came out not bad.

It’s got that antique sportscar look and it was hand done on the Bikernet milling machine.