
One of my earliest memories is my pop shouting “Hold on, Jes” over the potato-potato-potato of his chopped '57 Pan as he gave my first H-D ride. Much older I remembered pictures of this classic bike. It was bright orange with at least a 16-over front end (sixteen feet that is).

This was taken 27 or 28 April, when my Frame came in.
Another early memory was my father telling me, “If you want to ride a chopper, you have to build it yourself to understand what it's all about.” So from a young age I dreamed of building and riding my own orange chop like my father's. Some 20 years later I have reached my goal, and I have to admit the journey has been as fun as actually riding my finished bike.

My 100 cubic inch RevTech Motor came in today. Woo Hoo. I was so excited to get my motor! It's paint time now.
Coming up I have heard several superstitions about bikes. One that comes to mind is that you shouldn't paint your bike green. It's supposed to be bad luck or something. Another is that your bike has to have her own name. So, I named my bike “Saoirse Bhinn”, which comes from the Irish Gaelic term for Sweet Freedom.


This was taken 28 April, 2003 when my sheet metal, tank fenders, bars, etc. came in via UPS dude.
In order to fund this build, I had to sacrifice my “Citrus Belle” bike. I built her from a CCI Hard Core Kit over the past year and was pretty sad to see her go. It was torture not having a bike to wrench on while I was waiting on my new build. From December of 2002, it took 12 weeks for parts to start rolling in from Redneck Engineering in Liberty South Carolina. The 10-up five-out Gettin' High frame was the first to arrive in March 2003. Shortly after, the sheet metal came in.
Every few days, a new box of parts was ready to be cracked open. Once the 100 ci RevTech motor, RevTech 6 speed transmission and BDL 3-inch open belt primary came in, I started mocking it up. Before long, she was ready for paint.

Here is a shot of my new forward controls. Pretty sick huh? Still waiting on hand controls but they look the same as the forward controls.
The House of Kolor Tangelo Pearl base was done by Rich's Auto Body in Merced, CA. The House of Kolor Candy apple red graphics were created by Rico's Pin Striping and Graphics, also in Merced. Rico used my flame and clover designs as a base for his artwork. His talent and skill are evident in the pin striping over the ignition and at the base of the stretched King Sporty tank.


Here's Spunky and Skyler. We are all three sheets to the wind, talkin' crap about my new bike build, chicks and what not.
While the sheet metal was dressed, I sent the same basic flame/clover design along with my seat pan to Gasoline Alley in New York City. Paul Cox worked his magic and turned a simple piece of leather into an instant family heirloom. A photo of the seat is even featured on his section of Indian Larry's web site.

This is just a shot of the misc. parts that have started to roll in. Still nothing like when I got all my parts for the Citrus Belle. Man, I had parts all over the place. This doesn't seem like anything. Sure no front end yet and brakes etc. but most of the parts are here. Still need the primary drive too.


Avon Venom 250 rear tire. As put the dollar on it just to give you an idea how wide the fukker is. Sick huh. the dollar bill is 6 inches wide so you should see what I mean! This wrapped around a solid billiet smoothy rear rim is going to look sick as hell!
The Whiskey bars, Six Gun Risers and Grips came from the man, Billy Lane of Choppers Inc. in Melbourne Florida. I added these pieces to the final assembly while the local bike shop, Road Dog Cycles in Denair, CA, mounted my Avon rubber.

Here's the frame and sheet metal at Rich's Autobody.

Man this is going to look sweet when Mr. Rich's is all finished. I wish I could have been a part of it, but I'd only slow them down! I cannot wait to see the paint on her!
My first ride took place June 30th, 2003 without the seat. It wasn't back from New York, yet, so I wrapped a red shirt around an old sheet and taped it to my frame. At every stop light and corner someone gave me a thumbs-up or a wave. I was on cloud nine. After 20 years of day dreaming and six months of waiting on parts, paint and everything else, I finally rode my orange chopper. I'm sure my Pops was looking down from that big cantina in the sky, smacking his bros backs while sayin', “That's my boy!.”

Here is Rico, the graphics painter, and my rear fender. Next time I see the fender it will be flamed out!
19 Apr 03, I got a close look at the sheet metal today also. When the paint is on and everything is finished you will never know this had that big ol' bead in it to stretch it. looks like it was pressed from a million dollar machine, but it was not. Now that's somebody work!
-jes
“Jesse Kilgore – cvwebsolutions.com”
jkilgore@cvwebsolutions.com
KingJes.com

Here is a paint job that is really close to the paint job I am shooting for. I want to over lap the flames with a drop shadow on them and then add a four leaf clover with flames at the base of the tank in white or the same color as the yellowish pin around the flames. It's not long now folks!
If you want to build a similar Redneck Engineering kit, check Jesse's web site. There's over a 100 shots of the bike coming together with captions. We picked the cream of the crop.

GENERAL
Fabrication: Redneck Engineering/Owner
Year and Make: 2003 Redneck Engineering
Model: Getting High Rigid
Assembly by: Owner
Time: 6 Months

ENGINE
Year: 2003
Model: RevTech
Ignition: Nology
Displacement: 100CI
Carb: Mukiuni HRS 42
Pipes: Grumpys Hell Bent

TRANSMISSION
Year: 2003 RevTech
Shifting: 6 SPEED
Primary: BDL 3″ OPEN Belt

30 May 2003 – Driving from Rico's shop to Mr. Rich's must have been the longest 1/2 mile I have ever driven! I would have KILLED anyone that hit my truck on the way over, if my sheet metal was damaged at all!
30 May 2003 – Mr Rich and the Rocket Chopper frame! Mr Rich is a great guy! I have heard people say he is tuff on them, but wouldn't you be if your name was on the sign out from of the shop?
3 June 2003 – Mr. Rich's shop got the clear coat all finished up! I got the e-mail and when I looked at the paint I got short of breath and tiny goose bumps! How the hell is that for a paint job! Man, I am so pleased with this paint job!
PAINTING
Molding: Richís Auto Body
Painter: Richís Auto Body/Ricoís Pin Striping
Color: Tangelo Pearl/Candy Apple Red
Type: HOUSE OF KOLOR


WTF? Haha, I hate wiring! I am going to try to figure it out tonight! I hope my other parts came in. Six months later! Suggestion, don't get a bike kit from Redneck Engineering, this is BS…
FRAME
Year: 2003
Builder: Redneck Engineering
Type: Gettingí High Rigid
Stretch: 5″ STR/ 10″ UP
other: 1.5″ Dia. Tubing

Below is a shot of the new 6-gun risers and bars I got from Choppers Inc. I also have the 6-gun grips. Should look pretty cool when I mount them on my bike..
The risers and bars turned out nice. I like 'em alot.

ACCESSORIES
Bars: Choppers Inc. Whiskey Bars
Risers: Choppers Inc 6î Six Gun
Grips: Choppers Inc SCALLOPED Six Gun
Fenders: D&D Front/Redneck Rear
Headlight: Head Winds
Taillight: Cat Eye
Speedo: N/A
Front Pegs: Legends
Rear Pegs: N/A
Electrics: RedNeck Engineering/Owner
Gas Tank: Stretched King Sporty
Oil Tank: Redneck Engineering
Seat: Paul Cox Custom Leather

I mailed out the seatpan and design some time later in the week. I asked that Paul do whatever he thinks will look best on the seat. Since he is the professional, I'll let him change the flames, however he thinks is best. I cannot wait for this seat man! BAD ARSS!
July 10th my custom Paul Cox seat came in! I have to say – I have never seen this kind of quality in a seat, ever! All the Corbins and the other big guys all look like they were mass produced in some big machine.. This looks hand crafted. Paul took the time and cut every little peice of leather and hand tooled a custom design I sent to him. This seat is my favorite part of this bike. I am really liking the pin striping on the tank, but the seat is so custom you don't see it very often at all!

May 31 thru June 1 – Got the front triple tress and forks on the bike. I had to drimmle out the inside of the lower trees cause they were skuffing my fork tubes. Nothing a buffer and polish won't fix, but it's still a pain! You would think that since this was my 2nd build I would know this shit by now. Oh well, 3rd time is the charm! Haha.
FORKS
Type: Deuce
Extension: 16 OVER
Builder: Hawg Halters
Special Features: 3 DEGREES IN TREES

These were taken 22 May 2003 – I tapped the hub 'cause it had some shit clogged up in the threads. I didn't want to fuck it up, so I cleaned them out real fast.
WHEELS
Front
Size: 21×2.5
Rim: CCI
Tires: Avon Venom
Brakes: Hawg Halters
Rear
Size: 18×8.5
Rim: CCI Smoothie
Tires: Avon Venom 250
Brakes: Hawg Halters


30 June 03 – here it is the first ride. It was powerful, loud and snappy. I'm very happy. This 100 ci motor from RevTech is nice. I hope this one is as solid as the last one. I rode all over, after I made sure nothing was loose or falling off. I adjusted the clutch cable and gave the fuel idle adjusting screw a few twists to get her all lined up, and off I went! Woo hoo!

Took the choppa out for a few pictures the other day. Here is what I came up with. Sucky thing is I lost the Von Dutch buckle/air cleaner I made. That sucks. Guess JB weld isn't that great after all. Next time I'll make sure I bolt it on. Lesson Learned.
BIKERNET QUIZZED JESSE
BN:How did you pick a Redneck Engineering kit bike?
JK:I saw the Redneck Engineering axle covers on a bike I saw at a show. I cant remember what show. Anyway, when I got the chance I got on-line and started looking for there frames and found there site. When I got to looking around the site I saw that they had “bike kits” for sale but I could totally customize the kit, frame dimensions, open primary, front end etc. When I found out they offered this I was sold.
BK:How many models do they offer?
JK:They are not “kits” persay because they'll alter it to your liking while you talk to one of the reps (Michael was mine and a great help too). It's not like the CCI Hard-core or Hard-core II type bike in a box, they are pretty much kits you pick and choose.
BK:How are your feeling about a kit bike?
JK:For me a bike kit is a great place to start. I don't have a bunch of tools for fabricating tanks and fenders as well as everything else that goes into the hi-end bikes like WCC or Choppers Inc. level bikes, but because of places like Redneck Engineering, Big Bear Choppers, CCI and the like, a normal guy can get a really nice bike together because they can knock out all the stuff that takes $10k worth of tools.

BK:What would be your suggestions for young builders?
JK:Is this a trick question? I don't consider myself a builder. I think of myself as more of an assembly guy. I didn't bend the tubes for the frame, didn't bust out a hammer and leather bag and pound out a tank or anything like that. I just took a bunch of nice parts an put 'em together. Any Joe can order a “bike Kit” and put it together. It will be 10 years before I would even consider myself a builder. I have to much respect for the guys who are the real builders, to even try to call myself one.
So to really answer your question, the main thing I learned from this bike tech wise is to take an old water hose, cut it to length for your tubes then slice it long ways and slide that over the frame to protect it better. Tape doesn't work worth a shit if your puttin' the motor in by yourself you are less likely to scratch the frame if the motor hits it..
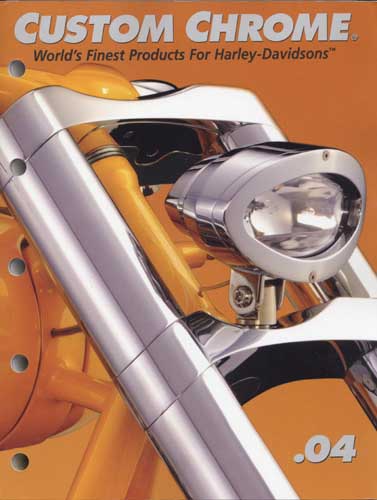
BRAND NEW CUSTOM CHROME CATALOG RELEASED–
Custom Chrome's new offering for 2004. The California based distributor brings you the most comprehensive product offering in the Harley-Davidson aftermarket! At over 1,200 pages and over 22,000 part numbers, their 2004 Catalog features the new RevTech 110 Motor, Hard Core II, Ares bikekits and noumious frames and forks–everything from nuts & bolts to performance products. It's the Custom Bike Bible for the year.
ONLY $9.95 + 6.95 Shipping**