Here’s the link to Part 12: http://www.bikernet.com/pages/Mudflap_Girl_FXR_Part_12She_meets_SS.aspx

Okay, so my Mudflap Girl FXR was running fine and I enjoyed every ride with the bare chassis, but I got a hair to treat the frame and powder coat some parts, but the corrosion treatment made the frame look almost black, and I didn’t want to build another black motorcycle.


I also had some tech obligations. I needed to test the new Centramatic wheel balancers. I needed to install new Spitfire rocker axles in the girders and tack weld them into place. Then the bros at Digital Dawg contacted us and told us about their new keyless ignition. Suddenly I was inspired. I had installed a marine ignition switch in the backbone of the frame, and Saddlemen carefully made me a seat that fit, but reaching in to install the key was a pain in the ass. I started to work with Bruce McKinley from Digital Dawg, and the keyless system made more and more sense.


One day, under the spicy effects from drinking RedBall Whiskey, I decided to tear the bike down to the ground, finish the final TIG welds, and then powder coat the frame and Spitfire Girder front end. I tore the whole damn thing to the ground, and then discovered that I still needed to build a front fender.


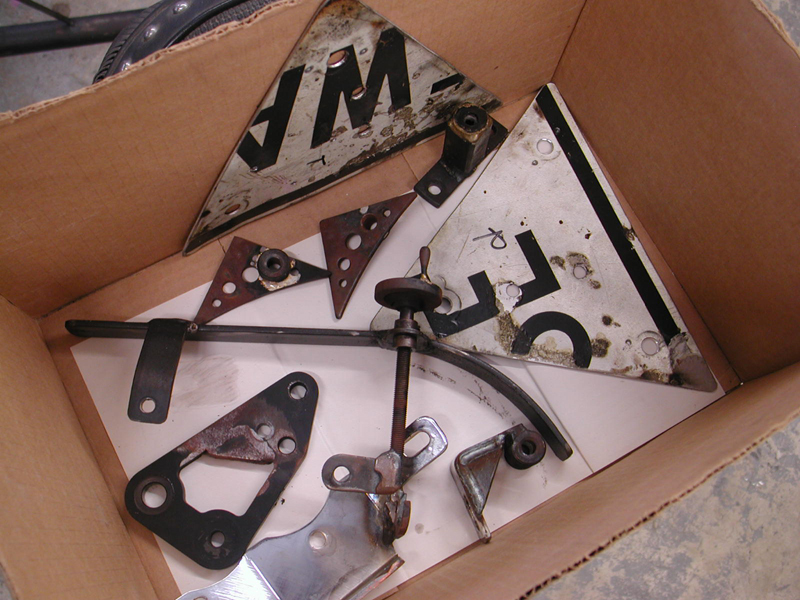
For some reason that seemed a daunting project, but ultimately I cut a slice of Bare Knuckles heavy-duty fender blank and went to work. With the help of our certified welder, and master metal fabricator, Tobey, we came up with the perfect fender.

I cut and shaped the fender brackets and tacked them into place. He performed all the final welds. Then all the parts were shipped to Worco Powder for heavy silver and asphalt satin black.


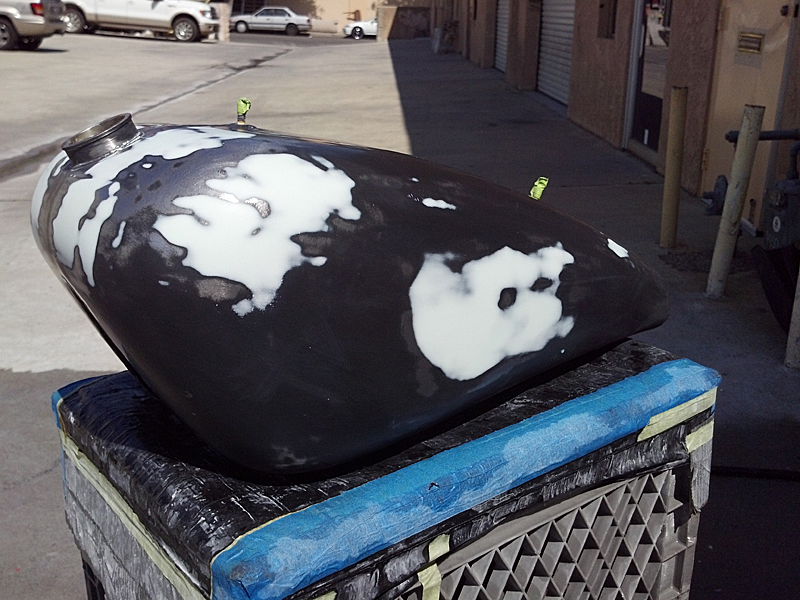
I hauled the tank to Chris Morrison in Harbor City to force the stretched Biker’s Choice flat black tank to match the powder, which he did masterfully. Then George, the Wild Brush put the final touches on all the black components with some simple matching silver pinstriping.


It was time finally, as the rainy season began to subside, to make this Girl run once more. Bruce Tessmer from S&S suggested I install a new Hi-4 single-fire ignition from Crane, along with their all powerful single-fire coil. There was nothing to it, and setting the timing was a breeze.


I pulled the plugs and the front intake pushrod tube clip. I rotated the engine over until the front intake began to close, then started to stare in the timing hole until the TDC slot appeared. I centered the slot carefully, rotated the ignition plate until the light went out, and presto, it was timed. The instructions called for an additional five degrees for electric start bikes, so I followed the instructions.


I also decided on a slight cosmetic change to the grips and pegs, and the new Contrast Cut Performance machine pegs and grips did the detail trick. I avoided chrome like the plaque, for a tough hot rod approach. I think it worked with the Metalsport Foose designed wheels and rotors.


John Reed made a comment to me about falling in love with a motorcycle, and I told him I was always in love with the bike I was building. This Mudflab Girl has touched a unique cord with me, and I’m not sure I can explain it. It’s absolutely the most comfortable, tall-guy fit bike I’ve ever built. I’ve tried to study every aspect of this machine and refine every element from the suspension to the electronics, and it’s still a work in progress. But there is something about this machine. It speaks to me, it fits, and it handles well for a chopper.

I called Bruce from Digital Dawg to discuss their keyless installation, and he informed me of a slight glitch. These systems are designed to slip neatly into any stock bike configuration, but nothing about my bike was stock. “You must have a kill switch,” Bruce said. “Most guys have a kill switch on the bars.”


He sent me a very cool kill button, and it worked perfectly to replace my old ignition switch in the backbone of the frame. This became a golden opportunity. I’ve built a lot of custom bikes, and few had kill switches. Like chain guards, kill switches are almost a Code of the West factor. If you need to kill your motor in an emergency situation, you don’t need to be hunting for that super-cool hidden ignition switch.

I followed the Digital Dawg directions and wired the system into my circuit. It works like a champ and is clean as a whistle.

Centramatic
This is one of those smoke and mirrors products that works. It’s like the guy in the seedy bar who hands you a small tainted bottle of liquid and swears that it will double your gas mileage. Don’t get me wrong, some of this shit works. Remember the guys who sold black rubber snakes or long tubes of solid rubber. If you installed them in your handlebars they would reduce vibration significantly. They may work, but they lack the obvious cool factor, and installation was a bear.


I watched the Centramatic youtube video around these puppies and was immediately impressed. I took a set of the stainless steel balancers to my local bike shop and asked if they would install them. The shop, Bennett’s Performance, is not a high-end chopper fab shop. It’s more of a performance, tough city streets, Sons of Anarchy style shop, but none of the customers would step up and install these puppies around their big buck Performance Machine custom rotors, or have them interfere with their brand new Chip Foose designed Metalsport billet wheels.


Centramatic On Board Continuous Wheel and Tire Balancers are a proven life cycle cost solution designed to smooth your ride and extend tire life with a unique “On-Board” balancing system for steer, drive and trailer axles for light duty and heavy trucks.
I actually believe Centramatic balancers would be perfect for Kendon Trailers. They manufacturer the same wheel and tire balance technology for Honda Goldwing, Harley-Davidson and Victory motorcycles.

• Increased Tire Life 35%-50%
• Reduced Vibration
• Dramatically Improved Ride
• 8%-10% Lower Tire Temp
For orders outside the United States, please call 800-523-8473 or e-mail us for shipping.
Not Sure Which Balancer Is Right For You?
To better serve you, E-mail us with the Year, Make, Model, Wheel Size, Number of Bolt Holes and Size of the Bolt Circle.
Click Here To E-mail: info@centramatic.com
The company describes the Centramatic product as a simple solution. Weights in Centramatic’s aluminum balancing ring move opposite of out-of-balance points with wheel rotation by centrifugal force, at any speed. The wheel is dynamically and statically balanced at all times. Old-fashioned lead weights are attached and can’t move or adjust to changing elements within the wheel system.
Large commercial fleets consistently see increases in tire tread life up to 50% and eliminate truck tire hopping from out-of-balance wheels. When a vehicle is retired, the Centramatic Balancer can be transferred to the new vehicle. No obsolescence here! Satisfaction is assured with a 5-year, limited, nationwide warranty and a 30-day, no-questions- asked, money-back guarantee.

Centramatic has had the privilege of having their “On-Board” balancers tested and evaluated by two of the most respected research organizations in the country: Auburn University’s National Center for Asphalt Technology (NCAT) and Speed Measurement Laboratories, Inc. (SML). At NCAT’s facilities, the effects on tire mileage and cab vibration were evaluated. Since operating temperature is critical to the endurance life of a tire, SML assessed the validity of Centramatic’s ability to decrease this debilitating condition.

By Speed Measurement Laboratories
By Auburn University Program for Advanced Vehicle Evaluation (PAVE)
Out of Balance Pounding Force, Per MPH
Balanced Wheel Diagram
Since I was in the process of tearing my Mudflap Girl FXR down for paint, I decided to give Centramatic a shot. I was concerned about only one aspect of the installation, the caliper fitment, since the stainless steel backing material was .030-.032 thick, so the rotors would move and require new caliper spacing in some cases. “Brembo brakes are more flexible than many calipers,” said Tom Nolte from Centramatic.

Other than the calipers, I ran into just one problem. My new GMA front caliper touched the outside ring of the balancer, and I needed to relieve the corner for clearance.

Other than those two issues, they simply bolted on under my Metalsport rotors and I was good to go. They are available for Victory motorcycles from 2007 to 2013. Victory bikes with ABS will need their sensors adjusted. GoldWings with ABS are good to go.


It took a couple of weeks to finish other aspects of the bike, before I could go for a test ride. My Metalsport wheels were mounted with Avon Tyres at Larry Settle’s shop and balanced, but in this case, I wouldn’t need to glue lead weights to my custom wheels. I rode the bike for a couple of thousand miles, before I tore it down. It ran fine and I worked extensively with David Zelma at Progressive Suspension, and Paul Cavallo at Spitfire on the rear suspension and the Girder front end travel.


When I finally pulled the Mudflap Girl off the lift and rolled it into the street for a test ride, I was astounded. This is a rubbermounted custom motorcycle with extreme suspension capabilities, and I was determined to make this custom bike handle very well for rides to the Badlands. I was blown away by how smooth it rode.

I faced one issue. The bike started to lean-snap or backfire through the carb. I couldn’t figure it out, so I rode it to Bennett’s Performance, and Eric adjusted the low speed jet on the CV carb, and monkeyed with the timing to no avail. Frustrated, I called S&S, Crane, and Departure Bike Works. I’m rejetting the carb right now with a new Sportster main needle, a .048 low speed jet, and a new choke cable. Hopefully, that solves the problems. I’ll let you know.

This was a Trock modified CV carb. Last night I tore it to pieces and studied every aspect while scrambling through the manual. I put it back together, and it did exactly the same damn thing. Then I replaced the new Nology spark plug wires with standard Compu-Fire jobs—did the same thing. I replaced the Crane high-power coil with my old Compu-fire single fire ignition coil—same results.


So this morning I started making more calls. I ended up on a mission to see an old CCI employee, Kip Woodring, now parts guy at California Harley-Davidson. Kip always makes the extra effort to help you find what you need. Like a dipshit, I didn’t note the jet sizes when I tore the carb apart. Of course the jets I bought were the same as in the modified jets in the Trock Modified Carb, but I still needed to replace my broken choke cable, so I wasn’t forced to manually hold the damn thing open.


The Bikernet Code of the West calls for never giving up. That line-item is right at the top of the list. A jet is nothing but a chunk of machined brass with a metered hole drilled in it, and mine needed to be larger. I dug through the official Bikernet dinky drill container, and was missing the finest of fine bits. I called the esteemed Bikernet Performance Editor, Ray C. Wheeler and he suggested a late-night run to Home Depot.


Sounded good, but I had one more option to try in the shop, my torch cleaner round files. I’ve had this set of cleaners for about 45 years. They’ve been kicked around the shop ever since I purchased my first set of Victor torches. I tried the smallest old bent and mangled tool. The non-abrasive end of the tool, just barely fit into the jet hole, but it did fit, and I started working the file back and forth until I could insert the entire body of the file through the tiny hole. I opened the hole from .019 to about .022 diameter. Chris, from Crane said the idle adjustment should be about two to three turns out. Lee Clemens confirmed three turns.

I ended up with a smooth idle at about two turns, and it quite lean-snapping. Tomorrow I ride, and we see if the fix is real. Hang on for the next episode with my grandson, and his Mudflap girl. He needs his baby to take him back and forth daily to Electric Tattoo on Balboa Island, where he works.

S&S
Bennett’s Performance
Wire Plus
JIMS
Spitfire
