
Out of Gas? What Green Regulations Could Mean for Classics
By Bandit | | General Posts

Editor’s Note: Here’s an interesting article about emissions and the Classic Car Industry. The topics discussed here will ultimately impact Choppers and classic motorcycles. But what if these regulations are misguided? Check out the report at the end of the Hagerty piece. –Bandit
Curtailing tailpipe emissions is a centerpiece of the Biden administration’s clean-air strategy, and some lawmakers have pushed for a phase-out of gasoline and diesel vehicles within the next couple decades.
It’s nearly impossible to find industry experts or environmentalists who think such a ban would spell the end for classic cars but, growing sentiment against the internal combustion engine could cause collectors headaches in years to come.
An Environmental Protection Agency official told Hagerty Insider that the current wave of legislation and rule-making is aimed at mandating standards for new cars. “The public policy focus is on the future fleet, and what it will look like, especially on the pace of electrification,” this official said.
Biden has announced plans to consider toughening emissions standards, subsidizing car-charging infrastructure and creating “alternative-fuel corridors.” But Biden, the son of a car salesman and a collector himself, hasn’t shown an appetite to slap new rules at his fellow enthusiasts.
While federal decision makers focus on the future, local lawmakers and politicians do have the power to mess with history. Among the buzziest examples is London’s designation of a low-emissions zone. Zero-emissions zones are either in the works or in discussion in Berkeley, Santa Monica, Los Angeles, with officials looking at outright bans to forcing delivery services to only use battery-electric vehicles. Internationally, there are plans for experimentation with zero-emissions zones in Amsterdam, Barcelona, Milan, Seoul, Oslo, and Auckland. It’s worth noting the U.K.’s green-car regulations generally have exceptions for classic cars, but opponents say such exemptions might not extend to newer classics.

“These things have a way of spreading,” Malcolm McKay, an automotive writer working in leadership of the newly formed Historic & Classic Vehicles Alliance in the U.K., said. Many of the tools regulators use to clean up roads, including smog tests, could someday discourage those wanting to begin collecting.
McKay noted there are a lot of new mandates emerging that impose hefty fees on classic car owners and seriously cripple the jobs and income that the hobby supports. Some currently may affect a particular class of vehicles, such as diesel vans, trucks or small busses, but “the danger is that this sort of rulemaking starts expanding. It’s something we have to monitor all the time.”
And let’s not ignore the elephant in the room: Classics do pollute. The average vehicle sold in U.S. dealerships (car or truck) achieves roughly 25 miles per gallon, traveling about twice as far on the same amount of fuel as a car built when the EPA first started tracking corporate average fuel economy in the early 1970s. A host of technological advances and new components, meanwhile, has caused the grams of carbon dioxide per gallon to plummet over the past 30 years.
“Emissions of classics are terrible compared to a modern vehicle,” David Cooke, senior vehicles analyst with the Union of Concerned Scientists, said.
Shelie Miller, a professor who directs the University of Michigan’s Program in the Environment, recently studied the emissions created during Detroit’s annual Woodward Dream Cruise, a gathering of tens of thousands of motorists driving classics down the Motor City’s main drag. Her conclusion: The event has a carbon footprint of roughly 400 metric tons of C02, nearly equivalent to the annual footprint of eight U.S. households.

The annual Woodward Dream Cruise is one of the Detroit area’s most beloved classic-car events. Matt Lewis Miller, however, notes these types of gatherings are not representative of a typical classic-car utilization, or contribution to climate change. While transportation is estimated to be responsible for one-third of all global warming, she said, that label encompasses all the ways people get from Point A to Point Z—ranging from scooters and semis to planes and trains. Classics contribute a miniscule share.
“Generally, they’re not your daily driver and the mileage is going to be limited,” Cooke said. The Federal Highway Administration estimates a Class 8 truck is driven more than 60,000 miles annually, meaning a semi clocks more mileage in two weeks than a classic car travels in the typical year. (The average classic vehicle insured with Hagerty gets driven 2212 miles a year.)
Also working in classic cars’ favor is that they’re relatively rare. As we’ve reported before, the natural attrition of older cars means the vast majority of the older “guzzlers” have already left the road.
That said, newer cars are more durable—a concern from a climate standpoint, Cooke said. Today’s vehicles last longer but corporate average fuel economy improvements have barely budged over the past decade. That means that the “long tail” of vehicle emissions isn’t getting meaningfully shorter with each new model year.
Number crunchers are hard at work trying to estimate the ideal lifespan for a vehicle, Miller said. Recycle a car too soon, and a lot of the energy used to make that car will be wasted; wait too long, and its poor emissions performance will outweigh the value of keeping it alive.
Reliable older cars benefit lower-income Americans needing reliable transportation, which is good for the economy but arguably bad for the environment. This can lead to a tricky balancing act for those trying to weigh a collector’s interests against environmental goals.
In 2004, for instance, then-California Assemblywoman Sally Lieber (who, like President Biden, counts a car salesman for a father and claims classic-car enthusiast status) drew criticism from collectors—including Jay Leno—for coming up with the idea to expand smog checks to progressively older vehicles over time. The rule had been cars 29 years and under had to be checked, but her proposal locked in the grandfather clause only for cars built before 1975.

As the years have gone on, the cars eligible for smog checks have gotten older and older. This, along with the state’s older-vehicle recycling incentives, help cut off faster the “long tail” of emissions Cooke referenced.
Nevada Assemblyman Howard Watts, representing residents of Las Vegas and surrounding cities, said legislators need to be careful not to punish collectors when trying to take old cars off the road, or force repairs to maintain healthy emissions levels. His recent bill, aimed at reducing the amount of Nevadans registering classic-car plates, has been signed into law.
About a decade ago, Nevada started allowing owners of vehicles 20 years or older to obtain these plates. The number of such plates has ballooned, from 5000 to 6000 cars in 2011 to about 30,000 now. Why? A classic plate exempts you from a smog check as long as you commit to driving less than 5000 miles annually.
“Over the years, word got around that the world’s worst kept secret is the DMV has no way of enforcing the 5000-mile limit,” Watts said.
“So you find there are low-income folks running a small landscaping company out of someone’s house and using a beat-up F-150 with a classic plate on it. Or someone is driving a 1990-something Toyota Camry and there is nothing classic about it but it’s got a classic plate … we had to close the loophole (and) keep the integrity of the classic plate.”

The solution is to require anyone with a classic plate to carry classic-car insurance, a move that most serious hobbyists have already made, he said. To help lower-income drivers make repairs or replace cars after failing an emissions test, legislators approved a small smog-check fee that will soon go into place. McKay, with the U.K.’s Historic & Classic Vehicles Alliance, said protecting enthusiasts from rules perceived to unfairly target classic cars can be as much about fighting well-meaning but misguided lawmakers as it is about fighting public opinion.
Recently, as London Mayor Sadiq Khan’s aggressive stance against internal-combustion-engine vehicles has gained traction, classic-car owners have seen a shift in sentiment. “Some have really noticed a difference,” he said. “Instead of being stopped in a parking lot and told ‘what a lovely car,’ now it’s a question. They say ‘that is a really polluting car, isn’t it?’”

The other side of the coin:

Vision Zero doesn’t work and is against human nature and the elements of a free society. It’s also an excuse for overreaching control.
Instead of being against fossil fuel cars, we desperately need to be pro-fossil fuel travel and energy.

Evidence:
•It is calculated that if the decline in CO2 levels were to continue at the same rate as it has over the past 140 million years, life on Earth would begin to die as soon as two million years from now and would slowly perish almost entirely as carbon continued to be lost to the deep ocean sediments.
•The combustion of fossil fuels for energy to power human civilization has reversed the downward trend in CO2 and promises to bring it back to levels that are likely to foster a considerable increase in the growth rate and biomass of plants, including food crops and trees.

•Human emissions of CO2 have restored a balance to the global carbon cycle, thereby ensuring the long-term continuation of life on Earth.
–Patrict Moore
http://ecosense.me/ecosense-wp/wp-content/uploads/2012/12/CO2-Emissions.pdf


Nick Picks the Classics
By Bandit | | General Posts

This month, Nick is channeling his inner Marty McFly and traveling back in time with these vintage motorcycles. These two-wheeled collector items never go out of style and, for that, we are grateful. Unlike some styles we can all be thankful are in the past (cough, bowl cuts…cough). There are more of these timeless beauties to be found on Twisted Road so take a trip down memory lane (literally, rent a bike and take a road trip) with these ever classic motorcycles — rent them while you can.


Laconia Motorcycle Week prepares for return of bigger crowds, vendors
By Wayfarer | | General Posts

by Andy Hershberger from https://www.wmur.com
LACONIA, N.H. — Laconia’s Motorcycle Week will have a very different look and feel than it did in 2020
The declining COVID-19 numbers are making a big difference this year as Laconia gets ready for the 98th annual Motorcycle Week.
“It means we’re getting back on to life and back on to what we all do best in the hospitality industry, so we were grateful to have it last year, but this year is especially important,” said Cynthia Makris, Motorcycle Week president.
There was a rally last year, but it was a completely different event. It was held in August instead of June, crowds were down and the normal carnival atmosphere suffered.
One difference this year will be the vendor tents. Last year, just four nonprofits were allowed to set up shop in Laconia. This year, there will be more than 200 tents selling everything from T-shirts to leather goods.
Officials said that alone will be a big draw for the event.
“It’s huge this year, especially after all our businesses have gone through in the last 12 to 15 months,” said Scott Myers, Laconia city manager. “And this really kicks off the summer season. It gives it a jump start because schools aren’t quite out yet and it’s not really family vacation time.”
Officials say safety measures will be in the form of awareness, hoping visitors are mindful of where the state and the country are at in terms of the pandemic.
“We’re encouraging everyone to still remain socially distant when possible,” said Jennifer Anderson, of the Laconia Motorcycle Week Association. “We’re going to have handwashing stations and sanitizer stations available.”
Officials said the best way to be socially distant is for people to get on their bikes and ride.
What does Pan America popularity mean for Harley-Davidson?
By Wayfarer | | General Posts

by Bill Roberson from https://www.forbes.com
Harley-Davidson’s Pan America ADV Bike Is Big News, But What Does It Mean For The MoCo’s Future?
The positive reviews and preorders are beginning to pile up for what is definitely this years most… unexpectedly good new motorcycle model: Harley-Davidson’s freshly minted adventure (or “ADV”) bike, the Pan America. In a typical motorcycle model year (the last of which was 2019), riders would usually see numerous new, updated and expected adventure machines from multiple marques, but in 2021, the Pan America stands out not just for being a Harley, but also for how it may signal changes within the storied American brand.
First off, the Pan America is a long shot: A completely new, fresh-from-the-wheels-up, whodathunkit offering far, far outside the typical realms Harley-Davidson plays in. There isn’t a speck of chrome on the Pan America, no cooling fins on the engine, no shoulder-height handlebars, no leather tassels. The Pan America’s all-new Revolution Max liquid-cooled engine makes 150 horsepower, which dwarfs the output of any other bike in the inventory. It is loaded to the gills with tech, including a big touch screen, sophisticated suspension, adjustable everything and innovative options like auto-lowering ride height, trick spoke wheels and headlights that look through corners. The look is unusual but it’s driven more by design than style.
But what is also so striking is how the Pan America is all business, focused on its ADV mission, and very unlike anything the company has attempted – or built – in its nearly 120-year history. Kitted up with aluminum panniers and other goodies, it looks ready to take the long way ‘round any continent with confidence, not just lazily cruise down to the local rider meetup. And those reviews? They range from warm to glowing at the PA’s capabilities, technical sophistication and innovation. It is a most un-Harley Harley. So how did this mystery machine come to be?
Following the reveal of the Pan America, I talked at length with Harley-Davidson Senior Public Relations Manager Paul James. We all know what PR and “marketing people” do: Put the best positive spin on the product as possible, even if that means applying some lipstick to the hog as it were. But Paul is a bit different. He’s a hard-core rider and rose through the ranks at H-D over nearly a quarter century. He has also worked on Harley’s product development team. He’s watched as Harley-Davidson rose from near-death in the 1980s to rule the cruiser market in the 1990s to the slow slide over the last few years.
James has been involved in numerous major product launches – including the electric LiveWire bike – and product cancellations, including the V-Rod cruisers and Buell sportbike efforts. He’s been there as CEOs have come and gone, and he’s watched as the motorcycle market has changed and evolved. He has the long lens of recent Harley and motorcycle market history in his pocket, and it was interesting to talk with him about the Pan America as seen through that lens.
James said that the decision to take on the Pan America project didn’t come from an executive edict or a focus group, it came from research, and a recognition of “the markets we were not in. Adventure touring is a big market, a global market, and a growing market in the United States,” he told Forbes.com, and when the company was re-evaluating their middleweight offerings, it became clear that adventure bikes were popular not just with the general riding public, but with Harley owners as well, who often had an ADV bike parked next to their Milwaukee iron.
Would they be interested in a capable, competitive ADV bike from The Motor Company? According to Harley riders James and his team talked to, they would. But James said that really wasn’t who Harley is truly going after with the Pan America. “Really, we were aiming at customers who had never set foot in a Harley-Davidson dealership before – and saw no reason to. This is a motorcycle aimed at them. Something that they see themselves on, and will give us a shot. Because it is an outstanding motorcycle and very competitive in the space.”
And while it might seem like common sense for any motorcycle maker to jump into a growing category like adventure riding, it’s a trickier wicket for a company like Harley-Davidson, which has a dedicated, hyper-loyal and vocal user base that expects certain things, and can also reject products that don’t meet expectations, no matter how good they may be. By many accounts, this was a factor that worked against the success of the liquid-cooled, higher-tech VRSC/V-Rod machines.
V-Rod bikes were more modern, faster, better handling and more powerful than the traditional air-cooled bikes, yet they met resistance from the Harley faithful and even some dealers. Confronting what would likely be blowback from both the Harley fans, industry pundits and the skeptical ADV rider sphere made getting the Pan America right even more of a challenge. Let’s face it: Harleys have a rebel, tough-guy (and gal) reputation. It is, to an extent, baggage you get with a Harley that you don’t get with a Honda. James said that issue was a factor they certainly considered. When the bikes were revealed, it was interesting to see photos of the Pan America show that branding was… minimal, with a large but fairly abstract logo and no glaring Harley-Davidson badges on the tank as per usual on the cruisers. A recent announcement that Harley’s new electric bicycle business will be branded Serial 1 was followed by another revelation that the electric motorcycle’s namesake, LiveWire, would be the umbrella over future electric models. Reduced baggage all around.
James also said that in their research talking with Harley owners and riders, they were open to Harley moving out into other as-yet unexplored spaces as it were, which was perhaps epitomized by the launch of the LiveWire electric bike. It’s clear that with the separation provided by the Serial 1 and LiveWire branding, they hope to attract new riders to The Motor Company, but perhaps through a side door as it were. James said that the LiveWire, Pan America and upcoming new models (details TBA of course) are part of that larger effort. “It’s our intent to attract riders who haven’t been in our showrooms before,” he said.
On the dealership side of the equation, more changes: a large effort has been made to educate staff about the Pan America riding experience and the people who will come through the dealership doors for the first time to ask about it. Many dealership staff members were put through off-road riding school on Pan America models in order to be able to understand the questions this specific – and non-traditional – Harley rider might ask, including about how the bike stacks up to competitors from BMW, KTM, Honda and others. It sounds like a far cry from the V-Rod days. Public demo ride events are also part of the outreach, but if current estimates are on the mark, it appears Harley has a hit on their hands with the Pan America as bikes are being bought as soon as they’re hitting dealerships.
And what about new bikes based around the potent Revolution Max engine? James said that while Harley has talked about possible future products in the recent past (the Bronx streetfighter to name perhaps the most high-profile example), they’re pulling back on promising anything specific for now while future plans are sussed out. But James did say that successfully venturing into the ADV space with new hardware “opens doors for us” into other markets, while not, of course, being too specific. But with an engine like this, it seems unlikely Harley-Davidson would pass on bulking up their offerings with new – and more un-Harley-like – models. Stay tuned.
Travis Wyman joins Harley-Davidson Factory Team for King of Baggers
By Wayfarer | | General Posts
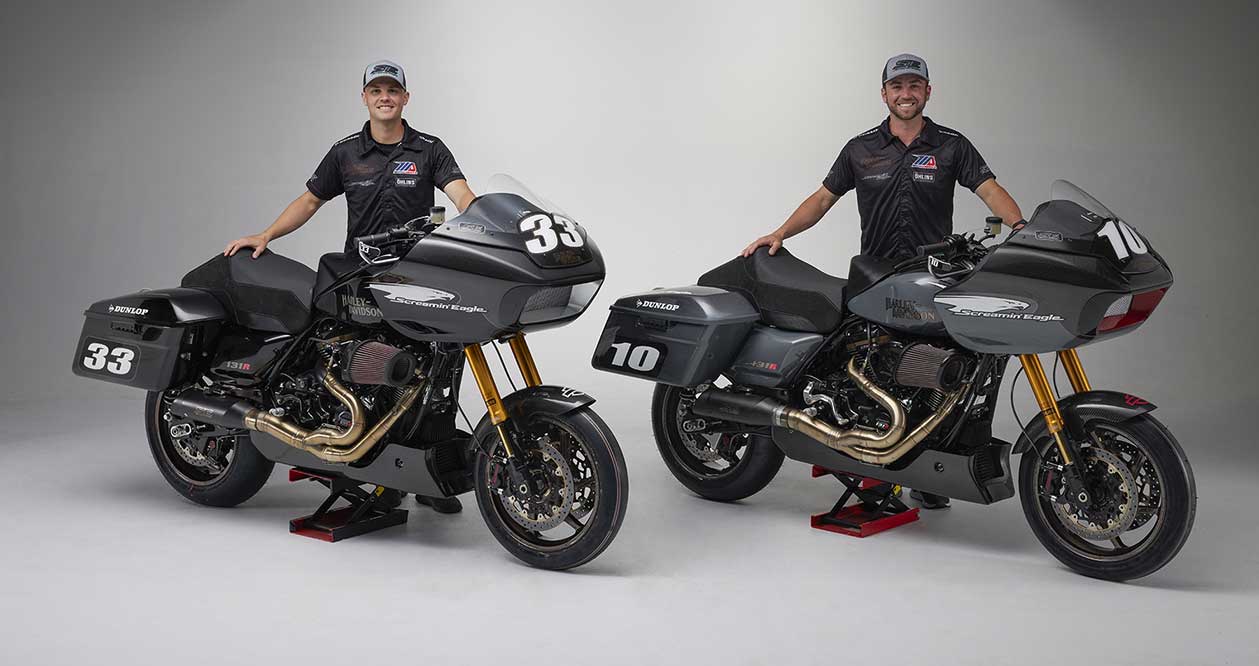
RACER TRAVIS WYMAN JOINS HARLEY-DAVIDSON SCREAMIN’ EAGLE FACTORY TEAM FOR KING OF THE BAGGERS SERIES
Brothers Travis and Kyle Wyman to Race Factory Road Glide Special Bikes at Road America
MILWAUKEE (June 10, 2021) – The Harley-Davidson® Screamin’ Eagle® factory racing team will field multi-talented racer Travis Wyman as a second entry in its MotoAmerica King of the Baggers road racing series. Travis Wyman will race a factory-prepared Harley-Davidson Road Glide® Special powered by a modified Screamin’ Eagle® Milwaukee-Eight 131 Performance Crate Engine. He joins his brother, Kyle Wyman, on the two-rider team for the King of the Baggers race June 11-13 at Road America near Elkhart Lake, Wis.
In addition to its factory team effort, Harley-Davidson is offering a nearly $30,000 cash contingency program for qualified Harley-Davidson® racers competing in the King of the Baggers series.
“We are ready to turn up the heat in MotoAmerica at our home track of Road America by adding Travis to the Screamin’ Eagle factory team,” said Jochen Zeitz, chairman, president, and CEO Harley-Davidson. “The King of the Baggers series is bringing big excitement for fans and we’re pleased to add to the show by expanding our team to two top riders representing Harley-Davidson and Screamin’ Eagle.”
The three-round MotoAmerica King of the Baggers series is for race-prepared, American V-Twin touring motorcycles equipped with a fairing and saddlebags. In the series debut on May 2 at Michelin Raceway Road Atlanta, Kyle Wyman placed second on the Harley-Davidson Screamin’ Eagle factory Road Glide Special motorcycle.
Travis Wyman is the owner of Travis Wyman Racing, based in Las Vegas. He is currently also competing in MotoAmerica Stock 1000, Honos Superbike and Superbike Cup. The 29-year-old racer finished the 2020 MotoAmerica season in second place in the Superbike Cup and third in the Stock 1000 championship. Travis Wyman also competed in the MotoAmerica King of the Baggers invitational race last October at WeatherTech Raceway Laguna Seca, scoring a fourth-place finish aboard a Harley-Davidson Road Glide. Kyle and Travis Wyman are the sons of Kim Wyman, owner of Harv’s Harley-Davidson in Macedon, N.Y.
Round two of the King of the Baggers series is June 11-13 at Road America near Elkhart Lake, Wis. The series continues July 9-11 at WeatherTech Raceway Laguna Seca, Calif.
About the Screamin’ Eagle® Milwaukee-Eight 131 Performance Crate Engine: The Screamin’ Eagle® Milwaukee-Eight 131 is the most-powerful street-compliant performance engine offered by Harley-Davidson. Built from the bottom up in Milwaukee, this 131-cubic-inch (2147cc) Screamin’ Eagle® crate engine delivers 131 ft-lb of torque to the rear wheel, and may be installed in 2017-later Harley-Davidson Touring models.
Track Records at Summit Point Raceway and Nelson Ledges Road Course
By Wayfarer | | General Posts

Stefano Mesa and Pirelli Take Two with Track Records at Summit Point Raceway and Nelson Ledges Road Course
Mesa’s Ninja® ZX™-10R is Unstoppable with the New DIABLO Superbike SCX Rear
ROME, Ga. (June 10, 2021) – Pirelli Tire North America captured the brand’s third and fourth absolute motorcycle track record of the 2021 racing season as Stefano Mesa put in an impressive performance at Summit Point Raceway in West Virginia and then backed it up with an inspiring ride at Nelson Ledges Road Course in Garrettsville, Ohio. The new lap records were set aboard a 2021 Kawasaki Ninja® ZX™-10R motorcycle-equipped with Pirelli DIABLO Superbike slicks.
“The feeling of achievement in setting a lap record just never gets old,” said Mesa. “Each year these things become harder and harder to accomplish but having Pirelli and the new products that they continue to develop certainly make a world of difference. They continue to develop incredible products and in return that allows me to be faster. The new 125/70 and 200/65 sizing are just insane, and when combined with this SCX rear compound, it’s a phenomenal package.”
Mesa’s new lap record of 1:10.551 in the Championship Cup Series at Summit Point Raceway was set in the Unlimited GP class, topping his own previous lap record of 1:10.728. A DIABLO Superbike SC2 in 125/70-17 was used on the front of his ZX-10R motorcycle, while a DIABLO Superbike SCX in 200/65-17 sizing was used on the rear. Just one week later, Mesa carried his momentum into Nelson Ledges Road Course by setting a new lap record of 1:03.926 in the WERA Series’ A Superstock class. A DIABLO Superbike SC1 front in 125/70-17 sizing and DIABLO Superbike SCX rear in 200/65-17 sizing were used to outpace the previous record of 1:04.192.
“We’ve seen the new SCX rear tire start to drop lap times across the nation, so these records are no surprise,” said Oscar Solis, Senior Racing Manager, Pirelli. “Stefano [Mesa] has a new weapon of choice with the SCX and we’re glad that he continues to put his trust in the Pirelli brand. He always manages to make this look easy, but we know it’s not. Congrats Stefano!”
Mesa is now the third different Pirelli rider to earn an absolute motorcycle track record in 2021 and the first to do so twice. Pirelli continues to remain the motorcycle tire of choice for North American riders looking to reach the top step of the podium and log fast laps at events and series that do not have a spec tire rule. Reward prizes are offered to riders who set a new motorcycle track record while using Pirelli race compound tires.
For more information about the complete line of Pirelli motorcycle tires, please visit Pirelli.com
The Crazy Bikernet Weekly News for June 10th, 2021
By Wayfarer | | General Posts

Life is Nuts, So Let’s Party
We are about to publish a story about the motorcycle boom during the Covid era. It’s interesting how our industry flourished when the world was shut down.
I’m about to finish a Life and Times piece about our move to the Badlands. I’m hoping it will help others, who are grappling with similar decisions. It was a stressful challenge but well worth every box of crap we hauled out here.
I’m working on a Cantina Episode, a few bike features, and a girls of bikernet feature.
In the meantime, ride free forever!
–Bandit
Click Here to Read the Weekly News only on Bikernet.
Join the Cantina for more – Subscribe Today.
https://www.bikernet.com/pages/custom/subscription.aspx
THE CRAZY BIKERNET WEEKLY NEWS for June 10th, 2021
By Bandit | | General Posts

Hey,
Times are crazy as you will see in the news. I’m reading another book about the errors of the Climate Doomsday bullshit. It’s called Unsettled by Steven E. Koonin. He’s a scientist who worked for the Obama administration. The more he studied the facts, the more the media and the control-freaks had it wrong.
We are about to publish a story about the motorcycle boom during the Covid era. It’s interesting how our industry flourished when the world was shut down.
I’m about to finish a Life and Times piece about our move to the Badlands. I’m hoping it will help others, who are grappling with similar decisions. It was a stressful challenge but well worth every box of crap we hauled out here.

Let’s hit the news:

The Bikernet Weekly News is sponsored in part by companies who also dig Freedom including: Cycle Source Magazine, the MRF, Las Vegas Bikefest, Iron Trader News, ChopperTown, BorntoRide.com and the Sturgis Motorcycle Museum.


HOT SHIT ON THE BIKERNET BLOG–
You know if this Canadian startup company Damon made its first electric motorcycle to go 200 miles with a 200 hp power – I don’t understand what research and money Harley spent on LiveWire to give it such a low range on a single charge.
Then there is the other market leader in electric motorcycles, Zero., also so many times better and advanced than LiveWire.
Have a look at sensors and AI built into this model of Damon, an industry first 360-degree warning system as well.
Damon Motorcycles to enter Latin America
https://blog.bikernet.com/damon-motorcycles-to-enter-latin-america/
–Wayfarer
Editor and Emperor
Bikernet Blog

THE CONTROL FREAKS ARE AT IT AGAIN–US House Democrats Seek Government Funds for Speed Cameras
Editor’s Note: This post originally appeared on TheNewspaper.com Website June 8, 2021 and with permission we repost this important post on the NMA Ticket Cam Alert USA Blog.
Federal transportation reauthorization measure would use taxpayer dollars to subsidize the roll out of speed cameras nationwide.
The US House Committee on Transportation and Infrastructure on Wednesday will review sweeping legislation that would, among other things, encourage local governments to set up speed cameras using federal taxpayer dollars. The move would reverse a ban on federal funding for both red light cameras and speed cameras that has been in place since 2015.
The House Democratic leadership’s proposed transportation reauthorization measure, dubbed the Invest in America Act, provides for a half-trillion dollars in spending with a new emphasis on passenger rail, public transit, cycling and walking infrastructure. It also adds a provision gutting the ban on taxpayer funding of speed cameras.
“Notwithstanding subparagraph (A), a state may expend funds apportioned to that state under this section to carry out a program to purchase, operate, or maintain an automated traffic system in a work zone or school zone,” the proposal states.

The federal government played a key role in the early development of red light cameras and speed cameras with the US Departments of Transportation (US DOT) and Defense providing critical seed money for their development prior to 1997. Five cities that were among the early adopters of photo enforcement were paid to do so by the Federal Highway Administration, including Beaverton, Oregon and Washington, DC.
The situation is different today, as photo radar firms offer “turn key” automated ticketing services for municipalities that require no public funding. In return for the right to issue citations on a city’s behalf, the company will install and operate the cameras and collect the citation money, depositing the funds in a city-designated bank account minus the photo enforcement firm’s cut (whether in the form of a percentage of revenue or a fixed fee). The offer of federal funds would merely increase the city’s cut of the ticket profit.
The Invest Act would also require the US DOT to begin studying school bus stop arm cameras and issue a report to Congress on their performance within two years. The 2015 Fast Act had previously required the National Highway Traffic Safety Administration to collect performance data sufficient to judge the effectiveness of speed cameras and red light cameras from each state, but the agency has allowed states to, for the most part, ignore the legal requirement and send in unverified survey responses containing incorrect and incomplete data. Results in 2020 continued with states submitting check-box forms devoid of performance data.
Florida, the only state besides Missouri to take the report seriously, did offer accident numbers. The state noted there were 12,211 accidents at red light camera intersections, an increase of 17 percent from the 10,410 accidents that occurred prior to camera installation. Both rear-end and angle crashes increased.
The Senate’s version of the transportation reauthorization bill, which was drafted with input from Republican senators, does not contain the provision encouraging the use of speed cameras.
By Shelia Dunn, NMA Communications Director
–NMA
![]()

Bad Joke Library, WEDDING REPORTS– for your special day last week.
At Marriage Counseling –
Counselor: “So your wife tells me you never buy her flowers.”
Husband: “I honestly never knew she sells flowers”
* * *
Definition: Husband – A husband is someone who, after taking the trash out, gives the impression he just cleaned the whole house.
* * *
Wife: “If I had known you were this poor I wouldn’t have married you.”
Husband: “When I was telling you that you are the only thing I have in this world, what did you not understand?”
* * * 
Wife quotable quotes: “I have birthed an entire baby in less time than it takes my husband to poop.”
Wife quotable quotes: “He asked why the house isn’t clean since I am home all day. I asked him why we aren’t rich since he works all day.”
Wife quotable quotes: “My husband thinks I am crazy, but I am not the one who married me”
* * *
If husband is head of the family, then what is wife?
Wife is the neck of the family, which can turn the head in any direction.
* * *
Definition: Marriage – the only war where you sleep with the enemy.
–Wayfarer
Marriage Counselor
Bikernet Medical Center

NEW 25TH ANNIVERSARY BIKERNET LOGO—from the mastermind, George Fleming.
![]()
“I just finished vectorizing the logo and I made some color variations for you to review. Let me know if you dig any of them and if you want me to try any other color combinations.
“Thanks, and talk to you soon,” George.

BRAND NEW New Bikernet Reader Comment!
SUMMER KICK-OFF BIKERNET WEEKLY NEWS for June 3, 2021
https://www.bikernet.com/pages/SUMMER_KICKOFF_BIKERNET_WEEKLY_NEWS_for_June_3_2021.aspx
–Rogue
rogue@bikernet.com
FL
Thanks, but we are still scrambling. The Redhead needs a driver’s license. I need plates for my Van and 10 motorcycles and insurance. We need a shop built, contractors, surveyors, arborists, you name it. It’s a scramble from one project to the other, but we’re getting there. I’m sure the winter will slow us down.
–Bandit

BIKERNET GUN NUT REPORT–Last week, Assembly Bill 1223, the gun tax bill, was defeated on the Assembly floor when it failed to receive the 2/3 votes necessary for tax bills. After failing, the bill was granted reconsideration and is currently still alive through procedural maneuvering. Please continue to contact your Assembly member and ask them to OPPOSE AB 1223.
Click HERE to Take Action!
Assembly Bill 1223 places an excise tax of 10% on the sales price of a handgun, and places an 11% excise tax on the sales price on all long guns, rifles, firearm precursor parts and ammunition. It is unjust to saddle law-abiding gun owners with special taxes.
Earlier in the week, the Senate passed two anti-gun bills, to further restrict gun shows and to further deny Second Amendment rights to young adults. They now go to the Assembly for further consideration. Click here to read more about them in our legislative alert.
Yours in Freedom,
Ken Lan
Communications Coordinator
NRA-ILA
http://www.nrailafrontlines.com/


MOTORCYCLE Tariff Battles Continue–
Americans for Free Trade – a broad coalition of businesses, trade organizations including the MIC, and workers united against tariffs – worked to encourage dozens of members of Congress to sign on to a letter regarding exclusions for Section 301 tariffs. The letter went to Katherine C. Tai, the new United States Trade Representative for the Biden administration.
The MIC, the Specialty Vehicle Institute of America, and the Recreational Off-Highway Vehicle Association also sent a joint letter to Ambassador Tai, outlining concerns the associations have with China tariffs, European Union tariffs, and with implementation of the United States-Mexico-Canada Agreement, better known as the USMCA free-trade agreement.
“We continue to work with our champions in Congress to encourage the new administration at the USTR to provide exclusions from tariffs on goods like motorcycle safety clothing, helmets, parts, and accessories,” said Scott Schloegel, senior vice president at the MIC GRO. “Tariffs are taxes, raising prices paid by consumers of powersports products.”
–MIC

NEWS FROM THE MASTER OF LIGHT–Artist David Uhl – Laconia 2021 Commemorative
Greetings from Smyrna, Tennessee where we’ll have the gallery this weekend at the Great Tennessee Air Show! If you are in the area, please stop in and see us.
For the first time ever, David has created a special piece for Laconia Motorcycle Week this year. Celebrating it’s 98th anniversary, Laconia is one of the longest running motorcycle events in the country.
In David’s words, “Growing up with 400 miles of water out my bedroom window makes me yearn for the boating lifestyle again. Colorado doesn’t have much to offer other than going in circles in a dammed upriver with a herd. I couldn’t resist putting both these vintage machines together to represent this rally by the lake. If you find yourself in the area, please stop in at the Speedway and say hello!”
“Live Free or Die”
David Uhl 2021
We’ll be sending the final image out again once we get the final scan.
Similar to David’s Sturgis and Daytona commemorative pieces each year, signed and numbered canvas prints will come framed with a Certificate of Authenticity and adorned with a special nameplate.
We are now taking orders for the prints, which are available at special Rally pricing through the end of the event (June 20th). Shipping is included within the contiguous 48 United States for orders placed by June 20th.
** Image size appx 24 x 24, $950 framed
** Image size appx 30 x 30, $2,250 framed. NOTE: We are offering a special pre-rally price of $1,895 for orders that are placed prior to June 16th, when the gallery opens in Laconia.
As always, edition numbers will be assigned as orders are taken.
Please let me know if you’d like to add “Live Free or Die” to your collection. As always, thanks for your time!
–Greg Rhodes
International Sales Director
David Uhl Fine Art
Uhl Studios
303-913-4840

RAY C WHEELER MEMORIAL–Please join us in a celebration of life for my father Ray C Wheeler on Saturday June 26th 2021
Graveside service – 12pm At the Grand Mound cemetery located at 6300 183rd ave sw Rochester Wa 98579. Bbq to follow at our house after to share memories and stories of the wonderful man that was Ray C Wheeler!
For the address or memorial information please call me Robin at 2069473635. Or you can message or comment below!
Thank you for all of the support and well wishes through out this time, it means so much to our family!
–Rogue

EVENT NEWS–Vintage Motorcycle Swap Meet
Mini Bike Races
The Museum will be open 8:00 am to 6:00 pm the day of the Swap Meet. Entrance to the Outside Swap Meet is FREE with a Special Museum Admission for the day of $10.00 per Adult – Children under 12 FREE with a Parent.
There’s nothing like a classic swap meet whether you are buying or selling old motorcycle parts and memorabilia! There will be a bikes-for-sale BIKE CORRAL as well. Have one you want to sell – call in and reserve a spot!
The VINTAGE SWAP MEET at the Museum is only on Saturday, but if you are a vendor, you’re welcome to arrive Friday after Noon, June 25 to get located in your space and begin set up. Security will be provided Friday night. Saturday morning set up starts at 7:00 am and the SWAP MEET gates open to the public at 8:00 am.
CLICK HERE for a form to reserve one of the limited number of 20 x 20 Swap Meet spaces or to reserve space in the Bike Corral.
SPECIAL GUEST – BILL FRANCIS: Who invented the Harley-Davidson Softail? Two guys in St Louis with no connection to Harley, actually. Meet designer/fabricator Bill Francis at Vintage Swap June 26 and listen to his awesome story, how he and Bill Davis sold their brilliant patented design to The Motor Company.
Please give the Museum a call if we can answer any questions. 319-462-3925.
This year the VINTAGE MOTORCYCLE SWAP MEET will include BRAAAP Mini Bike Races with a $500 purse presented by Mini Bike Weirdo.

THE HAL ROBINSON CONNECTION–After reading Bandit’s last episode, I thought this would be appropriate considering all the different freeways that were mentioned.
–Ann Robinson

Join the Cantina and read all 94 Episodes of the Bandit’s Cantina Series. Each one is a kick.
–Bandit

Thieves Keep Stealing Motorcycles From Harley-Davidson Dealerships–Another Harley-Davidson dealership got robbed over the Memorial Day weekend, this time in Tennessee. What originally looked like isolated incidents is turning into a problem as 12 dealerships have been hit by thieves with varying levels of success.
It was only March when a Harley-Davidson dealership in Kokomo, Indiana, experienced a Hollywood-style robbery of $100,000 worth of motorcycles. Now, as a report from Clarksville Now reveals, that dealership was only one in a line of 12 Harley dealerships to have been hit with robberies.
On May 29, Appleton Harley-Davidson became the latest dealership hit. But unlike the Kokomo robbery where the crew was prepared, these thieves did a comically bad job. They tried to make off with five motorcycles but only made off with three, leaving two stuck in a doorway, from Clarksville Now:
The five burglars did manage to get away with three motorcycles, but getting out took so long that two riders had to give up and make a run for it, as police were on the way.
They had to ram one of the bikes repeatedly into a front door to break it. Three of the thieves made it out on motorcycles, but one bike got stuck in the door, and another was trapped behind it.
–Meredes Streeter
Jalopnik


REDHEAD FEVER—Because I’m always thinking of you…..well at the least when it comes to red heads….HAHAHA


–EL Waggs

GUN NUT REPORT–California’s 32-yr assault weapons ban overturned. A “failed experiment…” that’s how a U.S. federal judge described California’s three-decade long ban on assault weapons, as he overturned it on Friday, calling the ban unconstitutional.
In his court order, Judge Roger Benitez wrote “Government is not free to impose its own new policy choices on American citizens where Constitutional rights are concerned… It is declared that these statutes unconstitutionally infringe the Second Amendment rights of California citizens.”
He also likened the AR-15 to a Swiss Army knife, describing both as a “perfect combination of home defense weapon and homeland defense equipment.”
California Governor Gavin Newsom was outraged at that comparison and the legal decision overall. He called the ruling a “disgusting slap” in the face to those who have lost loved ones to gun violence.
The court decision is subject to a 30-day stay, during which California’s attorney general, who called Friday’s ruling “fundamentally flawed,” can file an appeal.
California’s ban on the sale of assault weapons dates back to 1989.
Gun control is a hot-button issue in the U.S. where gun enthusiasts see gun ownership as a constitutional right, while gun control advocates want to see fewer guns after decades of deadly mass shootings in public spaces, including schools.
–Reuters.

JACK’S GALLERY–I don’t know if I ever shared this one with you or not, but it’s a group of my “favorite pics” from Sturgis 2019. These are just from my personal galleries of photos that I took, but they center on the Buffalo Chip, since I work there, but I hope you enjoy them.
Thanks.
–Jack

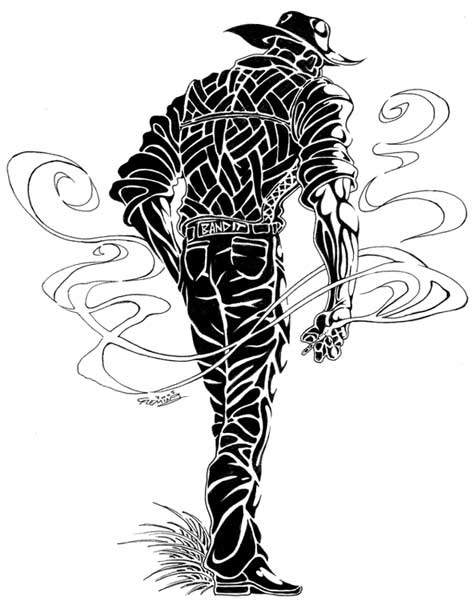
LATEST FROM SUPPORT GOOD TIMES– Bandit,
Hey, I know it’s taken a long time, but we had to wait on Edwards at Whiskey River Art to clear his schedule a bit. Anyway, I think the wait was worth it.
Attached is a copy of the illustration. Hope you dig it. I’d like to offer it as:
1. a tshirt front
2. a tshirt back with Support Good Times logo on the front left chest,
3. a sticker, and possibly
4. a vinyl garage banner.
Let me know your thoughts. And thank you so much for allowing us to produce this in tribute.
We look up to guys like you and I’ll personally put this tee into my collection.
–Cicero
No, thank you for remembering this ol’ grubby biker.–Bandit

[page break]

QUICK, OPEN THE BANDIT’S CANTINA BAD JOKE LIBRARY–
Three sisters age 92, 94, and 96 live in a house together.
One night the 96-year-old draws a bath, puts her foot in, and pauses.
She yells down the stairs, “Was I getting in or out of the bath?”
The 94-year old yells back, “I don’t know, I’ll come up and see.”
She starts up the stairs and pauses, then she yells,
“Was I going up the stairs or coming down?”

The 92-year-old was sitting at the kitchen table having tea listening to her sisters. She shakes her head and says, “I sure hope I never get that forgetful.” She knocks on wood for good measure. She then yells, “I’ll come up and help both of you as soon as I see who’s at the door.”
–El Waggs
Certified Librarian
Bandit’s Cantina Bad Joke Library


SEE IT HERE: https://www.lifestylecycles.com/default.asp?page=xPreOwnedInventoryDetail&id=10555684
This bike is classic harley look super clean bike

ONLY 15258.00 Miles !!!!!
2010 Red/Black Harley-Davidson SOFTAIL DELUXE FLSTN

Some of the features/Add-on’s on this bike
* 96c.i. Motor
* 6-Speed trans
* Vance & Hince exhaust
* Detachable windshield
* Hard leather saddle bags
* Luggage rack

This bike has passed Lifestyle Cycles rigorous 92 point safety and mechanical/structural inspection. Whether your looking to commute to work, ride the coast or take that dream vacation, this bike is ready to go!!!
Fill out an online application and ride today!!!
**Open 7 days a week**
Just $13,995.00 at Lifestyle Cycles (714) 490-0155

ENVIRONMENTAL PROGRESS ALERT– Why Drug Abuse, Not Climate Change, Is America’s Biggest Problem. Drugs killed 3,000 times more people than the climate in 2020.
President Joe Biden and Democrats in Congress say climate change is the most serious problem facing the United States, and have proposed to spend $1.7 trillion on infrastructure and climate, as well as many billions more, on addressing the issue.
But America’s biggest problem is drug abuse, not climate change. In 2020, nearly 90,000 people in the U.S. died from drug overdoses or poisonings. By contrast, just 308 people in the U.S. died from natural disasters, down from 413 in 2019.
And while drug deaths are skyrocketing, carbon emissions are declining. U.S. emissions declined 22 percent in the U.S. since 2005, which is 5 percentage points more than President Barack Obama promised the U.S. would reduce emissions under the Paris climate treaty.
It’s true that the Biden Administration has proposed new spending on addiction treatment and will likely do more on the issue soon. “My assumption is that later this summer, overdose deaths will be happening at a higher rate than COVID deaths,” Biden advisor and Stanford addiction specialist, Keith Humphreys, told me recently, “and everyone will get engaged in a new way then.”
But there is no scientifically valid scenario for climate change to ever kill 90,000 people in a single year, much less in the U.S. alone. Deaths from natural disasters have plummeted 99 percent in Bangladesh and other poor nations since the 1980s, even as the planet has warmed. Globally, the five-year period ending in 2020 had the fewest natural disaster deaths of any five-year period since 1900.
Neither the United Nations Intergovernmental Panel on Climate Change (IPCC) nor any other reputable scientific body predicts a reversal in the long-term trend of declining deaths, even if temperatures rise significantly. And both IPCC and U.N. Food and Agriculture Organization reports make clear that economic growth and existing technology can be expected to outweigh impacts of higher temperatures on food production, diseases, and sea level rise.
And while the Biden Administration has made climate change its highest priority and done vanishingly little to address the drug crisis. It has proposed spending just .02 percent of the six trillion dollar budget on the drug epidemic. Biden has yet to say anything of significance about drug policy, and he has not appointed a Drug Czar to head the White House’s Office of National Drug Control Policy.
Nor have the White House, Democrats in Congress, or Democratic governors and mayors proposed a strategy to break-up open drug scenes, mandate treatment as an alternative to incarceration, and launch a national advertising campaign warning of the dangers of fentanyl, meth, and other hard drugs.
As such, President Biden and Democrats in Congress, along with much of the news media and the American people, are deeply confused about what is and is not an urgent national priority. The U.S. is in the midst of an epic drug emergency, not a climate change emergency. The 3,000-to-1 death toll should make that blindingly obvious. But visions of the secular apocalypse and taboos around drugs have triumphed over truth and reason. The longer the confusion lasts, the more people will die.

Hard drugs like fentanyl and meth are not only killing people directly, they are increasing homelessness and undermining public order in liberal cities. Two weeks ago I wrote a column about a San Francisco Bay Area mother named Jacqui Berlinn and her son Corey, who is at high risk of dying from fentanyl overdose on the streets of San Francisco. Jacqui has been trying to save Corey’s life for ten years, but California’s laws are against her, and the politicians are doing little to help.
Desperate for action, Jacqui protested San Francisco’s fentanyl dealers in the Tenderloin neighborhood two weeks ago, and demanded action from politicians, generating widespread news media attention including by the San Francisco Chronicle, SF Weekly and local TV.
Then, last Wednesday, Jacqui and other parents of fentanyl victims protested at Venice Beach in Los Angeles. Four other parents joined us, but their situations were different from Jacqui’s. Fentanyl had already killed their children. You can watch a powerful and moving video of our protest by clicking the button below.
Against the insistence among some progressives that homelessness is strictly the result of poverty and housing prices, researchers for decades have documented not just the prevalence of mental illness and substance abuse among the homeless, but also those conditions’ role in creating homelessness in the first place.
A large, 5,406-person study of US veterans published in 2021 found that the major personal characteristics of the unsheltered homeless were “unmarried status, criminal justice problems, weak social support, medical diagnoses, drug (but not alcohol) problems, low income, and inability to afford basic needs.”
While just 8 and 18 percent of homeless people point to mental illness and substance abuse, respectively, as the primary cause of their homelessness in San Francisco, researchers have long understood that such self- reports are unreliable due to the socially undesirable nature of addiction, and the lack of insight that often accompanies mental illness.
Using other methods, San Francisco’s Health Department in 2019 estimated that 4,000 of the city’s 8,035 homeless, sheltered and unsheltered, are both mentally ill and suffering from substance abuse. Of those 4,000, about 1,600 frequently used emergency psychiatric services.
The same is true in other cities. In 2019, the Los Angeles Times analyzed government data and found that two-thirds of homeless in Los Angeles struggle with either addiction or mental illness.
In the late 1990s, I advocated drug decriminalization, harm reduction, and affordable housing before I started to focus on energy and climate change in the early 2000s. I stopped paying close attention to developments in the area, beyond voting for California state ballot initiatives to decriminalize drugs.
But then, around 2016 and 2017, as overdose deaths rose to 70,000 per year, I started to wonder whether we had gotten drugs wrong. And so, in 2019 I researched and wrote an article for Forbes, “Why California Keeps Making Homelessness Worse,” which described the role of untreated addiction and mental illness in worsening homelessness, and started conducting field research, including by traveling to the Netherlands, to understand how Amsterdam dealt with a similar problem thirty years ago.
Today, drug overdose and poisoning deaths are the single largest cause of accidental death in the US. More people die of drug abuse than of homicide (13,927) or car accidents (36,096). And the rate of increase in overdose/poisoning deaths has been astonishing, from 17,000 in 2000 to 88,000 overdose and poisoning deaths between September 1, 2019, and August 1, 2020, a number that is likely to reach 90,000 when data for the rest of 2020 becomes available.
Cities are essential to protecting the environment, and yet the addiction crisis is destroying California’s cities and affecting Environmental Progress directly. Two of my colleagues moved out of San Francisco earlier this year to escape problems created by its large open drug scene. I regularly encounter, and often try to help, floridly psychotic homeless people near my office. Just one week ago, while driving on the highway, I almost hit a man with my car. He was running across the crowded highway, perhaps in a meth-induced psychosis.
Meanwhile, fentanyl is making experimentation with drugs a death sentence. “This is my son Alexander,” said Amy Neville at our Venice Beach protest last week. “He passed away last June from a single pill. I found him on the floor of his bedroom.” Alexander was just 14. He had only started experimenting with opioids that week. Jaime Puerta’s daughter thought she was sniffing a line of cocaine. It was contaminated with fentanyl and she died.
When people hear those stories, many blame the parents in a knee-jerk way, perhaps because their stories are so emotionally disturbing. In truth, experimentation with drugs is widespread and while we should strongly urge children not to do it, they should not be allowed to die for their transgressions.
A better approach would be to treat the mental health issues that often underlie the desire to use hard drugs, including pharmaceutical opioids, spend $1 billion on public service advertisements warning of their danger, and break up the open drug scenes that make hard drugs cheap and available, as Europe did 30 years ago.
The problem, as I described in past columns, is not just that the policy makers aren’t taking the action they need to take. It’s that they’re making the problem worse. Cities like Los Angeles and San Francisco regulate ice cream stores more than they regulate open-air fentanyl and meth drug dealing. They not only tolerate but enable, through subsidized housing and services, open drug scenes like the ones in Tenderloin and Venice Beach.
In San Francisco, where the overdose death rate is quadruple that of the rest of the U.S., policymakers are only now questioning whether simply reviving overdose victims is a sufficient response to two overdose deaths a day.
“I think it’s the left combined with libertarianism around substances that makes it really hard to manage these problems,” said Stanford’s Keith Humphreys. “Out west, it’s more, ‘Do whatever you want,’ and, ‘No one has a right to interfere with your view.’ Sometimes that is terrific. We’re the home of gay rights. But it doesn’t work well for addiction. The pursuit of allegedly individual freedom ends up ultimately killing the person, and does enormous damage to everybody else.”
Motivated to address this problem, Environmental Progress’s board of directors and major donors decided last year to expand our work. And I am happy to announce that, this fall, HarperCollins will publish a new book by me on the untreated addiction, mental illness, and homeless crisis facing progressive American cities, based on our research.
The good news is that solving the addiction and overdose crisis offers a chance for Americans to come together at a time of historic division. The only way we know how to solve open-air drug scenes is with a combination of carrots and sticks, toughness and love, services and law enforcement. Amsterdam, Frankfurt, Lisbon, Vienna, Zurich and New York City show that we do not need to choose between mass incarceration and mass homelessness.
Mandatory drug and psychiatric treatment as an alternative to incarceration for those who commit crimes. Nobody is proposing to prosecute people using even dangerous and illegal drugs in the privacy of their homes. Nor do Californians want to return to the “One Flew Over the Cuckoo’s Next”-era of mass, involuntary hospitalization.
The flip side to our polarization is the potential to marry the best of liberal and conservative instincts. We need to be compassionate, but we need to be strict, too, with people whose addiction results in them breaking the law, whether through camping in parks and on sidewalks, defecating in streets, and selling, buying, and using hard drugs in public.
In light of the drug abuse crisis, and the opportunity for positive, unifying change, Environmental Progress is expanding our research and policy work. The word that best expresses what we are after is “peace.” It’s what’s missing from our streets and our minds, not just in progressive cities, but in America as a whole. And so we have changed Environmental Progress’s tagline to “Nature, peace, and prosperity for all,” and have launched the California Peace Campaign, complete with Peace Principles, a Peace Agenda, and Frequently Asked Questions.
The apocalyptic climate agenda is rapidly losing legitimacy, and failing politically. This is not just because climate activists are shutting down nuclear plants and increasing emissions, proving that their real motivations have less to do with climate change and more to do with restricting economic growth. It is also because drugs are killing 3,000 times more people than the climate, making plain what’s the true emergency and what isn’t.
Please email me if you’d like to get involved, subscribe now to this newsletter, and consider making a tax-deductible donation to EP.


MORE ON THE MAGNIFICENT BIKERNET BLOG–
Have a look – in April 2021 – Enfield motorcycle record speed of 132.05mph for an air-cooled, OHC parallel twin displacing just 648cc running commercial fuel on original stock frame – Speed Week at Salt Lake Gairdner in South Australia.

Customized Royal Enfield 650 Interceptor sets speed record
https://blog.bikernet.com/customised-royal-enfield-650-interceptor-sets-speed-record/
–Wayfarer
Supreme Editor
Bikernet Blog

CLIMATE HYSTERIA MEMO–Biden warns climate is ‘greatest threat’ to US security: ‘This is not a joke’ – Morano responds: ‘Oh, yes it is a joke’
Marc Morano: “Oh, yes it is a joke.”
‘Global warming’ causes war claims — debunked – ‘Warm periods are more peaceful than cold ones’ – Bonus Chapter #2 for Politically Incorrect Guide to Climate Change
– Bonus Chapter #2 from The Politically Incorrect Guide to Climate Change:
Excerpt: The climate activists have it backward. A 2011 study published by the Center for Strategic and International Studies titled “The Climate Wars Myth” found, “Since the dawn of civilization, warmer eras have meant fewer wars.” As author Bruno Tetrais explained, “History shows that ‘warm’ periods are more peaceful than ‘cold’ ones…
John Horgan, the director of the Center for Science Writings at the Stevens Institute of Technology, explained, “In spite of the recent surge in violence in the Middle East, war-related casualties have fallen over the last half-century, as temperatures have risen…
A 2013 study published in the Proceedings of the National Academy of Sciences found that cold eras were dark times in Eastern Europe. “Some of Eastern Europe’s greatest wars and plagues over the last millennium coincided with cold periods,” explained a summary of the study in Science News.
–Marc Morano
Supreme Leader
Climate Depot


DIRECT FROM J.J.’s ADVENTURE–
Some fucking 4th generation offspring of the hippies approached me when i was ambling along the Haight-Ashbury district recently in a kind of memory-making personal retrospective of my early 20s….and I’m in grandpa tourist clothing from Middle America, and he approaches me all stinky with some fucking shit-creations he made on a flat tray that I have a hunch were supposed to look like critters and he says, “Do you have a spirit animal?”
I said, “Yeah. C’thulhu.” He kinda jerks and just looks at me for a long time while I look at him and he finally says “You can go to hell, shitface.”
I said “I have been to Hell. I have been sent back here to summon you by force back to the Eternal Pit where you are to be sacrificed to the Elder Gods in a full-moon ceremony on an uncharted island in the Aleutians that is eternally snowless and balmy due to unnatural thermal vents hewn by the damned. You are to be slaughtered and eaten in a ritualist ceremony formulated to jolt from sleep the horror-god of the goat-faced Abomination who will rise from the utter black depths of the deepest ocean trench, and with fins, tentacles, claws, spikes, poisonous skin and immortality begin to walk in towering, plodding fixated resolution on his mission to upend 3-dimensional reality and warp it into mind-shredding 7th dimensional filth and pain.
“You think you have come to me of your own accord with your pathetic tray of untalented ass-splatter. In fact, this was all preordained: I have been sent to you to drag you back to the Filth Ceremony where you will be the filth and fed to Ablathloton, the God of fungus, and your cock, if you have one, will be eaten by pigs. What are your thoughts on that?”
I stuck a commie poster/ propaganda pamphlet with amateur but still interesting art festooned all over it and probably drenched in typhus that a different vagabond, a fucking teen, handed me earlier, I jerked it to a halt under his nose said “…and speak into the rolled-up pamphlet if you will.”
He started walking sideways away from me mumbling “Fuck you, fuck you, fuck you…..” and he “fucked me” for ABOUT a half a block.
Cecily looked at me and said, “That was uncalled for.”
I said “It was not only called for it’s the only thing that actually works: a fearless and determined demonstration that they have a lot to learn about what crazy actually is.”
–J.J. Solari
from a to-be-announced memoir

QUICK, New Bikernet Reader Comment!
SUMMER KICK-OFF BIKERNET WEEKLY NEWS for June 3, 2021
https://www.bikernet.com/pages/SUMMER_KICKOFF_BIKERNET_WEEKLY_NEWS_for_June_3_2021.aspx
I guess congratulations are in order. Best wishes.
Practice, practice practice.
— Rhys
South Daytona, FL

THE BUFFALO CHIP GARAGE–The Team in Sturgis to Trust
Premium Parts • Service • Customization
Open July 26 – Aug. 12, 2021 from 8 a.m. – 6 p.m.
at the FREE-ACCESS CrossRoads
MEET THE TEAM
Fozzy’s Cycle Shop
Presented by Black Hills Harley-Davidson
Paul “Fozzy” Fosdyck and his dedicated Harley-certified team have earned a reputation for being some of the best motorcycle mechanics in the rally circuit. Whether you need a fresh set of 2-For-1 Continental Tires, a new Free Yuasa Battery, or an oil change, Fozzy’s Cycle Shop has you covered.

NEW FROM LOWBROW–Whiteknuckler Brand is about a certain aesthetic…
A way of doing things that puts look, feel and style in balance with functionality.
Fine crafted quality and classic looks permeate all of their designs.
Proudly made in Columbus, Ohio, USA.
PS – A handmade Whiteknuckler knife makes a perfect Father’s Day gift!


ANOTHER New Bikernet Reader Comment!–Cantina Episode 92: The Wild Road to Recovery
https://www.bikernet.com/pages/Cantina_Episode_92_The_Wild_Road_to_Recovery.aspx
Where the fuck did this redhead come from? Bandit might be better off with a brunette. Sounds like all the Redheads keep him on the road instead at home where he can get some peace in life. Enjoyed reading about all the towns, freeways, and scenery, and important places between LA and Sturgis. Really enjoyed all the description and seeing Hal’s works.
–Ann Robinson
Long Beach, CA


THAT’S NOT ALL—I’m working on a Cantina Episode, a few bike features, and a girl feature. We are due to receive the last of the bikes today. I need to wrap up the news so I can jam over to the other digs. Shit is happening fast, everywhere. Hell, I could use a shower.
It’s incredible how handy tools come into play. I set up some torched in the Deadwood house and immediately needed them.

I need to reach out to Dan Stern about his feature. We have another notion we are playing with regarding Jack’s galleries. I’ll report this week.
In the meantime, ride free forever!
–Bandit

Indian Custom Project Scout 3K Challenge
By Wayfarer | | General Posts

by Daniel Patrascu from https://www.autoevolution.com
Over the years, we’ve gotten used to Harley-Davidson organizing all sorts of build competitions for its international dealers. The most recent such gimmick was last year’s massive King of Kings competition, which saw the Mexico-built Sportster XR1200 Apex Predator come out on top.
The Apex had to battle several other exciting builds coming from all over the world, and that made the competition particularly challenging. It must have been challenging for Thor Motorcycles as well this year, given how the workshop had to fend off eight other competitors. Still, it was probably a tad easier, given how all the entries in this competition are shops based in the UK.
Also, Thor and the others did not set out to remake a Harley, but an Indian. Their efforts were part of the Project Scout 3K Challenge announced by Indian Motorcycles back in November last year, which set out to find the best Scout custom build of the year.
Thor’s build is called Kermit, probably on account of the green hue that adorns the fuel tank and fenders. It was originally a stock Scout Bobber but was modified as per the competition rules with limited parts and within a 3,000 British pounds ($4,250 give or take) budget.
The finished product was gifted with an 8-inch mini-ape handlebar conversion, LED headlight, and micro COB stop-tail and turn signals. An in-house-made side-mount number plate mount was fitted, and the tank and rear fender were wrapped in 3D Gel vinyl in a triple-layer green overlay and finished with a charcoal pinstripe.
The build was completed over a twelve-week period, and the Kermit was crowned the winner at the end of May. We are not given any indication of what will happen to the finished motorcycle, but we certainly would love to see it on the road.
British Motorcycle show pays tribute to the legacy of Joe Ellis
By Wayfarer | | General Posts
by Chris Crook from https://www.zanesvilletimesrecorder.com
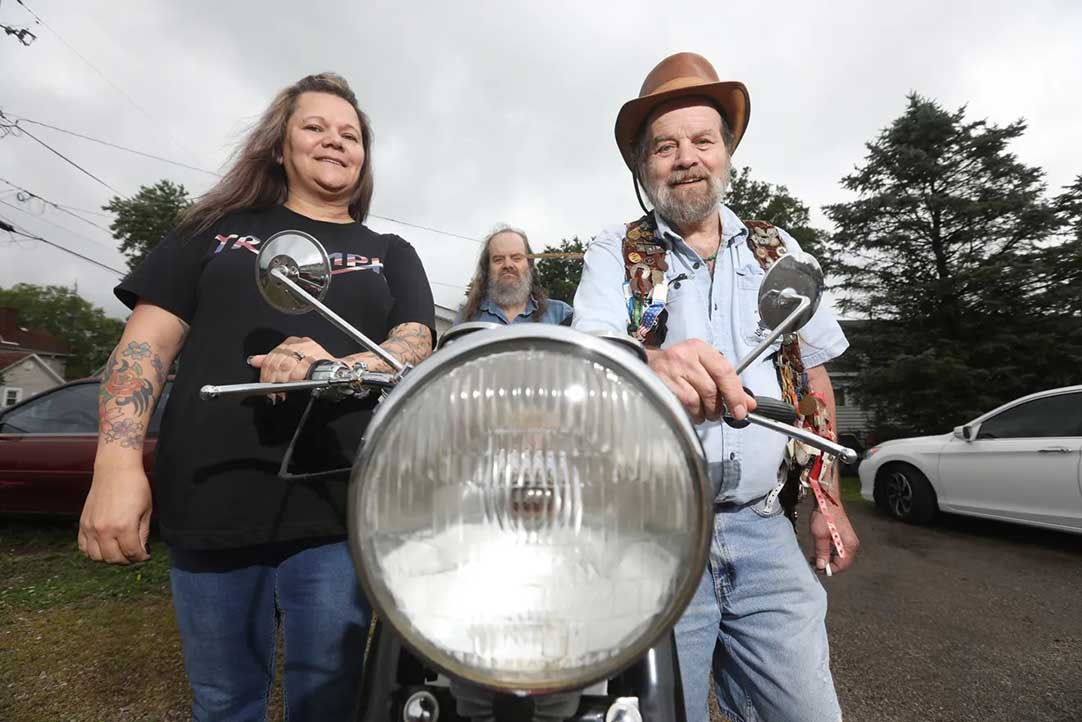
NEW LEXINGTON – An old motorcycle has woven friends into family in memory of Slow Joe Ellis, a Perry County motorcycle enthusiast who lost his battle with cancer in 1986.
Ellis, a Shawnee native, was one of the driving forces behind a British Motorcycle show that that now bears his name, the Friends of Slow Joe British Motorcycle Show. This year’s event, the 39th annual, will be held at the Perry County Gun Club on Friday and Saturday.
The show opens on Friday, with a tribute to motorcyclists who have passed away and a surprise, said John Fiore, a long-time friend of Joe’s. “Around 5 p.m. we have our opening ceremony, a prayer and a moment of silence for the veterans.” He is calling the ceremony “those that ride, and those that died,” and keeping the details under wraps until the event.
Saturday will feature a poker run starting at noon and a bike show, which welcomes non-British bikes as well starting at 4:00 pm.
The show is free, and all are welcome, including “well-behaved children,” said Fiore. “We turned it onto a free show because there are so many people that were not showing up because they couldn’t afford it.”
Calling it a gathering of a good group of like-minded people, Fiore said the camaraderie of the local motorcycle scene brings out people who, even if they can’t ride any more, still want to come out and talk motorcycles. Fiore credits the show’s good vibes for keeping it going for 39 years, creating a bond between Ellis’ friends and those who never met him.
Slow Joe gained his nickname because he slowed down a bit during his 9 1/2 year battle with cancer, but he could still outride anyone, Fiore said.
A family man and avid dancer, Ellis and Fiore met by chance in 1977, and quickly developed a bond over a shared love of Triumph motorcycles. “We did a lot of riding together, a lot,” Fiore said.
The motorcycle, a fully restored 1972 Triumph 500 T100, that Joe used to ride on the highways and byways of Perry County has changed hands numerous times, connecting friends and family to Ellis, who died just after the third British Motorcycle Show. It now resides with Ellis’ niece, Lisa Fox and her husband Alan. “It is a blessing to have it,” she said, “a connection to Joe.”
Just before Ellis took his final ride, he asked Fiore to keep the show going. “We didn’t know this thing was going to take off,” Fiore said, but the show has attracted visitors from all over the world.
“Our eyes painted a different picture,” Fiore said of the style of the Friends of Slow Joe British Motorcycle Show. “We had that vision and we stuck with it.”