Doug Coffey’s RetroMod Panhead Part 6
By Robin Technologies | | General Posts


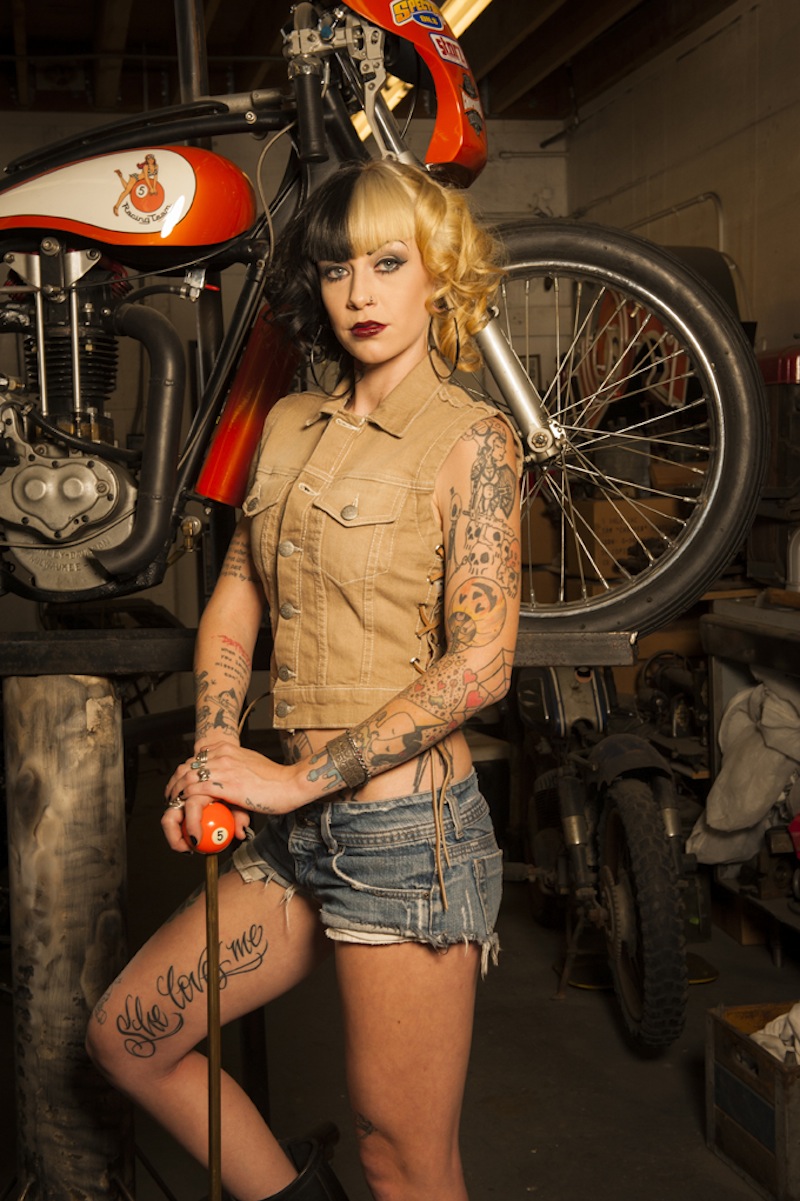
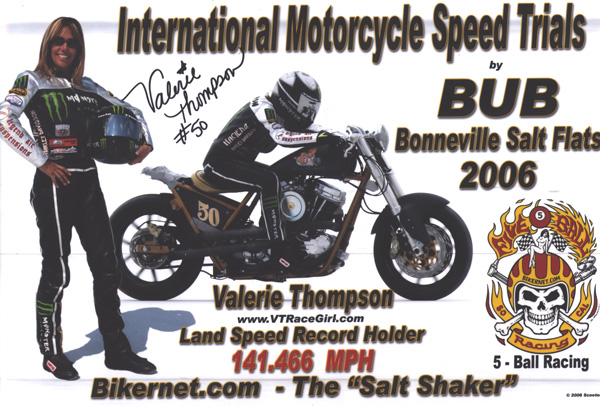
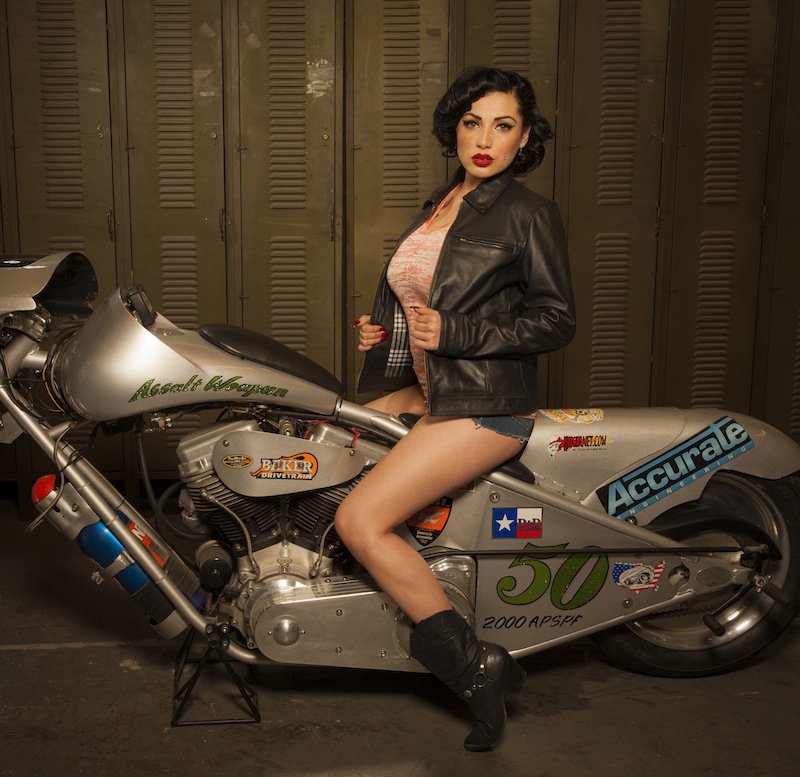
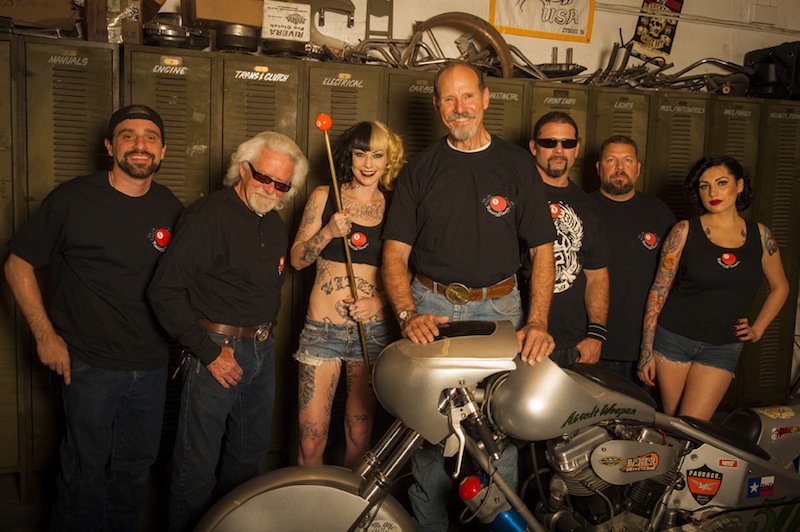
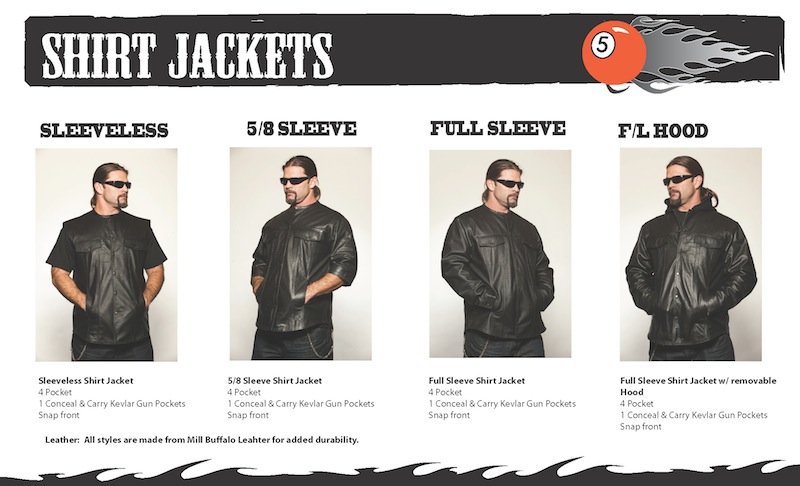
What the Hell is 5-Ball Racing?
By Robin Technologies | | General Posts


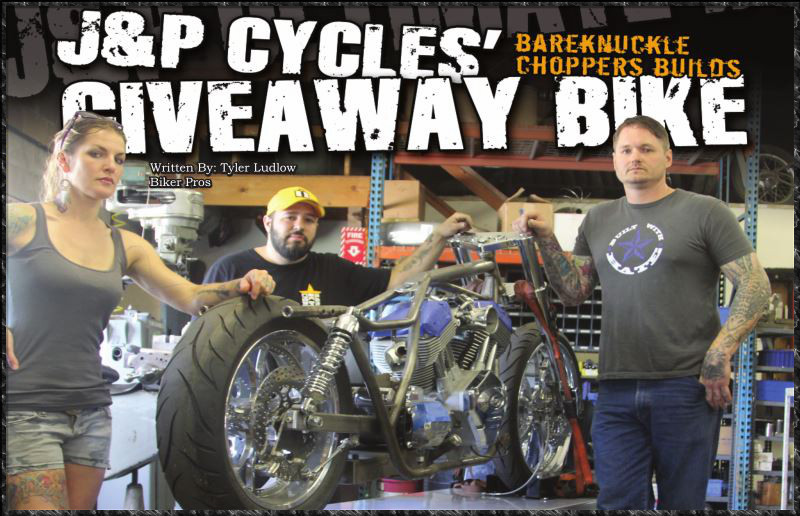
J&P Cycles Giveaway Bike – Part One
By Robin Technologies | | General Posts


How to replace grips on a Harley-Davidson by J&P Cycles
By Robin Technologies | | General Posts
Today, J&P Cycles shows you how to replace grips on a Harley Davidson motorcycle. From removing your old grips and adding new grips watch the entire process take place.In this video they use a 2013 Harley Davidson Softail Slim for demonstration but the process will be very similar for all motorcycles that utilize dual throttle cables.

Bikernet Project: Charity Bike, Widowmaker Style
By Robin Technologies | | General Posts

“A man’s got to know his limitations”-Dirty Harry
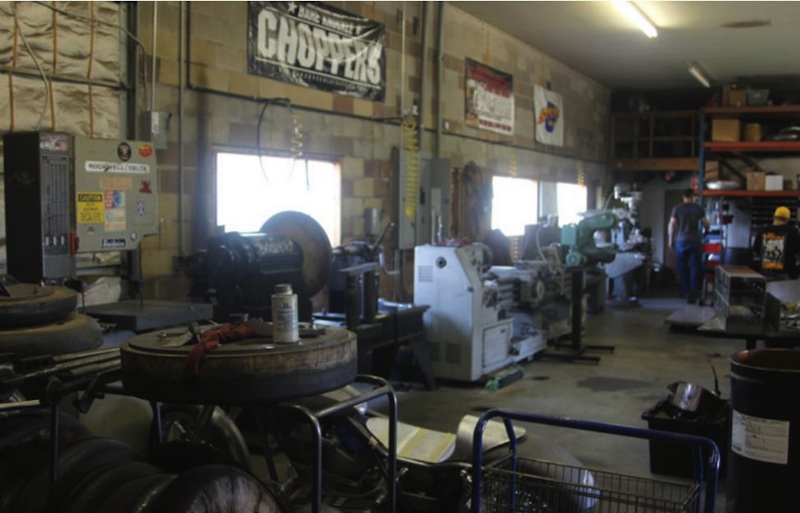
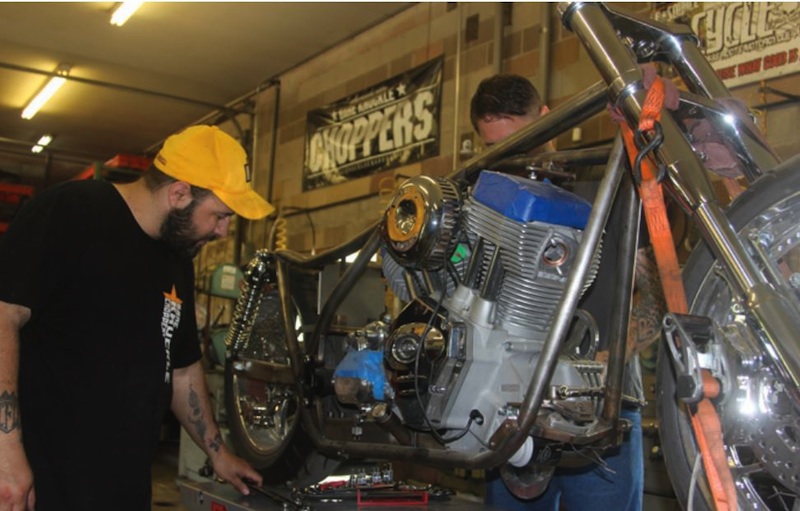
The Widowmaker crew is ready to do everything from rebuilding the top end of your old Sportster, fabricating a set of head turning handlebars, or adding class to your fresh-off- the-showroom floor Milwaukee Iron, by installing Hank’s custom two-into-one pipes. Then giving her the iconic Widowmaker designed and fabricated intake so she can breathe 15 horses faster. Your ride isn’t made-in-the-USA? No worry, Hank has a solid record of having a complete disregard for the national origin of any type of stray bike landing on his doorstep. He’ll take it and improve on your ideas, or, like he did two years ago, just take a crotch rocket, chop it up, lay his magic welding rod upon it and get top prize at the Ray Price Capital City Bike Fest in Raleigh, NC.

Each year for the past eight years, the Widowmaker family had been organizing a very successful ride raising money to help families deal with their child’s medical expenses. This year is different; Hank is fabricating a custom motorcycle which will feature his signature hand made parts recognizable throughout North Carolina as the Widowmaker brand. The plan this year is to sell raffle tickets and raise $25,000 and give five local families in need, $5,000 each, to help with the medical care of their child. We caught Hank early in the planning stages and wanted to share his progress of this project to the announcement of the winner on September 26th at Ray Price Harley Davidson’s Capital City Bike Fest in Raleigh, North Carolina.
Bikernet is going to follow Hank through the process of building a custom chopper and staying within the basic interactions between: cost, skill level and availability of tools. This is the first in a series of five articles in which we will be going over some issues that need to be addressed prior to putting fire to metal or pen to paper.
Here’s Hank layin’ it out straight for you in his words: Set the goal and make a plan…then be flexible while you work towards that goal. Reaching that goal is the successful art of harmonizing your choices with your plans within the parameters set by your skills, or as Dirty Harry would say, “A man’s got to know his limitations.”

Be honest in evaluating your skill level; choose a bike that works within your ability and the tools you’ve got in the shop. For example, I would not recommend a 2005 fuel injected V-twin to anybody but an advanced builder. If your strong suit is not electrical, stay away from electronic bikes. Stick with the basic skills for a basic drive train and fuel delivery. Use the theory of K.I.S.S.- Keep It Simple Stupid. A carbed Sportster has been a simple and proven canvas for decades of custom builders of all skill levels. Carbed metric bikes are getting more attention partly due to popular magazines such as The Horse-Backstreet Choppers and Cycle Source. The metrics tend to lose their value quicker yet remain reliable, but the metrics need a more fluent skill set. Sportster tooling is basic, aftermarket parts are readily available.

Choosing a bike. Choosing your donor can be difficult. However, surfing the internet somewhat simplifies this option. Knowledge is power, knowing people helps. Know your surroundings and what you are willing to do to get what you want. What are you limitations? If you find a great deal on a bike but its 1,000 miles away, is it worth the drive? Consider any time, effort and expense in acquiring the donor bike or parts for your project. Speedy decision making is the key to sealing any internet deal. If you find a good deal, jump on it. There are plenty of up and coming backyard builders, and many are out there in the fast lane. This is where your skillset, tooling, and above all- your planning comes into play. Choosing a bike that best fits your ability is better than choosing a bike that better fits your wallet. Knowing your limitations will save aggravation and keep you from wasting time and money. Decide if you want a running bike or not. Running bikes are easier to start with. You’re trying to re-engineer the bike completely. If you decide an engine rebuild fits your plans, your market for a donor bike expands considerably.

Choosing a wrecked bike. First question, does it run? Look at causes of failure. How bad of a hit did the bike take and where? What are you changing about the bike and how does this affect what your plans are? Is the front end in the frame? Are you replacing the frame? Looks can be deceiving. Frame can be bent. Always check. Where was the impact? What deemed it totaled? What condition is the engine? Compression Test? A compression test tool can be easily found at your local auto parts store. Review the specific bikes requirements before performing the test. Basic actions, remove spark plug, disconnect ignition coil, install tester. Spin engine over with throttle open. Evaluate readings. Every engine has different specs. Know your specs. You should not have a difference of more than 10% from one cylinder to the other. This will give you an idea of overall internal condition. An easy way to decide if you have leaking rings or valves is to squirt some oil into the cylinder. Retest them if you have a poor reading. If your value goes up, the rings are bad and the valves may be ok. How long has it been sitting? Perform a Cylinder Leak Down Test using another tool easily found. This can be confusing to understand. You will have 2 gauges. One showing the air coming into the cylinder, the other showing a percentage of air lost. The more air lost, the worse the condition of the internals of the engine, i.e. valves, rings, etc. Make sure the valves are closed and engine is on Top Dead Center (TDC) for that cylinder. Does it run? Get a grasp on the variables of how long it has sat, what is the overall shape of bike? How many miles? Is the speedo stuck on a certain speed? This is a good indication of speed of impact. Is it water cooled? How will this affect your ability? Can you rework the design of the cooling system? Have a game plan for the bike. What parts will you have to fabricate to use in your build? Again, what is your skill set and tooling for the bike? Plan ahead. How far can your abilities carry you and what do you have to buy or source. Make sure your plans also consider the laws of you state for signals, light sizes, handle bar heights, fork lengths? Look at the overall of the bike. What is damaged, where, why, how come?

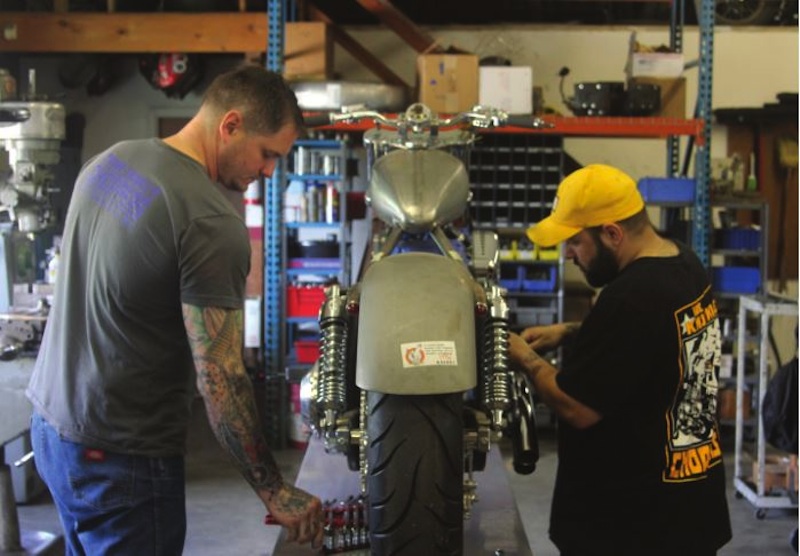
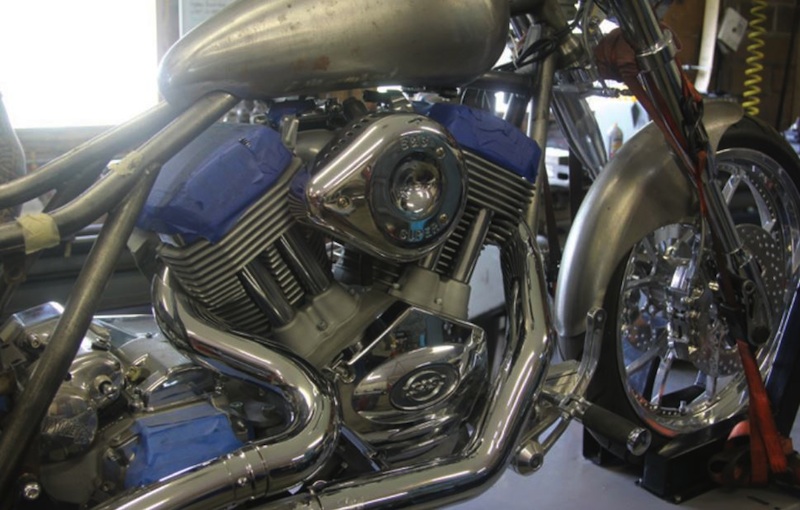
In this build, we are using a wrecked ’99 Yamaha Road Star 1600. The insurance company determined the bike was “totaled” based on overall damage vs. cost of repair and value of a repaired bike. The bike was running good and in good riding order. The majority of damage was isolated to the front and right side of bike. Fender, exhaust, tire, turn signal bar, etc. (insert pix here). (talking about points of impact, overall condition and damage). But the overall running works of the bike were intact and in good running order.

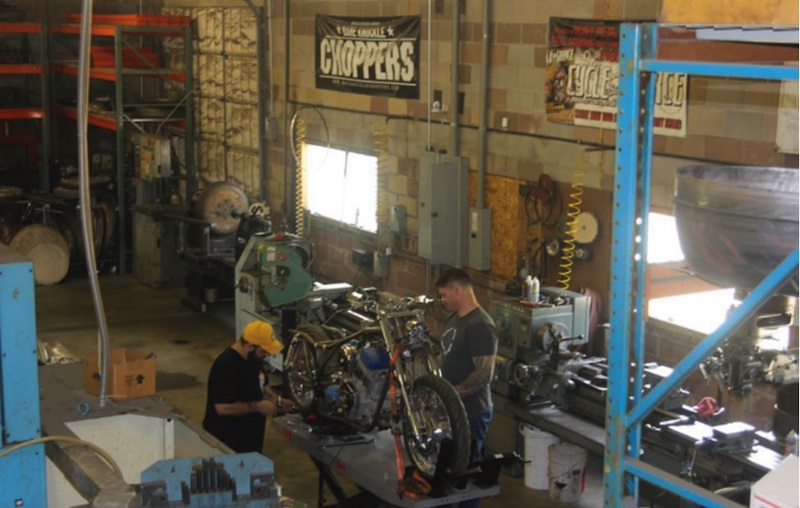
Having a plan. For this project, we chose this bike specifically based on availability and cost. Knowing our skill set on the front end, we knew this bike would be a challenge, but be a great build. We already planned ahead. We had a Crafttech frame with a 240 back tire that needed a large displacement motor. The 1600 cc Road Star engine fit the bill. Now this comes into tooling. Keep posted to see how the overall pieces are made to fit. See you next month.

SPONSORS
Triangle Cycles
Grip Ace
Chop Rods
Fastnel of Roxboro, NC
Amzoil
Ah-maiz-in Paint and Finish
Carolona Custom Powder Coating
Turner Asphalt of Raleigh, NC
Camp Bow Wow
Chandler’s Towing
Peak City Trucking
Carolina Ceramic Coating
Brandon’s Harwood Floor and More
Bikernet Project: Widowmaker Charity Build, Part 4
By Robin Technologies | | General Posts


I cannot stress enough to plan ahead.


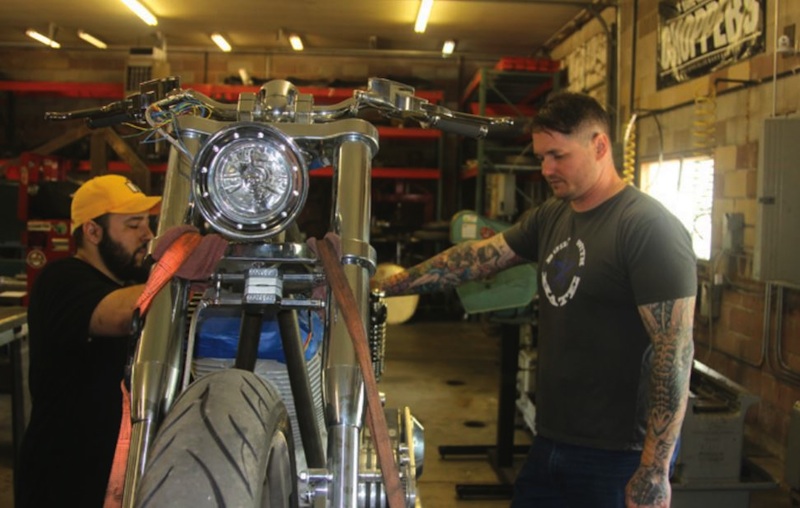
The “Grip Ace” makes for a super clean and simple install without the dopey look of stock switch housings. If you are not familiar with this product, visit them at www.gripace.com. This product allows you to have all of your bike functions literally at your fingertips of your left hand. The system is compiled of a four button key pad that is installed on your left hand grip and a slim line module that can easily hidden almost anywhere on your bike.

The wiring is super simple. Once your left hand grip is fitted with the key pad, run your preformed wire and plug through your bars and plug into the module. All of your bike functions are wired to the module. The unit comes with clean and clear wiring instructions and easy to follow schematics. On our bike, we chose to keep the system super clean and mounted our key pad to the inside tunnel of the gas tank. As for the rest of your wiring, test each circuit as you assemble it. Try not to rely on butt connectors, solder as many of your wire connections as possible and keep in mind the serviceability of the bike. Make sure that future removal of the headlight and rear fender can be done by unplugging the wiring rather than cutting it.

Item Five: Last pieces of the puzzle, installation of the tins. This can be the most rewarding part of the job, seeing your new bike in all its glory or it can be a bad day and a trip back to the painter. Make sure you take your time in this installation. Make good choices of hardware. I personally like to use rubber washers on painted surfaces so as not damage the paint with the installation of the mounting hardware. Once everything is hooked up, top off your fluids and add only enough fuel to get the bike running. I suggest this in case there is a an issue of a gas leak or oil leak that may require you to remove the tank.

Once everything has checked out, get out and enjoy that first test ride. Make it short, come back, check everything over. Once all is good, pack up and enjoy your new ride.
THE CHOPPER OF CHOPPERS FOR SALE
By Robin Technologies | | General Posts

This bike represents an upbeat era when choppers were kings and the Discovery Channel made it so.
We are going to attempt to tell the story of the bike, the shows, and the esteemed owner, Hugh “The Chopper” King, the producer/director.

Hugh actually worked for Easyriders, as the video editor/director, while I watched over the magazines. But he moved on to Original Productions. Motorcycle Mania was the first motorcycle show and I got a call. “Who should I recommend?” Dave Nichols asked. I said Jesse James, and the rest is history.
“Tom Beers, the boss of Original Productions, came to me,” Hugh said. “He asked me if I knew anything about motorcycles, and I said I knew everything about motorcycles, which of course I didn’t.”

“I had worked for one year at Easyriders, “Hugh continued, “doing Easyriders home videos, back when Keith Ball was the editor. These videos really captured the hard core, get down, biker lifestyle. So when Discovery came to us about a custom Harley show, I was all over it.”
The industry started flying and the ratings for these shows went through the roof. During filming at an Easyriders granddaddy bike show in Columbus, the Discovery Channel guys interviewed me and they asked what sorta chopper show I would suggest.


“Roger built his beautiful machine in honor of his daughter,” said Hugh, “who was killed on a motorcycle on the previous New Year’s Eve. It was very moving. His bikes are mean, man, and they run. The guys rode like bats out of hell, at over 100 mph a lot of the time, from Florida to North Carolina. At one point, Billy hit a big pothole, and flew so high into the air I thought we were going to lose him. That episode was really well received, which was enough for Discovery to order four more, and then seven after that, and 11 after that. There were a total of 44 Biker Build-offs.”

Hugh and I talked from time to time during the seasons. The flurry of action was high and the drive-by builders to be celebrities flew over the top. I remember riding my 2003 Road King to the Laughlin River Run. Hugh invited me to, I believe, the unveiling of this bike, but as usual, I got lost with a girl in the desert and never made it. While at Hot Bike, I attended with my crew one of the season finales to celebrate the builders and their accomplishment. The King presided over the festivities.


This chopper may end up on eBay, but if you’re seriously interested reach out to Hugh King at: hughk16@gmail.com.

Sturgis Shovel Gets A Wrap
By Robin Technologies | | General Posts


VHT FLAMEPROOF COATING
VHT FlameProof Coating will renew and extend the life of any surface exposed to extremely high temperatures. This unique coating is a matte finish, silicone ceramic base widely used by the automotive industry on exhaust systems and the aerospace industry for jet engines, re-entry vehicles and other high temperature applications. VHT FlameProof Coating will withstand temperatures up to 2000°F (1093°C) and is ideal for use on headers, exhaust systems, or wherever an extreme temperature coating is needed.
Applications: Headers, Exhaust Manifolds, Piston Domes, Inside Heads

VHT FLAMEPROOF COATING does require curing and VHT includes some specific instructions on how to do this.
Curing FlameProof
VHT FlameProof Coating only attains its unique properties after correct curing (refer to instructions on the can).
Paint must be completely dry before curing
Heat to 250°F (121°C) for 30 minutes
Cool for 30 minutes
Heat to 400°F (204°C) for 30 minutes
Cool for 30 minutes
Caution: Do not exceed the temperature of the least heat tolerant component or the base metal
Paint must be completely dry before curing
Run at idle for 10 minutes
Cool for 20 minutes
Run at idle for 20 minutes
Cool for 20 minutes

Once I finished painting and curing(?) the exhaust pipe, it was time to get wrapping. J&P Cycles has a large selection of exhaust wrap to choose from in their online catalog and after looking at all the different options I decided to order the Design Engineering Inc, Titanium Exhaust Wrap Part #308-159. I also had them throw in a package of DEI’s 8-inch Stainless Steel tie wraps to secure the ends.

•Promotes increased flow for improved performance
•Reduces temperature & vibration breakdown
•Extremely pliable for a tight and secure wrap
•DEI HT Silicone Coating not required
•Pre-wetting roll not necessary for wrapping
•Hi-tech carbon fiber look
As usual my order from J&P Cycles showed up almost as fast as I hit the enter key on the order form. Once the wrap arrived I looked over DEI’s directions and proceeded to start wrapping the pipe.


Mudflap Girl FXRs Build, part 9
By Robin Technologies | | General Posts
Here’s a link to the last chapter: http://www.bikernet.com/pages/Mudflap_Girl_FXRs_Part_8_Wiring_World.aspx

What a year, and we’re cranking on so many two-wheeled fronts. Both Mudflap Girl bikes are running and one is in the wind, but I’d better back up. You’re going to love this tech, and the ending.
I took the Mudflap Girl bike to Saddlemen during the holidays, at just the wrong time. They faced the holiday schedule, then dealer shows, including the Easyriders V-twin show, then Daytona, before the dust settled and the shop was calm enough to focus on a couple of custom seats.

Sure, the economy sucks, but you wouldn’t know it if you stumbled into their brick manufacturing facility in a Los Angles industrial community. The shop is cooking, building twice as many seats as last year, and adding 420 new seat part numbers. Tom Seymour, his partner, Dave Echert, and Avery Innis have stepped into the luggage arena for touring bikes, cruisers, and sport bikes. They designed a line of bag inserts, sissybar pads, tank and fender trim, you name it. If you’re going for a long ride, they have the product for you.

That’s just the tip of the chrome and leather iceberg. The Saddlemen team will attend 78 shows, and events this year, from Sturgis to flat track racing, with the marketing director, Ron Benfield in the lead. The family atmosphere in their facility started to impress me after a couple of visits. I met 25-year team members and their sons and cousins. In fact, Avery kindly took a liking to an old Bikernet buddy, Buster Cates, and offered him a position on the team. Buster owns and rides our Shrunken FXR to work every day.

Let’s cut to the seat-building chase. The Saddlemen team turned motorcycle seats into an engineered art form. They don’t just make cool seats but poured engineering into the mix for comfort and long-ride ability. They studied the use of medical gels, then the spinal relief channel, lumbar support, and foam and fabric functions. Now they make heated seats, and the heels-down seats for shorter riders. Several of these elements add time and substantial cost to the seat manufacturing process. Plus they always attempt to make their seats fit better than stock.

Saddlemen has a team of custom seat builders who carefully design seats for special applications, race bikes, and sometimes, ultimately production seats. I was impressed with the myriad of seat manufacturing processes and how the team handled each one. Jose, the senior custom seat designer, worked with us through the entire process. First, he verified the position of the seat and the position of the frame rails, which are not always entirely symmetrical. Then he determined the center of the fender. He carefully masked off the entire seat area, and then began to hand-form a sheath of 1/8-inch wax. It performs a couple of functions. First, it molds perfectly to the frame, and second, it affords a 1/8-inch clearance for fabric to fill during the final stage.

“Every motorcycle has a seat,” Avery said, “but there are multiple body styles.” Avery is the engineering, design, and customer relations guru. He worked for Suzuki and Honda for years, and rides touring bikes and enduros. “All body styles don’t fit the same seat or style of riding.”

The wax helped the seat to locate itself on the frame perfectly. With wax strips, Jose formed a small channel on the inside of the wax seat pan to allow for fasteners not to protrude. The channel is about ½-inch wide and 1/8-inch thick. When the channel was placed securely, Jose filled the wax-to-wax edges with clay to prevent resin from seeping under the wax channel.


After the first sheet of fiberglass was carefully laid over the wax and carefully coated with resin, we cut a dusty trail and planned to hook up the following week.


Day Two:

We returned to the shop. The doors open at 6:30 in the morning and shut down at 3:30. I found the timing to be very civilized. The staff can enjoy a comfortable afternoon at home. We didn’t roll into the shop until 10:00 and Jose was already cutting and shaping the fiberglass seat pan, with the seat hook brackets molded into the bottom of the pan. Fiberglass contains amazing strength, yet adds flexibility. They are the official seat maker of the AMA pro racing/flat track, and now road racing classes, and they make all of Steve Storz café racer kit seats for Sportsters. They also sponsor dozens of flat track racers, the 5-Ball Bonneville Racing team, the Jordon Race Team, and Lotus.


With the seat pan shaped perfectly for my goofy Mudflap Girl ignition key system, we peeled out once more, and returned the next week for foam shaping.


Day Three:
“This is the most impressive aspect to making a custom seat,” Buster said of the foam shaping process.

“The driving force is style,” Avery said, “then we add performance with the gel, the spinal relief channel, and lumbar support.” Initially, I shot for the coolest, cleanest design to feed my chopper soul, but realized I needed a long-distance rider for my future Sturgis runs. When the discussion of lumbar supports surfaced, my lip zipped tight. I didn’t want to step into the middle of the comfort engineering mix.


My goofy key position worked perfectly into the channel design. Jose cut and shaped the 1.5 inches of foam with highly sharpened kitchen knives and coarse emery discs. Avery and Jose discussed the sketches for the position of the channel and the gel. One inch of gel represents 3 inches of foam.


Here’s the company’s gel description: Almost two decades ago, Saddlemen was the innovator of SaddleGel for motorcycle seats, bringing over a gel technology widely used in medical applications.

Without question, SaddleGel is the most important breakthrough in motorcycle seating technology in decades. This amazing product will increase the amount of time you spend on your motorcycle, creating the comfort necessary to ride all day. Every type of riding is more enjoyable, from touring to dual sport, canyon carving to street cruising.

When it comes to motorcycle seat comfort technology, nothing compares to a Saddlemen seat with SaddleGel. The proprietary SaddleGel technology was gleaned from the medical industry with specific origins in wheelchair pads and hospital beds. The gel was used (and still is) to prevent bedsores for those confined to beds for long periods of time and for people in wheelchairs—some for their whole lives. Know anyone that rides as much as a person confined to a wheelchair?

In the early ‘90s, the experienced riders at Saddlemen figured out a way to incorporate all the benefits of gel into a motorcycle seat and quickly learned it was far more comfortable than standard seats for a variety of reasons. For one, SaddleGel isolates engine and road vibration, a common cause of rider fatigue. SaddleGel is a molded solid with fluid-like properties that will not slide to one side or move around in your seat like air or water in a plastic bag. Instead, the proprietary design eliminates pressure points at the hip bones and tail bone by evenly distributing your weight across the surface of the seat. Otherwise, pressure points or hot spots can hinder blood flow, causing pain and discomfort. Normal circulation is never lost on a seat with SaddleGel. It keeps your rear end comfortable on a long ride, and ready to respond quickly as road conditions change.
Saddlemen SaddleGel is extremely advantageous, but we were able to maximize its benefits by developing a seating comfort system around it. Our integrated seat designs include a selection of materials that work together to make our seats as comfortable as possible, while still giving your bike show-quality style.
Avery has a product formula he learned from the president of Suzuki in 1990 at a business philosophy conference. “Every product must be evaluated for styling, performance, and value,” Avery said. We discussed business notions and the alignment of the stars while Jose carefully shaped foam.
Day Four:

While I was missing in action, Jose refined the shape, inserted large segments of gel, and made a custom aluminum channel section. They need something to apply the upholstery to, and then fasten it to the bottom of the seat pan. Nothing is as easy as it seems. Then he added a final lather of breathing foam, only about ¼-inch thick, and we started to decide on the fabric and pattern.

“In the past, we all thought leather was the ultimate fabric,” Buster said, “but not so.” Learning the Saddlemen ropes fast, Buster discovered new, more resilient fabrics, stronger materials, and more comfortable weaves. Avery chose a long lasting carbon fiber weave for the front of the seat panels, then a brushed aluminum vinyl for the channel center and the lumbar region. They even planned to scan a Mudflap girl and embroidered her into the seal. The rear seat tab was positioned during the second layer of fiberglass. Avery chose another black vinyl for the back of the seat. It’s tough, has the delicate touch of skin, and will last.


Jose marked lines for fabric patterns, and next he would drill and counter-sink the custom aluminum panel before upholstery and placement down the center of the pan. He ensured that the gel was properly glued with their coveted water-based adhesive, used for all foam application. The thin layer of porous headliner foam acts as a visual detailing source for seat shaping and adds breathing, but it’s not long distance comfort foam. The Saddlemen-designed progressive foam and gel handled the tough job.

Here’s the Saddlemen description regarding the spinal channel system: Our Gel Channel line of seats for sport bikes are designed specifically for the rider that needs a seat that can do everything—canyon carving, track days, or commuting.

They feature Saddlemen’s Gel Channel (GC) technology (patent pending) that incorporates a split piece of SaddleGel and a channel in the base foam to relieve seating pressure on the perineal area, increase blood flow, and keep the rider in the saddle longer.

While another week sped past, the Saddlemen staff sewed the pattern pieces together with marine grade nylon and polyester, colorfast thread for sun tolerance and lasting durability.

I never imagined so much thought, engineering, product testing, selection, and creativity would go into a goddamn seat. But when you think about it, you’re almost as involved with the seat as you are with any other aspect of a motorcycle.


The call came: “The seat is finished and fine,” Buster said. “Come and get this puppy.”

We grabbed the new license plate, a new Aeromach mirror, a Bandit’s Dayroll packet full of tools, and peeled out. This wasn’t within the mantra of the Eddie Trotta break-in procedure. The well-organized Saddlemen facility was located about 10 miles from the Bikernet Interplanetary headquarters. We ran the driveline through several heat cycles, but it never felt the clunk of the BDL clutch allowing the JIMS 6-speed transmission drop into gear, or the Metalsport mag wheels and Avon tires skid across any dusty asphalt lanes.


The Mudflap Girl resided in the asphalt driveway, out front, as we pulled up to the Rancho Dominquez facility. For the first time, I swung my leg over the carefully detailed Saddlemen seat, and sat down, as if about to cut a dusty trail. I immediately felt at home.

While the Saddlemen gang hung out around my Mudflap Girl in their driveway and we warmed the H-D Evo engine, we tightened the leaky fuel filter, adjusted the position of the clutch lever, and then I dropped it in gear. It shifted so smooth, I didn’t know I was in first. I was slightly nervous as I rolled out of the driveway. The seat was amazing, but would I survive the virgin ride home?

Next, we will cover my son’s final build aspects, adjustments, and first ride. Hang on.

Spitfire
D&D Exhaust
Biker’s Choice
JIMS Machine

MetalSport
BDL/GMA
Wire Plus

Branch O’Keefe![]()
Bennett’s Performance
Custom Cycle Engineering
Saddlemen
Bub
Progressive Suspension

Bikernet/Cycle Source Sweeps Build, Part 3, Sponsored by Xpress
By Robin Technologies | | General Posts

Hang onto your asses. This is going to rock your boat, or your solo seat springs. We are building a bike just for you. That’s right. A Cycle Source or Bikernet reader will own this one-off custom at the end of this year. No, I’m not kidding.
This world-class team of builders, lead by Prince Najar, the vast and all-powerful organizer is headed-up by builder/designer Gary Maurer of Kustoms Inc, and Ron Harris of Chop Docs. We have the Texas Bike Works frame, the magnificent Crazy Horse 100-inch engine, and Jules, of Kustoms Inc. hand-made an oil tank. This issue we welcomed another state of the chrome-arts team into the fray, 3Guyz, a manufacturing shop capable of anything. They work out of a former aerospace manufacturing facility in Hillsboro, Oregon. Their mantra is as follows: Providing specialized customizing and performance solutions for American V-Twin and sport motorcycles, Smart cars, and industrial clients.

I spoke to Andy, one of the guys, who introduced me to the boss, Bob, and the other guy, John. Around 2004, they needed a springer, and although they were big fans of Sugar Bear, they decided it was time to manufacturer their own.
“We started by building a dozen all stainless springers,” Andy said. “We still have a few.” Then they discovered the need to build springers for builders who sought flexible units for various finishes. Each springer is custom-made for whatever application any builder needs. In this segment, we will reprint the 3Guyz tech on how to measure a roller for the perfect length springer. They also published a tech on tearing a 3Guyz springer down for finish work.

For more details about fork design and handling, take a few minutes to read through their “Fundamentals of Front Fork Geometry” in the 3Guyz.com tech section.
So here’s what Gary was faced with when the word came from Prince Najar, “3Guyz will make us a springer. Order it, will ya.”

Options:
Brake stay(s): Right, left, none or both (we position them, and provide the correct bolt thread based on the brake system you choose). In this case, we are using Hawg Halters.

Handlebar mounts: Standard is ½-inch through holes on 3-1/2-inch centers in the top tree for solid mounting, designed to use any stock Harley risers. You can add bushing mounts, or larger holes for custom handlebar controls. Or a springer can be ordered without holes for risers. Their springers are available wide or narrow.
Axle diameter: Standard is ¾-inch. You can choose to have us provide a 5/8-inch axle for spool wheels if you prefer.

Fork Stops: Standard is external pin stops in the lower tree based on our bearing cup stop set. You can choose to add in our cup and bearing kit, have us provide the internal stop kit, or specify internal stops by providing the manufacturer details about the stop kit.
Brakes: You can provide the distance from the axle to the brake anchor link point on your brake kit, and we will place the brake anchor where necessary to match it. We can also provide a wide selection of brakes from aftermarket suppliers and pre-fit them to your fork.

Fenders: Left fender mounts, off these springers are available to allow adding the fender of your choice (there are too many possibilities to list here).

How to Measure Your Frame for a Springer Front End Build
To build a springer front end specifically to match your frame, we need a few simple dimensions and facts.
All the directions and examples here are based on the fact that your frame uses a 1-inch neck similar to a big twin H-D. If not, you can use this example, but you will have to give us additional information on the length, inside dimension and outside dimension of your neck to determine, if our system will work with your frame.
To start, set your frame up on a riser (blocks, or a jack) to set it at ride height. That is, where you want it to be when the bike is fully finished, and running down the road. It is best to do this with the rear wheel (in this case Ride Wright wheels) and tire (Metzler) installed to allow you to set the lower frame tubes level with the ground, or slightly raised, as some designs prefer.
Mock-up-frame-height. In this example, we have mounted the rear wheel in the frame, and used a frame jack to set the “attitude” of the frame stance. This step is important, as changes to the angle of the lower tubes to the ground can change the neck height, and neck angle as the frame pitches upward.
We typically use a digital inclinometer to establish the neck angle for our calculations to measure the angle within one tenth of a degree. We do not expect everyone to have one of these. We’ll show you a few other ways to get the neck angle damn accurate with common tools
To measure the neck angle relative to the table, we need to zero the device. In the photo above, you can see that we have used a long straightedge set on top of the table surface to average the table surface. This is important because these lift tables are not flat, and we need to establish a flat average surface plane to measure from.

As you can see, there was an error here. Our floor is sorta flat here as well. Most garage floors at home slope toward the door, and can induce more error. If you are using a lift in your garage, try to set the table across the natural slope of the floor to eliminate that possibility. Most garage floors are somewhat flat side-to-side.

After the gauge is set, simply set the gauge across the top of the neck as shown.

Keep in mind that:
1.The better these measurements are, the more accurately the front end can be built.
2. There are other ways to do this, but this is how we do it.
3. The smaller the neck angle, the less effect small errors have on the length of the fork
Let’s take a look at other ways to measure the angle. A machinist protractor is very inexpensive, and can be used as shown.

Keep in mind here that as we use a level to determine the angle, you must use the same technique on the table to subtract (or add) the correction angle into the measurement for a relative angle.
Another tool to use like this is available at lots of tool stores, and is pretty easy on the wallet. We see it in use in this shot.

Now that we have the neck angle, we need to know how far from the ground the neck bearing is.

Measure from the centerline of the lower neck bearing race (Bearing IN PLACE) directly to the table as shown.

It’s important to measure the lower edge of the bearing in the race, along the centerline of the neck axis.
This one measures 32 and 3/8-inch from the table surface. Try to get within 1/16-inch here.
This allows us to calculate the length of the fork, as long as we know the tire size, type, and brand you will be using. We have a table of “loaded” radius dimensions for most major tire types we can use to determine the distance from the table to the front axle.
With this information, we will build you a springer to fit in the space required, and we will pre-load the springer so that it will settle to this height when it is fully loaded with the bike and average rider weight.
We also use this geometry to select the correct size rocker length and tree selection to provide you with the best steering trail for a safe and smooth ride.
Gary Maurer has been building bikes for years, so I’m sure he has a formula for figuring the springer length or he can follow the instructions here. So, the other crucial variables at this point were the dimensions of the wheels and tires.

I reached out to Ride Wright wheels in Anaheim, California. They manufacture custom wheels, rotors, and pulleys for Harley-Davidson, American Classic, custom chopper and import motorcycles.
“We strive to be your one-stop source for aftermarket custom wheels and tire needs with the hottest styles and various sizes, including super wide or tall rims.”

They make straight, cross, and cross-radial (overlapping) lacing patterns with smooth and diamond cut wire and spoke wheels in 40, 50, Fat 50, 60, 80 and 120 spoke-count styles. They build their own high-polished stainless spokes in diamond cut, twisted, jeweled and blade styles. Finishes include custom colors, powder coating, chrome, and polished hubs and rims.
They also manufacturer steel and aluminum rims. Their soft-lip aluminum rims have no step and are thick enough for engraving or machining.

This is damn exciting, the way this putt is coming together right before our eyes. We now have a complete roller, and soon the sheet metal fabrication will begin under the guidance of Gary, Jules, and Ron. Hang on for the next chapter. And remember you can win this one-off custom chop. Just subscribe to Cycle Source or Bandit’s Cantina on Bikernet.com. Or just fill out the application and keep your money. No purchase is required, but don’t tell the other guy.
–Bandit
![]()
Xpress
http://mysmartcup.com/
Crazy Horse
http://www.crazyhorsemotorcycles.com/
![]()
Texas Bike Works
www.TexasBikeWorks.com

Kustoms Inc.

Chop Docs
Accel
Accel-ignition.com

Fab Kevin
.jpg)
D&D Exhaust
http://www.danddexhaust.com/
Wire Plus
http://www.wire-plus.com/
Barnett
Barnettclutches.com

Rocking K Custom Leathers
![]()
Ride Wright Wheels
Bell

Metzeler Tires