
Here’s one for you guys who have a little lathe at home and would like to expand your home bike building capabilities. Sprocket spacing can allow for quick and easy chain alignment if you are running wide tire sizes or mismatched tranny configurations.
Because the sprocket receives an enormous amount of torque, it is important to make sure your spacer is close tolerance to avoid any lash which might occur from large displacement motors. For these reasons on custom builds, we use the actual wheel hub to be employed for our proxy. This will ensure we won’t be off by a thousandth of an inch, if the hub we use is out (of measurement) from the standard (speaking of standards- remember a “standard”). Standard is a piece of precision stock used to cross check your measuring device. It’s a very important tool; ensuring your measuring equipment is accurate before an operation.
Start by taking the hub stock width to determine which size aluminum bar you will need to buy at the metal shop. Remember the metal shop will be able to cut the bar for you for a nominal fee and will usually provide a very clean accurate band saw cut to start with if you don't have a good band saw at home.
From here determine how much offset you need to accurately move the sprocket for proper chain alignment. We mocked the bike up, then offset the sprocket manually using washers and shims until the chain aligns properly. Then we simply measure the stacks of washers/ shims for our final sprocket spacer width.
Once you have determined the width the sprocket spacer need to be, you’re ready to chuck up your blank stock.
We started by machining a shoulder or carrier into the spacer which will “carry” the sprocket and be used as a register for the sprocket.
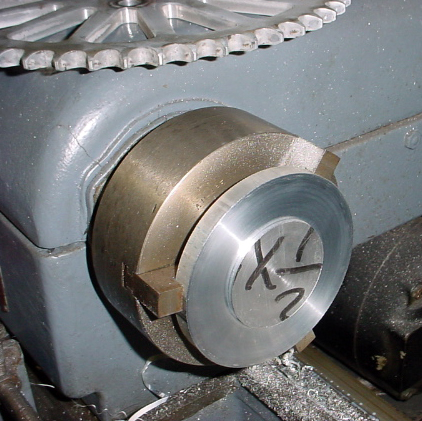
Check with sprocket inside diameter.
Now we determined that the sprocket will be carried fine and ensured accurate alignment of sprocket bolt hole spacing.
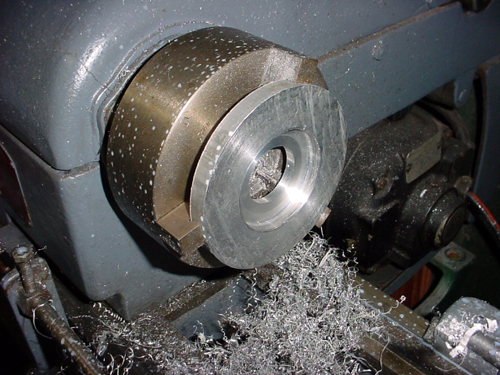
Then we flipped our sprocket spacer to the other side to run at bore and counter bore procedures.
Next we chucked up a drill bit in the tail stock of the lathe and drilled a ¾-inch hole into the center of our spacer.
Following this we used a boring bar to bore the inside hole which will hold our axle and axle spacer. We like our axle spacers to have a tight fit and also register to the sprocket spacer providing a very tight rigid design without slop, so we bore to the size of our axle spacer OD.
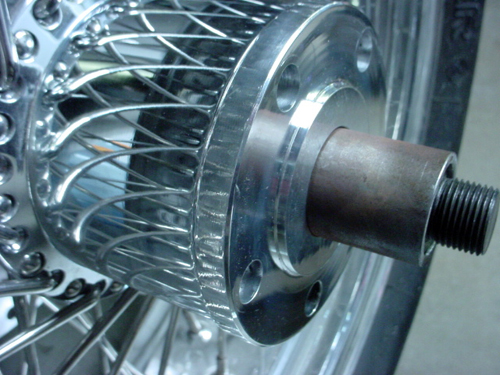
Don't forget to counter bore your sprocket spacer so that it it registers with the existing hub flange for a tight accurate fit! You do this as a second operation with the boring bar.
Next we pulled the spacer and gave it a good dose of layout fluid to the outer ring of our newly bored spacer.
Use a good scribe to mark your bolt hole locations.
Then pop your spacer in a drill press with a good vice and drill to match your bolt size.
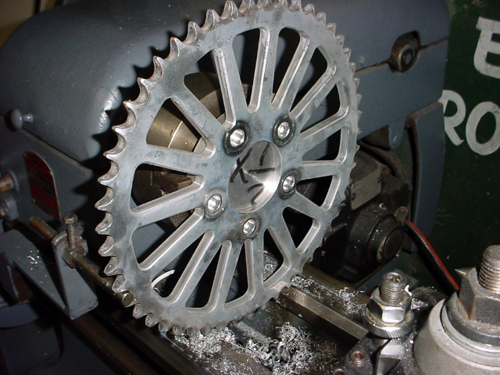
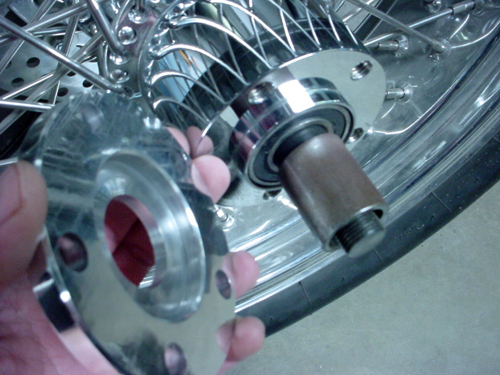
We checked ours by completely bolting it to the hub we will use, to ensure that we had a proper fit.

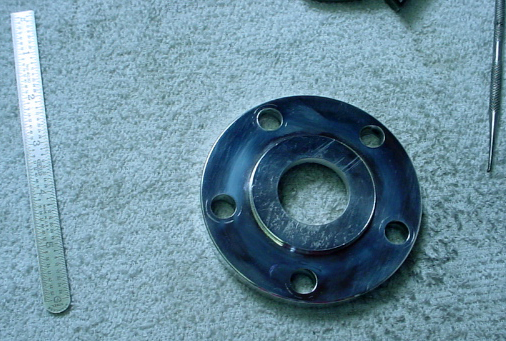
This is what our rough spacer looked like.
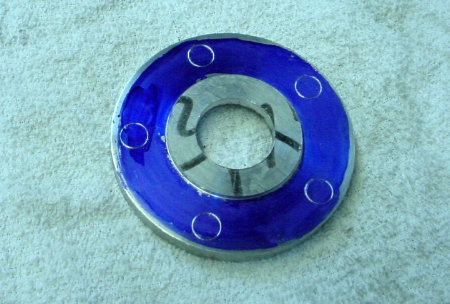
For a slick finished part. We chucked spacer up again and put a bevel on the edges. This bevel enhanced the finished parts beauty as well as preventing the polishing wheel from hooking up on the part, when we made it shine.
And now, the final product–We had the pride of being able to say that we didn’t need a catalog companies to build our scoot, at least this time.
Keep posted for more tech tips from U.S. Choppers, featured exclusively by www.bikernet.com ….

U.S. Choppers
2039 S. Lyon St
Santa Ana, CA 92705
714-546-4699
Appointments Only Please
http://www.uschopper.com/