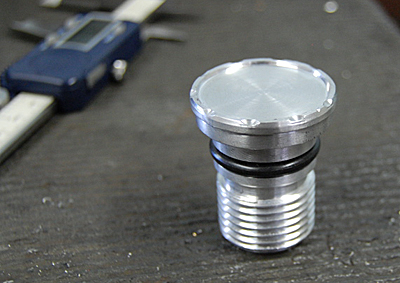
This project has been lots of educational fun and I am starting to see the light at the end of the tunnel. Ryan took a break from the triple trees and aimed his attention back at the tank. It still needed a petcock, so he machined a bung and welded that in. He also finished a motor mount and turned an excellent gas cap that we are using as an example of design for several other parts on the bike.
We altered out building course back to the front end, while knowing the level of work projects ahead were considerable. Sucker Punch Sally’s sent a pair of their billet spoked “Blokes” wheels and matching rotors for the front. I also talked to Kelly at Velocity and she is shipped out a pair of Metzeler tires.
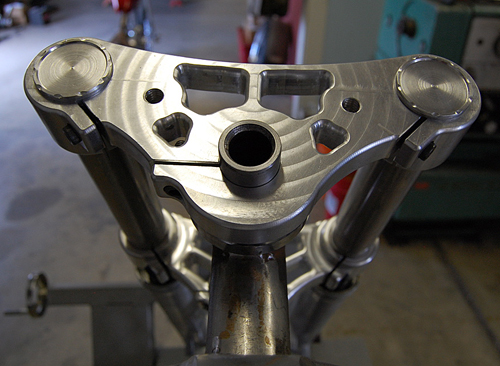
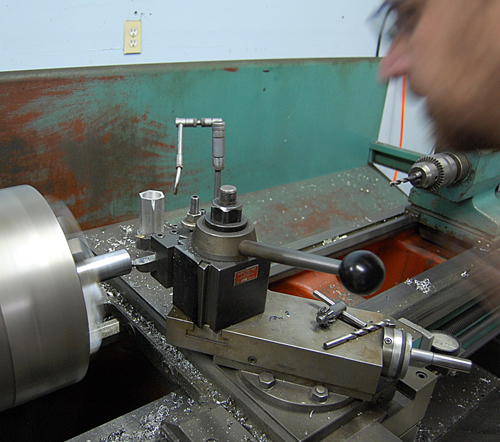
Ryan had some serious figuring on how to cut the slits and drill the holes for the pincher bolts. Engineering decisions were made is smoke-filled design sessions. The top tree would contain one pincher bolt for each slit, and the bottom would have two. Ryan needed to make a fixture for the trees so that he could drill, tap, and slit the trees.
It was the moment of truth when he chocked the first tree to drill and cut. This could screw up the entire delicately machined masterpiece. We were proud as hell of the nearly finished product. I was sweating bullets, even though I had complete faith that Ryan knew what he was doing. Everyone screws up once in a while, and he hadn’t yet, so our odds were sinking. I called Bandit, at the Bikernet headquarters as asked him to roll the dice.
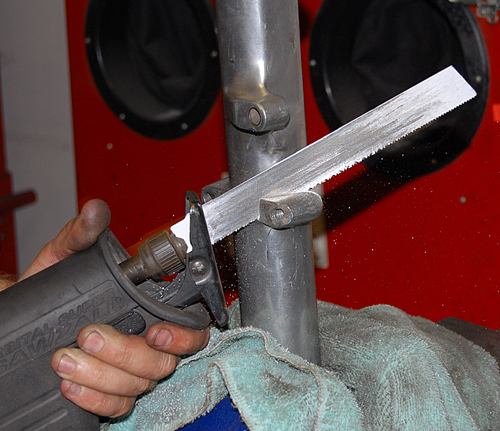
Ryan started by drilling the pincher boltholes and tapped them, then countersunk the bolts. That aspect slipped along like a shot of 12-year-old Irish whiskey. Then he hooked up the saw blade to his Bridgeport. It looked menacing, like it could cut through the hull of a battleship. He set the tree in place and slowly started to cut.

Billet aluminum fragments flew everywhere and when the dust settled it looked great. He took a simple angle file and finished the slit nicely. It took an entire night to carefully each gash. There's something nasty about that word. It was slippery process, but well worth it. They look like no others and are going to be the crown jewels of the bike.
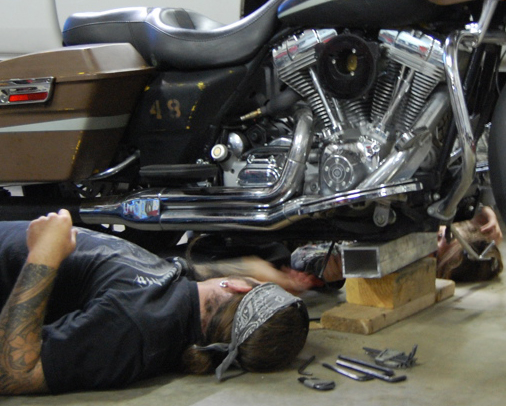
As Ryan cautiously filed the edges, Tattoo John stopped by to change fluids in his Roadglide before his lower 48 tour (which he is still roaming through). He changed engine and trans oil, and realized he needed a rear tire. The wire carcass was showing. Just another great example of why you should go over your bike before a big trip.
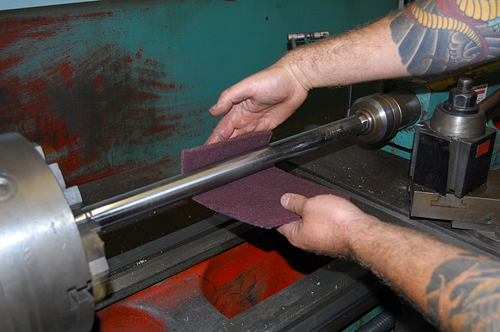

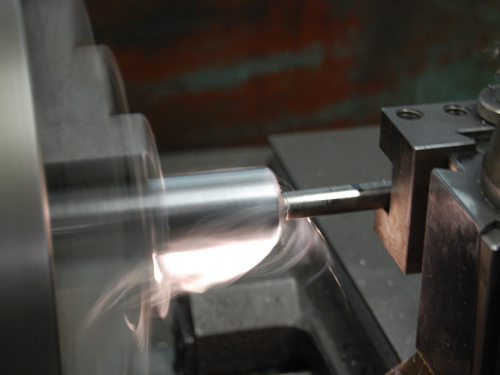
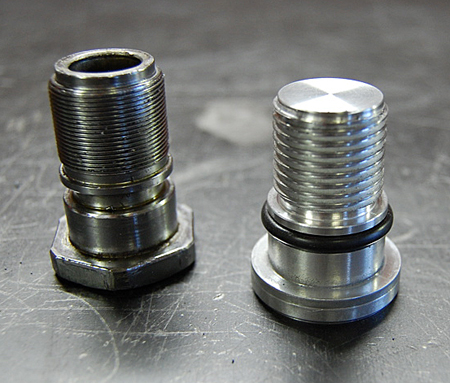
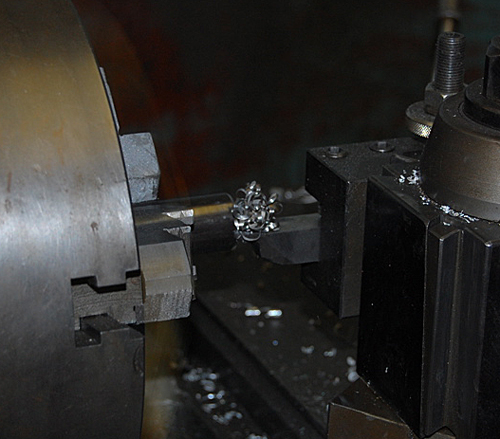
It was time to cut some bitchin fork caps. I hated the old steel ones, and since they weren't weight bearing, they could be made of billet. Ryan chucked a chunk of billet aluminum into his lathe jaws, and an hour or so later handed me a killer fork cap. He sliced another, and then it was time to shorten the existing tubes and internally thread them to match the thread pattern on the new fork tube caps.
I have no idea how he did it, but it was like magic. They were precision, tight, and just right.
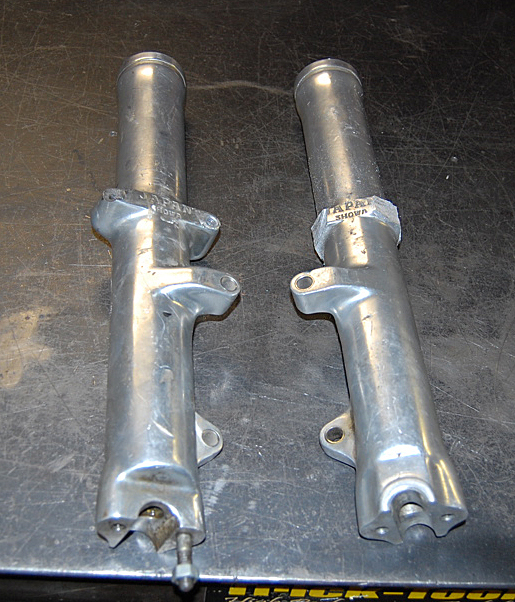
We moved on to shave the fender mounts and reflector landings off lower legs. The lowers were rough but after shaving them with the lathe and putting some fine sandpaper on them they looked really clean and smooth. We did the same thing to the other side. It didn’t take very long, but made the lowers look 100% better.


The fork stem was next. Ryan grabbed a piece of solid cold rolled steel and milled it. He then cut another piece, so that it would fit flush on the bottom of the tree. He welded the two machined elements together and voila, a stem was made! Sometimes it seems like stuff just happened out of nowhere…he's that good.
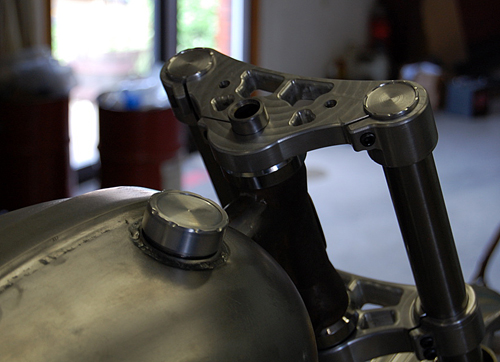
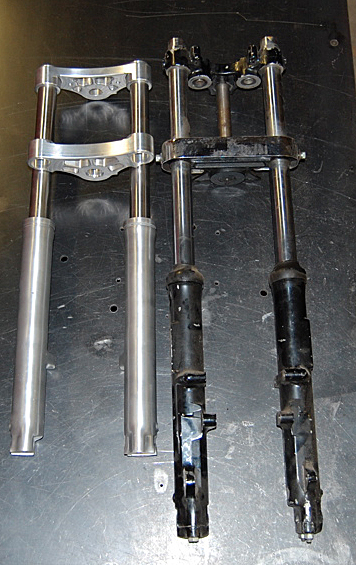
Of course when that was all done, we had to install everything together, to see what it would look like with the front end assembled and the ISR brake caliper from Gard at LA County Choprods. It looked killer.
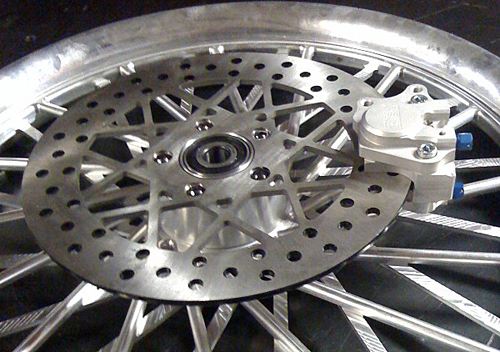
We needed materials for the hubs so I bought a 6-inch solid piece of 6061 billet, as well as some wheel bearings. Sometimes it’s funny to wander into to a Harley shop and ask for a part that's not associated with a motorcycle. They almost don’t know what to do.
I talked to an old-timer who got me a set of bearings that looked like they could be used on a truck. They will be plenty beefy and seem to roll well. Ryan made the front hub for the front wheel on his Bridgeport and lathe. When he was done, the wheel got mocked up with rotor and caliper. They look amazing.
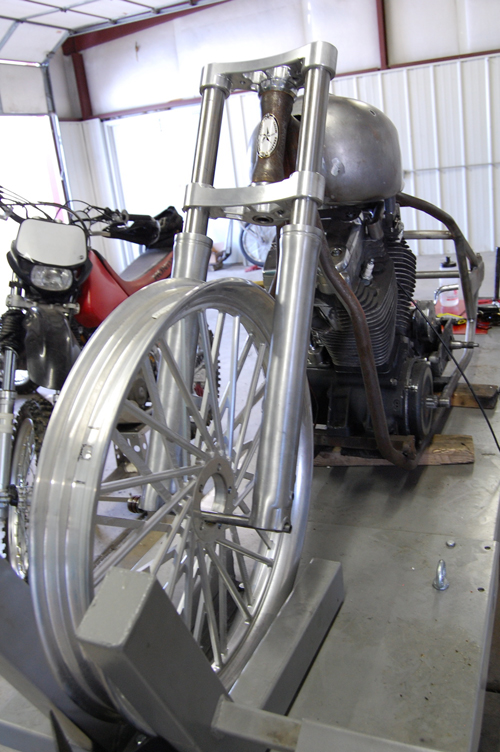
Next, we cut the springs down, installed seals, and final assembly of the front end was complete. We still have a long way to go, but overall we are well on our way to building the amazing bike of my dreams thanks to Ryan, Bandit, and everyone else who has helped out on this epic build.