
Master weldors make welding look so easy and so essential that many of us are tempted to rush out to the nearest tool store and buy a full featured TIG machine – even if we don’t know what TIG stands for, what it does, how it works, or how to use it. We’ve been lured by custom bike builders in magazine articles or TV programs where, without apparent thought, they grab an always handy, ready-to-go welding torch; snap down their welding helmet; and merrily fuse the seams of an aluminum gas tank. Their welds of orderly, evenly spaced, identical swirls are so perfect you think that’s the way the bead flows out of the stick.
Before you go on that shopping spree, let’s talk to a real world weldor and get a better idea of what this welding thing is all about. What is it? What is the difference in Stick, MIG, and TIG? How does it work? Is it that simple?
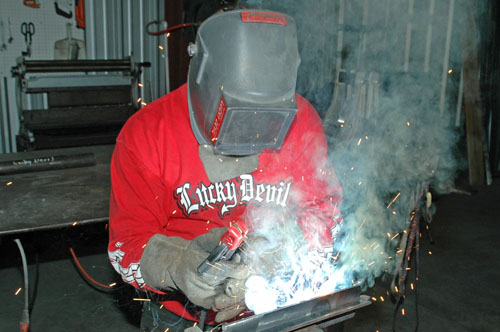
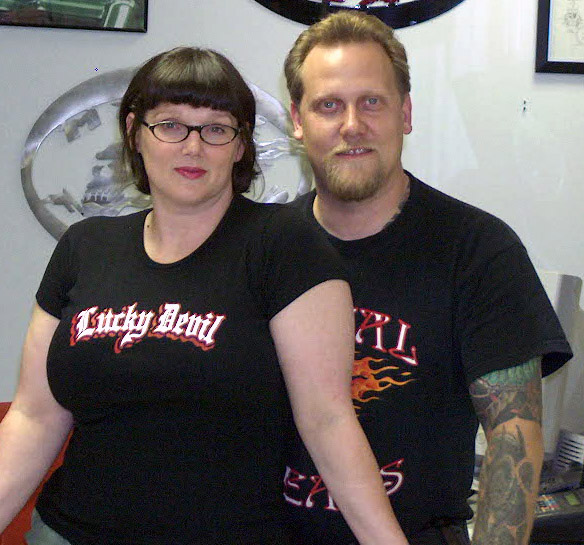
Let me introduce Mr. Kent Weeks (aka Mr. Devil) the master weldor at Lucky Devil Metalworks in Houston, Texas. He is definitely one of those craftsmen who really can make welding look easy.
Over Kent’s career he has worked as a professional fabricator and weldor on a wide variety of things from large industrial parts, handicap vehicles, elevators, wheelchair lifts to hot rods and custom bikes. He’s worked with exotic specialty materials, performed micro-welding, and operated machine shop equipment. But it’s Kent’s passion for welding that lead him to run The Best Little Fabhouse In Texas where he builds custom motorcycles and customizes stock motorcycles. Kent says he’s had the opportunity to learn how to use all kinds of equipment from different welding processes and fabrication tools but that he hasn’t done or seen it all. Good thing too ‘cause it would only make his head bigger.
What is Arc-Welding?
Arc welding is a fusion process that joins metals by using an electric arc to apply intense heat at the joint between two pieces of metal. The metal is melted and caused to intermix usually with an intermediate molten filler metal. When cooled and solidified, the metals are permanently bonded together with the joint having the same physical properties as the original metals. For convenience, we’ll refer to arc-welding as just welding from here on out.
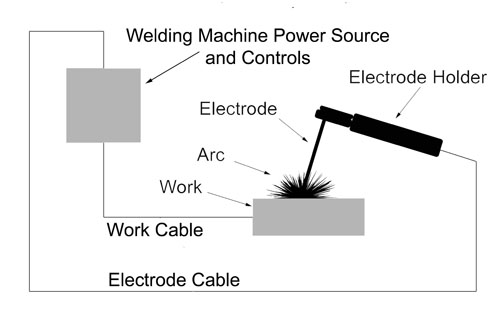
The basic welding circuit consists of a power source connected by a work cable (often called the ground) to the work piece and by a electrode cable (often called the hot cable) to a holder with a welding electrode. An arc is created with the electrode tip touches the work piece and is withdrawn a short distance. The arc produces a temperature of about 6500°F at the tip that melts the base metals at the joint.
Since metals at high temperature react to the oxygen and the nitrogen in the air, the molten pool must be shielded by an inert gas or slag. This shield prevents bubbles forming in the weld which would weaken it. The basic welding circuit is the same regardless of the welding process.
The three commonly used welding processes are:
1.Stick Electrode or Shielded Metal Arc Welding (SMAW)
2.MIG for Metal Inert Gas or Gas Metal Arc Welding (GMAW)
3.TIG for Tungsten Inert Gas or Gas Tungsten Arc Welding (GTAW)
Stick Electrode
Kent says that stick welding is perhaps the oldest form of arc-welding, having been around for decades, like his grandfather’s old cracker box. These simpler machines are common in many garages, home shops, and farms. While they aren’t used as much in the motor sports industry, the process still has a solid place for rough fabrication, repair work on fences and trailers, and especially in heavy industry such as oil field work, mobile welding, large equipment repair, building construction, and underwater welding.

Stick or SMAW welding requires a holder for the replaceable welding rod (or electrode). The rod completes the electrical circuit and is consumed by the welding arc. The rod supplies both the filler metal for the weld bead and a chemical coating that when burned creates protective gasses to shield the molten metal. Since there is no need for a bottle of inert gas, the stick welding process is the simplest and requires the least equipment. Welding rods are available in a wide variety of sizes, materials, and coatings.
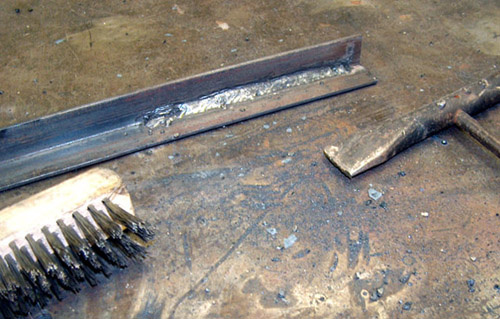
Stick welding can be used for almost any application. Its main disadvantage is that the slag leaves a messy weld and there is usually more spatter than other processes. The spatter and the slag must be chipped and cleaned away before painting. Also, starting the arc requires a light hand. Most beginners will burn up a lot of rods sticking them to the work material.
MIG
MIG or GMAW welding is a well established and easy to use process that’s also common in many home garages these days. MIG welding can be used in almost any application. It’s most useful for light to medium fabrication projects.
MIG welding uses an electrode cable that includes the circuit wire, a tube for the filler wire, and a tube for the inert shielding gas. The cable ends in a MIG gun with a trigger which activates the electrical circuit, the wire feed, and the gas flow. The filler material is fed by the machine from a spool to the gun.
Kent uses his 220 single-phase MIG welder mostly for welding fixtures and occasionally for use on light fabrication and automotive projects. In it he runs .035 thick ER70S-6 welding wire which is designed for welding mild steel material from 18 Gauge to ¼-inch thick material. He uses .025 wire for lighter sheet metal work. A variety of wire gauge sizes is available for use on thinner or thicker material as well as different alloys such as stainless.
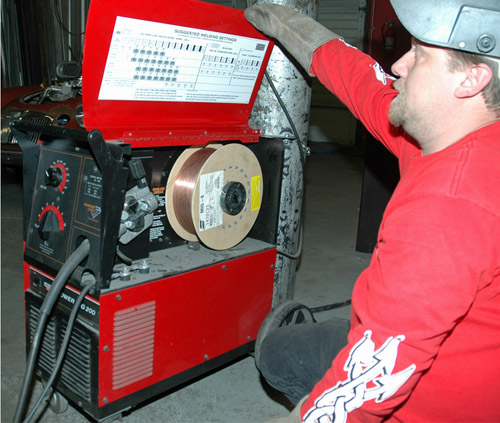
Of course, each wire size and welding situation requires a change in the MIG gun tip, arc temperature (determined by voltage and amperage settings), and wire feed speed. You will find temperature and wire feed setting info on the back of the door to the spool compartment on most models regardless of the manufacturer. Kent recommends fine tuning your set-up by making a test pass on some scrap material before welding your work piece.
To shield mild steel welds, Kent uses a bottle of C25 mix made up of 75% argon and 25% CO2 (carbon dioxide). To shield stainless steel welding, you need to change your gas to ether pure argon or Blue max (90% helium, 7.5% argon and 2.5% CO2).
To use MIG to weld aluminum, Kent says you’ll need to use pure Argon gas and to purchase a spool gun to run aluminum welding wire. Spool guns are designed just like they sound; they hold a small spool of welding wire right in the gun itself. This is necessary because the aluminum wire is too soft to be pushed through the lead on a normal gun. This process is messy but it sure gets the job done in a jiffy.
Smaller MIG welders are a good option for custom bike projects in the home garage. A machine like the Lincoln Power MIG 140 is fine for mounting tabs and basic sheet metal work. It’s designed to weld from 24 gauge to 10 gauge mild steel in a single pass with .025 welding wire. If you have to weld thicker material then run multiple passes and pre-heat the work material.
TIG
TIG or GTAW (or for you really old guys, Heli-Arc) welding is a very powerful welding process because it gives the weldor almost complete control of all the welding elements to achieve welds of great beauty, strength, and quality. However, that control brings additional complications requiring a higher degree of knowledge and skill than either stick or MIG. While TIG can be used for almost any application, it is the number one process chosen by professionals in the motor sports industry. Why? Because TIG is a very good process for welding nonferrous metals (aluminum etc.) and stainless steel.
Mention welding to Kent and he will quickly inform you that TIG is his favorite; that he tolerates MIG as a useful, but distant, second, and that stick is at the level of cavemen pounding bronze ore with rocks. Kent has invested significant time and energy (as you would expect from a man following his passion) to learn the intricacies of the TIG process and to develop the expert skills with the equipment. And he’s not afraid to use it.
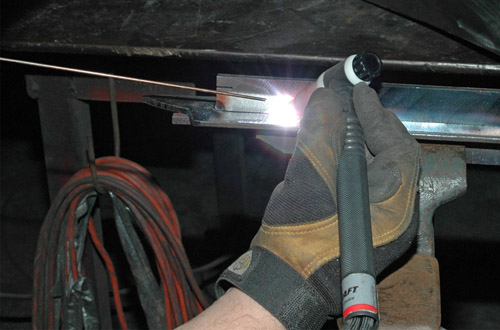
The controls on a TIG welding torch are a little more complicated than MIG gun. Instead of a trigger to turn on the flow of power, gas, and filler metal, TIG uses a foot pedal which variably controls the power output within the selected range. A tungsten electrode is used inside the torch to put the power to the work piece and a welding rod is used to manually feed material to the weld bead in a method similar to oxy-acetylene welding. Starting with MIG experience and learning to TIG weld is sort of like learning to drive a car with an automatic then switching to a manual. You realize you got a lot more to do but you have a lot more fun.
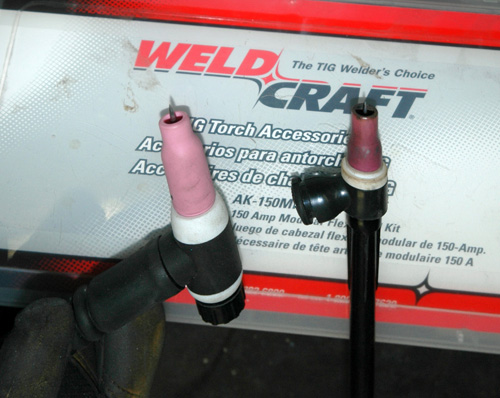
The pointed pin sticking out of the cup of the torch is the tungsten electrode. Its function is to create the arc between the work piece and torch. The tungsten electrode is a non-consumable part and it is important to keep it clean and sharpened to a fine point in order to make a nice looking weld. So if you take it for a dip in the base metal or slam your filler rod into it then you need to clean it up on a grinding wheel or belt sander.
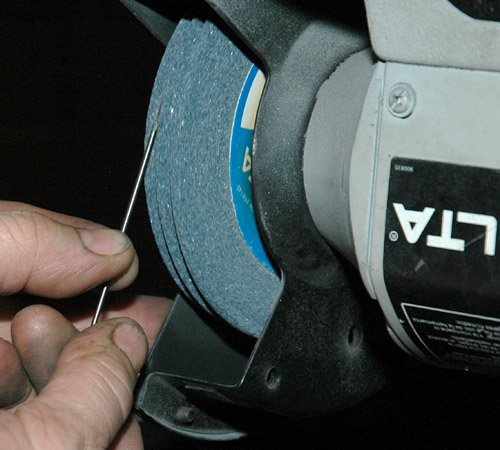
Tungsten electrodes come in many different sizes. Kent uses 3/32-inch the most. For thicker frame pieces he steps up to 1/8-inch and for thinner material he goes down to 1/16-inch. He also has even smaller ones for micro welding but doesn’t get many opportunities to use them. The tungsten electrode also comes in different tungsten alloys. Kent uses thoriated tungsten, which includes 2% thorium oxide, to weld mild steel, stainless steel, etc. and pure tungsten for welding aluminum.
For welding in tight spots, Kent ran across some new Weldcraft torches (the WP-150/200 Series and the WP-125 Micro-TIG Torches) which are designed for advanced projects. These styles are extremely helpful in a fast-paced welding shop or in the hands of a serious motorcycle fabricator.
First of all, the heads on these torches can be changed in seconds without the need for tools. This allows Kent to have a variety of head assemblies ready to go at all times. For all around projects on light sheet metal, he has a straight head, a 90-degree head and a special 90-degree head without a back-cap for extra tight spots. Then for thicker materials like framework, Kent keeps both a large style straight head and a 70-degree head ready. All these are set up with tungsten electrodes, cups and back caps – ready to weld at all times. This flexibility allows Kent to jump from one project to the other.
Secondly, these torches are available for air or water-cooled applications and they are compatible with WP-20 hoses, cables and handles. For those who don’t know (like me), WP-20 style torches are standard on most TIG welders, so chances are you can upgrade your existing power cable to get started and save a few bucks in the process.
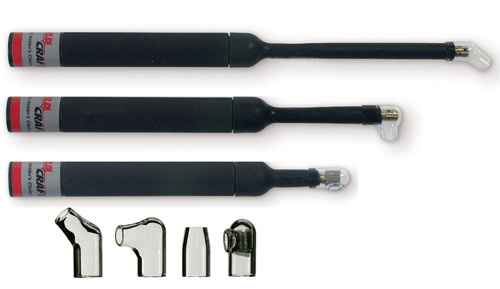
The WP-125 Micro-TIG Torches are great for super tight spots where even flex-heads can’t reach. This rascal can get down in a 5/8-inch diameter hole for nearly impossible welding work. These torches are rated for 10-125 amps (DCSP), 100% duty cycle with quarts nozzles. 3/32-inch chucks are available for increased capacity to 160 amps to weld 1/8-inch mild steel in a single pass.
While too many to adequately cover in this simple article, it’s worth noting that a large number of components and assemblies for the TIG torch are available depending on the welding situation. These include different sized gas cups and back caps; straight or angled torch heads; and air or water cooled heads. Check with your welding suppliers for configurations, which will fit your welding machine.
TIG Welding Examples
Kent insisted on throwing in a couple of extra TIG welding examples to illustrate and highlight his favorite welding pastime.
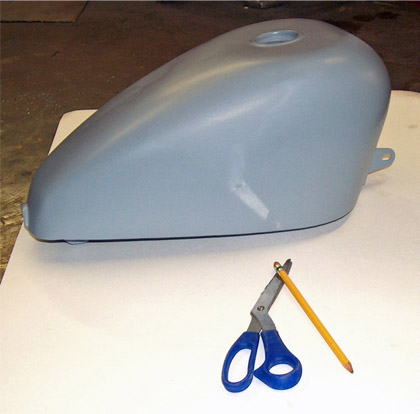
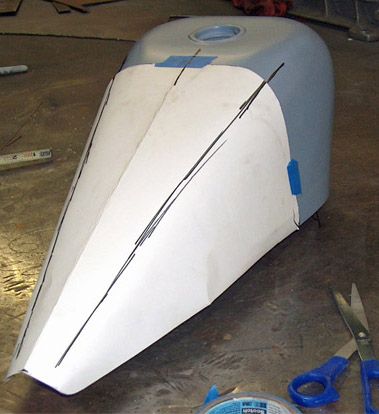
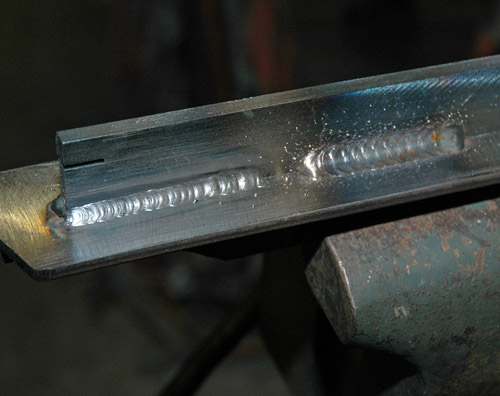
To illustrate a good home-style shop project using basic TIG equipment, Kent shows us how to stretch a gas tank. He used only basic tools and methods available to anyone. First, he used construction paper to make a template, which he carefully fit to the tank using alignment marks. He transferred the template outline and alignment marks to a sheet of 18-gauge cold rolled mild steel. To cut the steel sheet he used a cheap, limited duty electric sheer that he got from a local tool store for about twenty bucks. They work great for occasional projects, there’s no need to get the most expensive tools for every task. Next, he shaped the cut piece to the tank using a solid round bar with the end rounded off. Using the alignment marks and feeling the edges, he tacked the new piece to the tank.
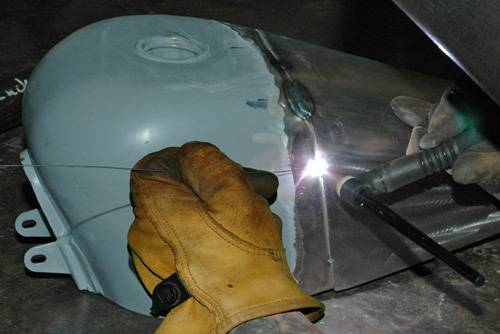
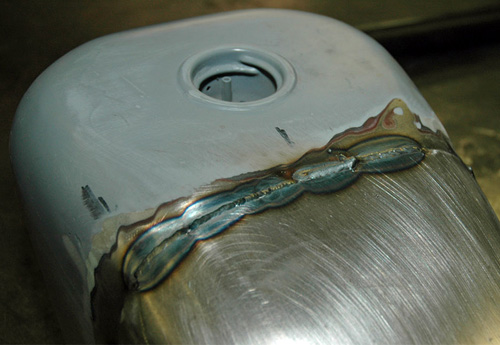
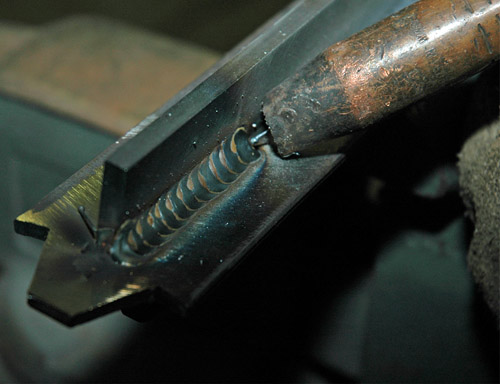
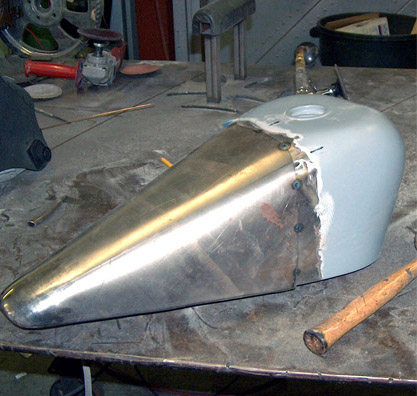
Here’s a Mr. Devil welding tip: On projects like this, use “skip welding” where you run one inch beads separated by two inch gaps, allow the base metal to cool, then make as many passes as necessary until all the gaps are filled. This method keeps the metal from getting too hot and warping. After the welding was complete, Kent sanded the welds to make the bodywork easier. This process takes a little work, but if you take your time and not force the work, you will end with a completed, sharp-looking tank.
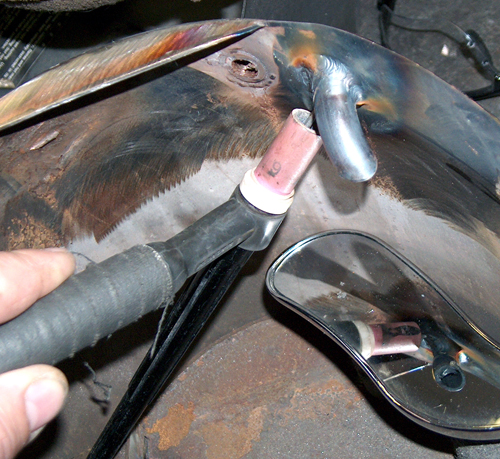
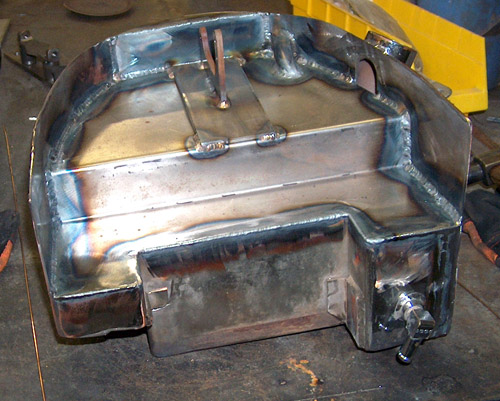
With this project Kent cut the top out of an oil bag to make a place to mount an air pump and the mounts for the air bags under a solo seat. He needed to add a tube for the vent next to the oil return. Not as easy as it sounds, because he had to use a mirror to see the underside of the tube while welding. This sounds funny, but you can get the hang of it if you try hard enough. Even Kent says that no matter how many times he tries this trick, he always sticks the tungsten tip at least once.
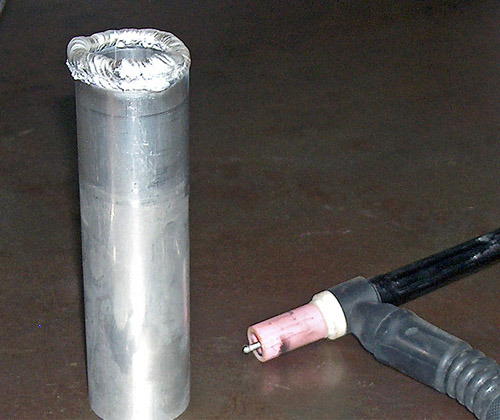
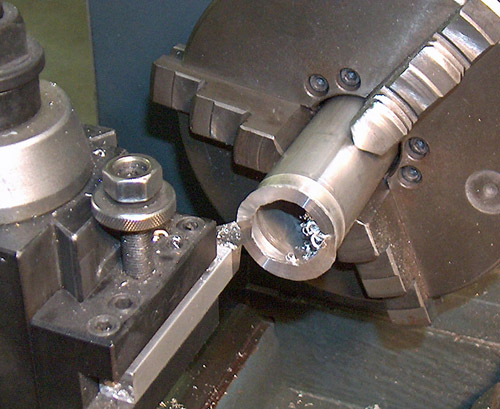
Here’s another of Kent’s, “why use a cheap shim when you can play with cool tools instead,” tricks. It’s very straight forward, to set the endplay on wheel bearings, Kent builds up the end of a center tube then turns it down to the proper dimension. Just think of the savings is shims.
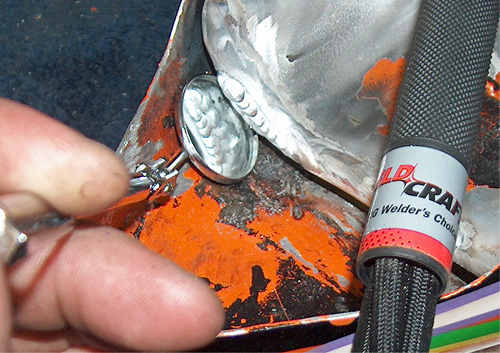
This little exercise reminded Kent of another useful surface build-up application. It’s called hard surfacing. This is where you run continuous beads of a hard alloy (such as chromium-manganese stainless steel) over a cheaper stock material like stainless steel. This is done to provide the benefits of the hardened material without having to make the entire part from the higher cost alloy.
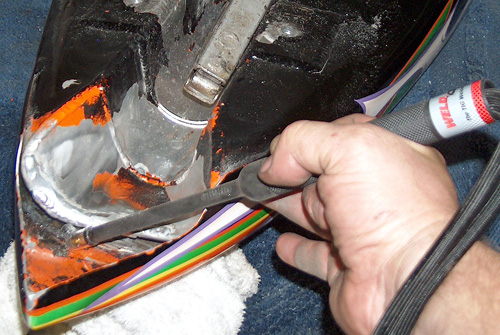
Nobody, not even Mr. Devil, likes to do unnecessary work, so Kent was pleased when he used his WP-125 Micro-Torch with a 90 degree head to reach into a narrow spot and repair a leak in steel gas tank. Normally, he would have to remove and replace the front part of the tank. But with the new torch, he could fit it into the tank channel where a normal sized TIG torch won't go.
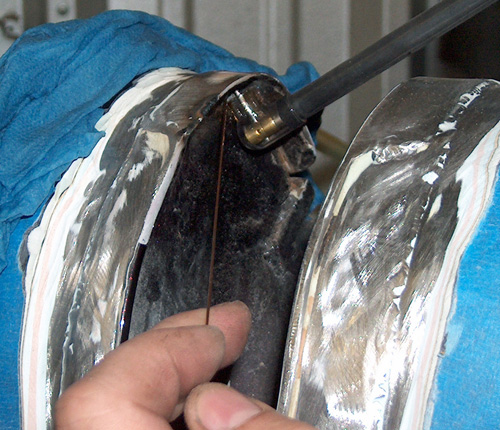
When Kent needed to repair a crack just under the rear stretch on an aluminum gas tank, he turned once again to his WP-125 Micro. This type of job is totally out of the question with a standard torch head.
Mr. Devil says, “That’s the bottom line!” By using the micro torch, Kent avoided major rework on the tank and thus saved some expensive artwork. Kent says he doesn’t keep the micro connected all the time but it sure is handy when needed. While Kent is leery about sounding like a Weldcraft commercial he truly believes this stuff is worth talking about.
Safety, Equipment, and Shop Tips
Kent’s alter ego may sound evil but when it comes to shop safety, Mr. Devil follows the rules like they were the ten commandants. He strongly recommends you do the same.
He offers these sources for the latest in welding safety so you can decide what is right for you.
•OSHA Safety and Health Topics
•Lincoln Electric on Arc Welding Safety
In addition Kent offers the following comments on particularly important safety issues and throws in some comments on equipment and shop tips.
All welding processes produce toxic fumes which vary is severity based on the welding electrode, shield gas, project material, and any coating on the project material. Exposure standards have been established to protect weldors from over exposure to these fumes. There are different kinds of breathing filters and fume extractors on the market to reduce exposure to acceptable levels. Whether or not you choose to purchase a small portable fume extractor, Kent strongly suggests that you work in a well-ventilated area with an exhaust fan.
Safety glasses are standard protection in any shop and Mr. Devil says. “Use them; you only get one pair of eye balls.” In addition to those, a welding shop requires shaded welding lenses. While many people are familiar with the classic green lens in most welding hoods, there are many more choices. Kent uses #10 gold lenses in his hoods for both MIG and TIG welding and sometimes even a darker one for high heat projects. The gold reflective face is designed to provide a crisper view of the work without the discoloration of a green lens while also reducing temperature and infrared penetration generated from the electric arc.
One particular project that deserves special safety attention is welding on a gas tank. Unless you like bursting into flames, take extra care if you have to repair a tank. Just empting the fuel is not enough. You must also vent the fumes and flush out any residue. Washing out the tank with soapy water and purging with welding gas like argon will take care of fuel. But even if you get a tank that the owner claims is bone dry, they may have used a chemical solution to clean it out and remove moisture to prevent rusting. Flush it anyway. Finally, some tanks may have liquid liner materials that you’ll have to remove. Speaking of which, you may want to line the tank after your repair as extra insurance against leaks and rust.
Most welding shops (home or commercial) have some kind of gas torch to use for preheating, bending, and cutting metal. If so, the smart guys also have fire extinguishers rated for the types of fires they’re likely to encounter and they know how to use them. Mr. Devil relates from first hand experience, if you play with fire and brimstone you will get burned. So have extinguishers handy; and a really good first aid kit too!
Speaking of heat, if you do find yourself working on a project where you need to monitor pre or post heating, then you should have one of Kent’s favorite little shop tools: an infrared temperature gun with laser pointing. Yeah, Mr. Devil likes to use modern gadgets to know how hot it is in his place of worship.
With a home garage your biggest limitation may be your available power supply. Determine what kind of power supply you have or what can have installed. It’s probably best to have an electrician install a specific outlet for your welder. They will also check that your breakers are rated high enough and that the outlets are properly grounded. Have we mentioned fire extinguishers?
Conclusion and Final Thoughts
If you want to give welding a try there are several quality manufacturers to choose from, such as Lincoln, Miller, Hobart, Esab and Thermal Dynamics. In addition to the common welding processes mentioned here, there are a slew of different controls, options and settings that vary from one brand to another. You may want to shop a little and check them all out to find the right one for your needs and preference. Visit the local welding and fabrication shops, they’ll be happy to assist you.If you need welding lessons and you don’t have a weldor buddy to show you the ropes or help you take the next step in skill level then you check you local community college for training classes or metal workshops. Even if you already know how to weld, continuing education will fine-tune your skills and techniques to help make the most out of whatever projects you try.
Mr. Devil says there is more to welding, metallurgy, machining, and metal shaping than he ever thought possible. Go ahead, sell your soul, he did.
Many thanks to Lincoln Electric and Weldcraft for technical assistance with this article.
— Ronnie